
Capturing summer’s vibrant energy in your garden doesn’t have to end when the seasons change. With simple techniques, you can preserve your favorite plant allies to enjoy their benefits year-round. All it takes is a little know-how—no fancy tools required.
Imagine reaching for a jar of homegrown chamomile in January or brewing mint tea from leaves you dried yourself. These moments connect you to nature’s rhythms while keeping herbal medicine within arm’s reach. Best of all, you don’t need complex equipment—just basic supplies like breathable containers and a shaded space.
Timing matters when gathering leaves, flowers, or roots. Some varieties thrive when picked at dawn, while others need afternoon sunlight to concentrate their active compounds. A trusted guide like Juliet Blankespoor’s The Healing Garden can help you navigate these nuances.
Proper care ensures your efforts pay off. Stored correctly, your dried botanicals retain their potency for months or years. This means stronger teas, more effective salves, and remedies that work when you need them most.
Ready to transform your garden’s bounty into lasting wellness? Let’s explore how small steps today create a pantry full of nature’s healing gifts tomorrow.
Getting Started with Your Herbal Harvest

Your journey into plant-powered wellness starts with two simple questions: What do you need most, and when do your green allies shine brightest? Let’s break it down.
Choosing the Right Herbs for Your Needs
Match plants to your priorities. Need immune boosters? Try echinacea or elderberry. For calming effects, reach for lemon balm or chamomile. Herbs like peppermint aid digestion, while rosemary sharpens focus. Ask yourself: What’s missing in my daily routine?
Identifying the Best Time of Day to Harvest
Early birds get the best flavors. Most aromatic herbs peak around mid-morning—after dew dries but before heat wilts leaves. Check stems: If they snap crisply, your plant is ready. Flowers like calendula show readiness through vibrant, fully open petals.
- Harvest leafy varieties when buds form but before blooming
- Collect roots after frost for concentrated nutrients
- Avoid midday sun for delicate flowers
Remember, happy herbs smell strong, taste bold, and feel resilient. Your senses become the ultimate guide. Time your pickings right, and you’ll capture nature’s pharmacy at its most potent.
Harvesting Medicinal Herbs Properly: Drying and Storing for Maximum Potency

Your garden’s green treasures deserve careful attention from the moment you pick them. Gentle methods protect the valuable compounds that make your plant material effective. Let’s explore how to handle stems and leaves like a pro.
Handling Fresh Plant Material with Care
Treat herbs like fragile glassware—rough handling crushes cell walls, releasing precious oils prematurely. For delicate varieties like mint or basil, snip stems with sharp kitchen scissors. Tougher plant material, such as rosemary stems, demands bypass pruners for clean cuts.
| Tool | Best For | Examples |
|---|---|---|
| Kitchen Scissors | Tender stems & leaves | Basil, Lemon Balm |
| Pruners | Woody stalks | Rosemary, Thyme |
Using Proper Cutting and Trimming Techniques
Snip stems just above leaf nodes—those bumpy spots where new growth emerges. This encourages bushy regrowth while giving you usable material. For plants like sage, harvest the top two-thirds but leave four sets of leaves at the base.
Spring through early summer offers prime gathering times for most herbs. If you’re new to growing, consider container-friendly varieties that simplify harvesting. Always choose vibrant, unblemished flowers and leaves—their bright colors signal peak potency.
Preparing Your Herbs for the Drying Process

Freshly picked botanicals need quick action to lock in their goodness. Think of this stage as setting the stage for success—what you do now determines your final product’s quality.
Sorting and Cleaning Your Harvest
Start by shaking stems gently over a clean cloth. This evicts tiny hitchhikers without crushing delicate flowers. Separate plant material into categories: leaves in one pile, roots in another.
For dirt-covered roots, use cool water and a stiff brush. Scrub until no soil remains—any grit left will haunt your teas later. Delicate flowers demand softer care: a light mist followed by pat-drying works best.
| Plant Part | Cleaning Method | Tools Needed |
|---|---|---|
| Leaves/Flowers | Air shake & spot-clean | Soft brush, cloth |
| Roots | Water scrub & dry | Stiff brush, towel |
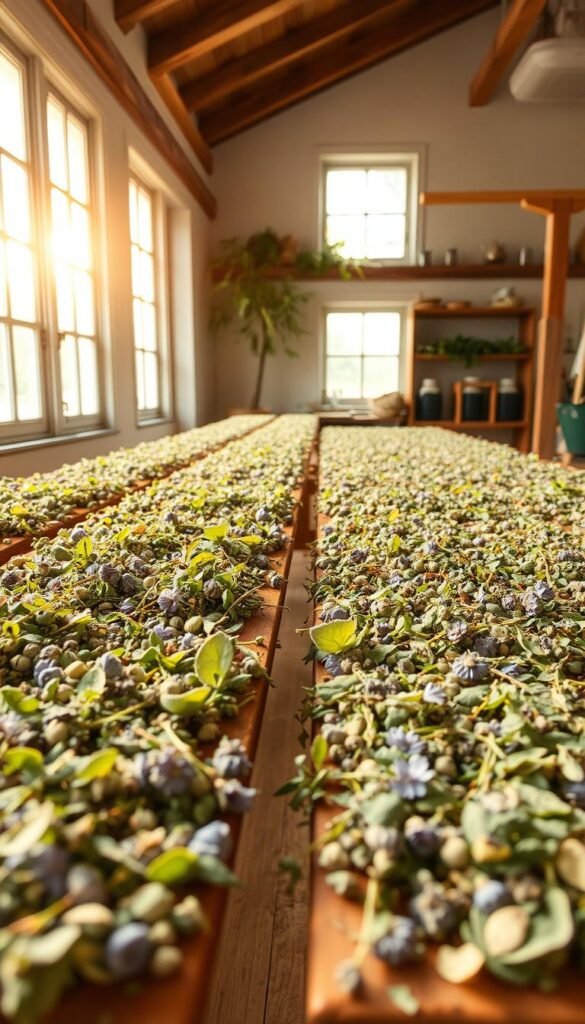
Arranging Herbs to Optimize Airflow
Spread your herbs in single layer on breathable surfaces. Old window screens or woven baskets work perfectly. Avoid plastic—it traps moisture and invites mold.
Rotate material daily to ensure even drying. For bushy stems like rosemary, create loose bundles tied with twine. This method preserves oils while letting air circulate freely around each layer.
Need more tips? Explore our guide on preserving garden treasures for deeper insights into long-term storage solutions.
Effective Drying Methods for Maximum Potency

Preserving nature’s gifts begins with mastering airflow and temperature control. Your dried botanicals will sing with flavor when you balance these elements. Let’s explore how simple tools create professional results.
Bundling Herbs for Air Drying
Rubber bands become your secret weapon here. Unlike twine, they tighten as stems shrink—keeping bundles intact. Aim for groups of 10 stems maximum. Split larger clusters to let air reach every layer.
| Method | Best For | Pro Tip |
|---|---|---|
| Rubber Band Bundles | Lavender, Rosemary | Hang upside-down in shaded space |
| Divided Clusters | Thyme, Oregano | Check centers daily |
Utilizing Screens and Dehydrators for Thorough Drying
Delicate flowers and chopped roots need flat surfaces. Spread them thinly on mesh screens—no overlapping. Rotate pieces every 12 hours for even results.
“Slow drying preserves what matters most—the plant’s essence.”
Dehydrators work wonders for tough materials like burdock roots. Set temperatures below 95°F and check every hour. Remember: Low heat = vibrant colors + full potency.
| Tool | Temperature | Time Frame |
|---|---|---|
| Air Drying | 70-80°F | 3-14 days |
| Dehydrator | 90-95°F | 4-12 hours |
Your patience pays off in teas that burst with flavor and remedies that deliver results. Now you’re ready to store nature’s magic properly!
Storing Your Dried Herbs Safely and Effectively

Preserving your garden’s magic requires smart choices after drying. Think of this phase as creating a time capsule—every decision impacts how well your botanicals retain their power.
Selecting the Ideal Containers and Jars
Glass jars outperform plastic every time. Their airtight seals block moisture, while colored glass filters harmful light. Try this test: Crush a leaf between your fingers. If it crackles instead of bending, it’s ready for storage.
| Container Type | Best Use | Avoid If… |
|---|---|---|
| Amber Glass Jars | Long-term shelf storage | Storing damp material |
| Mason Jars | Frequent-use herbs | Placed in sunlight |
| Metal Tins | Travel-sized portions | Storing oily plants |
Labeling, Dating, and Organizing Your Collection
Write the name and date on every jar. This simple habit prevents mystery mixes and helps track freshness. Store jars in dark spaces like closets—heat and light degrade quality faster than time.
Rotate your shelf stock seasonally. Place newer jars behind older ones to use materials before they lose vibrancy. Your future self will thank you when reaching for that perfect peppermint batch mid-winter.
Integrating Seasonal Harvesting into Your Routine
Nature’s calendar holds the key to unlocking your plants’ full potential. By syncing your harvests with seasonal shifts, you’ll capture peak potency in every leaf, bloom, and root.
Timing Your Harvests With Nature’s Rhythms
Spring energizes plants to push nutrients upward. This makes April through June prime time for gathering flowers and tender leaves. Think of it as catching nature’s enthusiasm—vibrant growth above ground means richer essential oils.
When autumn cools the air, energy retreats downward. Dig roots after the first frost for concentrated compounds. Early spring also works, before plants channel resources into new stems. One Appalachian forager notes: “Dandelion roots taste sweeter in November—like the earth itself is storing sunshine.”
| Season | Plant Part | Best Time | Key Reason |
|---|---|---|---|
| Spring | Leaves/Flowers | Morning dew dried | Peak essential oils |
| Fall | Roots | After first frost | Energy stored below |
| Early Spring | Bark | Sap rising | Easy separation |
Bark requires special attention. Collect it as trees wake in March or when they shed leaves in October. These windows let you gather material without harming the tree’s vitality.
Regional weather patterns matter too. Dry summers? Harvest herbs earlier to beat heat stress. Rainy springs? Wait for sunny days to prevent mold. Your local climate becomes part of the schedule.
Enhancing Your Remedies and Culinary Delights with Dried Herbs
Transform your pantry into a treasure trove of natural remedies and culinary magic. The choices you make now determine whether your dried herbs become vibrant additions to meals or lose their spark in storage. Let’s unlock their full potential.
Using Whole vs. Crushed Herbs for Optimal Flavor
Keep herbs whole until the moment you need them. Intact leaves and flowers preserve flavor three times longer than pre-ground versions. Those crumpled rosemary sprigs? They’ll retain 70% more aromatic oils if you crush them right before cooking.
Exceptions exist for woody varieties. Thyme stems and bay leaves benefit from slight processing before storage. Store these in small jars to limit air exposure—they’ll stay potent for 6 months instead of weeks.
Maximizing Shelf Life Without Losing Potency
Dark glass jars become your dried herbs’ best friends. They block light while sealing in freshness. Roots and barks last 2-3 years this way—leaves stay vibrant for 18 months.
Label every container with dates. Rotate older jars to the front of your shelf. For blends you use daily, grind a month’s supply and store in airtight tins. Your teas and soups will burst with vitality, sip after satisfying sip.
With these strategies, your kitchen becomes a hub of nature’s finest. Whole or crushed, properly stored botanicals deliver flavor and healing power exactly when you need them most.


