
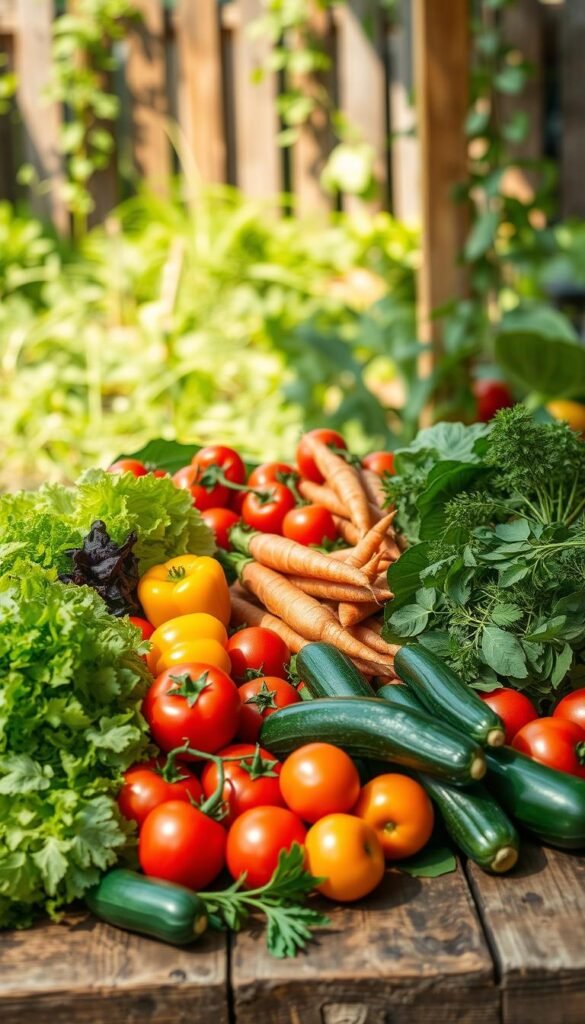
Imagine stepping outside to pluck sun-warmed tomatoes bursting with sweetness or crisp greens that make store-bought salad kits taste like cardboard. This delicious reality awaits when you cultivate edible plants in your personal green space. Whether you’ve got acres or a balcony, nurturing your own crops offers rewards far beyond grocery savings.
Newcomers often worry about complicated techniques, but success starts with simple truths: quality soil + sunlight + water = magic. Even a 4×4-foot raised bed can yield enough basil for weekly pesto and enough cherry tomatoes to outshine any supermarket haul. You’ll savor flavors amplified by vine-ripened nutrients while knowing exactly what touches your food.
Beyond taste, there’s science-backed joy in connecting with earth. Studies show digging lowers stress hormones better than many meditation apps. Bonus? Thirty minutes of weeding burns calories equivalent to a brisk walk!
Our comprehensive beginner’s guide walks you through smart space planning, easy-care crops like peppers and kale, and harvesting tricks. We’ll help you avoid common pitfalls so your first season feels triumphant rather than overwhelming. Ready to trade produce aisles for soil-stained hands?
Introduction to Your Home Vegetable Garden Journey

Every thriving patch of earth begins with a single seed and a spark of curiosity. Seasoned growers often chuckle about their early mishaps – leggy basil plants, undersized carrots, or zucchini that grew faster than expected. What matters isn’t perfection, but showing up consistently to learn your soil’s secrets.
Start with forgiving leafy greens like spinach and lettuce. These quick-growing plants offer near-instant rewards while teaching watering basics. Once comfortable, try radishes – their rapid growth (21-30 days!) makes them ideal for practicing root crop care. Save tomatoes and peppers for later seasons when you’ve mastered sunlight management.
| Crop Type | Beginner Picks | Average Growth Time |
|---|---|---|
| Leafy Greens | Kale, Lettuce | 3-5 weeks |
| Root Crops | Radishes, Beets | 4-8 weeks |
| Fruiting Plants | Tomatoes, Peppers | 8-12 weeks |
You’ll develop a new rhythm with nature – checking soil moisture becomes as routine as morning coffee. There’s magic in watching sprouts emerge where you placed seeds weeks earlier. That first salad made entirely from your patio containers? Pure triumph.
Expect to spend 15-30 minutes daily tending your green space. Most beginners see measurable progress within 6-8 weeks. Our guide breaks down each phase into manageable tasks, helping you avoid overwhelm while building essential skills.
Selecting the Ideal Garden Location

Your garden’s success begins with strategic placement—even nutrient-rich soil can’t compensate for poor site choices. Think of your plot as a real estate agent would: prime locations balance sunlight, drainage, and protection from environmental stressors.
Importance of Sunlight Exposure
Sunlight fuels photosynthesis, the engine driving plant growth. Fruiting crops like tomatoes demand 6-8 hours of direct light daily, while leafy greens tolerate 4-6 hours. Observe patterns across seasons—a spot shaded by trees in summer might bask in winter sun.
Test your space with a sunlight app or old-school observation. Track intervals every 2 hours from 8 AM to 6 PM. Mark areas receiving less than 6 hours as “partial shade” zones for kale or spinach.
Ensuring Proper Drainage and Airflow
Roots need oxygen as much as water. Dig a 12-inch hole and fill it with water. If it drains slower than 1 inch per hour, consider raised beds. Avoid low-lying areas where puddles linger after storms.
Gentle breezes prevent fungal diseases, but strong winds snap stems. Position tall plants like corn as windbreaks, or install temporary barriers for seedlings. Leave 3-4 feet between beds for easy access and air circulation.
Preparing and Amending Your Garden Soil

The secret to thriving crops lies beneath your feet. Healthy soil acts like a nutrient-packed buffet for your plants, delivering minerals and moisture directly to their roots. Start by assessing what you’re working with—scoop a handful and squeeze. Sandy soil crumbles quickly, while clay forms dense clumps. Ideal garden soil holds shape briefly before breaking apart.
Building Nutrient-Rich Soil
Improve poor soil by mixing in organic matter like aged manure or shredded leaves. These materials boost drainage in clay and help sandy soils retain moisture. Aim for a 3-inch layer worked into the top 8 inches of earth. This creates a welcoming environment for roots to spread and absorb nutrients.
| Amendment | Benefits | When to Use |
|---|---|---|
| Compost | Adds nutrients, improves texture | Spring or fall |
| Leaf Mold | Retains moisture, attracts worms | Autumn |
| Aged Manure | High nitrogen content | 3 weeks before planting |
Homemade Compost Tips
Turn kitchen scraps into black gold! Layer equal parts greens (vegetable peels, coffee grounds) and browns (dry leaves, cardboard). Keep the pile moist like a wrung-out sponge. Turn it weekly with a pitchfork—you’ll get crumbly compost in 2-6 months. Spread this free fertilizer to feed your plants and lock carbon in the soil.
Remember: Soil improvement is a marathon, not a sprint. Try cover crops like clover during off-seasons to protect and nourish your garden soil naturally. Your efforts today will yield sweeter tomatoes and sturdier kale for years to come.
Choosing the Right Garden Beds: Raised Beds and More

Elevate your gardening game—literally—with raised beds. These elevated planters solve common challenges like rocky soil, limited mobility, and urban concrete yards. They’re not just trendy—they’re practical tools for controlling your growing environment from the ground up.
Why Gardeners Love Elevated Options
Raised beds warm faster in spring, letting you plant earlier. Their loose soil lets roots spread freely, while contained spaces simplify weed control. Unlike traditional rows, you’ll never compact soil by stepping where plants feed.
- Harvest 2-3 weeks earlier than in-ground plots
- Mix custom soil blends for fussy crops
- Reduce bending by choosing 24-inch heights
Start with a 4×4-foot bed for herbs and greens. Upgrade to 4×8-foot versions for tomatoes and cucumbers. Cedar and galvanized steel last 10+ years, while untreated pine offers budget-friendly durability.
| Material | Lifespan | Best For |
|---|---|---|
| Cedar | 10-15 years | Wet climates |
| Galvanized Steel | 20+ years | Modern aesthetics |
| Composite | 5-7 years | Curved designs |
Fill your garden bed with equal parts compost, topsoil, and coarse sand. This trio drains well yet holds moisture—perfect for carrots and peppers. Add hardware cloth underneath to deter burrowing pests.
Home Vegetable Garden: Easy Steps to Start Growing Your Own Food
“It’s better to be proud of a small garden than be frustrated by a big one.”
New growers often underestimate how much space crops need. A 10×10-foot plot lets you master watering schedules and pest control without becoming a part-time job. Focus on what your household actually eats – three favorite varieties create more joy than twelve neglected rows.
Pick vegetables that spark excitement. Love taco nights? Grow six jalapeño plants instead of twenty. Prefer fresh salads? Three lettuce varieties will outproduce grocery bags. This selective approach prevents zucchini avalanches and keeps meals interesting.
Here’s why limiting quantities works:
- Five tomato plants yield 25-50 lbs – perfect for sauces
- Nine bush bean plants fill a freezer drawer
- Three cucumber vines supply weekly salads
Starter gardens teach spacing needs you can’t learn from seed packets. Those “tiny” pumpkin seedlings? They’ll sprawl 10 feet by August. By growing fewer plants, you’ll give each one room to thrive while avoiding jungle-like chaos.
Remember: Success breeds confidence. A modest harvest of sun-ripened strawberries beats overwhelming buckets of rotting squash. Next year, you’ll know exactly how much space your favorites demand – and how to expand wisely.
Planning Your Garden Layout and Design

Smart garden planning transforms chaotic patches into productive spaces. A thoughtful arrangement lets you nurture crops efficiently while keeping maintenance manageable. Let’s create a blueprint that works with nature’s rhythms rather than against them.
Designing Accessible Paths
Create 3-foot walkways between every planting zone. This lets you reach plants without compacting soil. Use wood chips or gravel to mark permanent paths – they suppress weeds and keep shoes clean during harvests.
Test your design by kneeling at bed edges. Can you comfortably reach the center? Narrow beds (3-4 feet wide) prevent the temptation to step where roots grow. Compact soil reduces yields by up to 50% – your plants deserve breathing room!
Maximizing Plant Spacing
Position tall crops like corn along northern borders. This prevents them from casting shadows on sun-loving peppers or carrots. Use vertical space wisely – pole beans climbing trellises yield more per square foot than bush varieties.
Shady spots? Perfect for leafy greens that bolt in heat. Try these pairings:
- South-facing zones: Tomatoes, eggplant, basil
- Partial shade areas: Spinach, arugula, parsley
Stagger planting dates for continuous harvests. Sow quick radishes between slower-growing broccoli – you’ll pull roots before cabbage family plants need the space. This approach keeps soil active and meals diverse.
Choosing Vegetables for a Bountiful Harvest
Your plate becomes your palette when selecting crops for a thriving garden. Focus on varieties that excite your taste buds and forgive rookie mistakes. Smart choices here mean fewer headaches and more overflowing salad bowls.
Beginner-Friendly Powerhouses
These 10 vegetables deliver reliable results with minimal fuss:
| Vegetable | Why It’s Easy | Harvest Time |
|---|---|---|
| Lettuce | Grows in partial shade | 3-4 weeks |
| Green Beans | Thrives in poor soil | 50-60 days |
| Radishes | Fastest edible reward | 21-30 days |
Start with 2-3 types your household actually enjoys. Five tomato plants yield enough for weekly BLTs, while six bean bushes supply summer stir-fries. Overplanting leads to zucchini doorstep drops at 2 AM!
Nature’s Dinner Partnerships
Some plants boost each other’s growth naturally. Try these dynamic duos:
- Tomatoes + Basil: Repels hornworms
- Carrots + Peas: Loosen soil for roots
- Lettuce + Chives: Deter aphids
“Plant friends together, and they’ll handle the rest.” – Oregon market gardener
Add marigolds between rows – their bright blooms repel nematodes while attracting pollinators. This strategy reduces pest battles and makes your plot look like a living bouquet.
Timing Your Planting for Seasonal Success
Mastering nature’s calendar transforms your edible space from hopeful experiment to reliable food source. Planting times matter as much as sunlight – sow too early, and frost nips seedlings; plant late, and summer heat stifles growth. Learn your USDA hardiness zone for frost dates, then match crops to their ideal windows.
Cool-weather lovers like spinach thrive in spring and fall, while tomatoes demand warm soil. Try succession planting: replace harvested radishes with heat-tolerant beans, then swap summer crops for autumn carrots. This keeps soil active year-round. Space-conscious growers can rotate compact varieties in containers across seasons.
Track progress with a simple journal. Note when seeds sprout, flowers form, and fruits ripen. You’ll spot patterns – maybe basil thrives when planted after last spring chill, not before. Within two growing cycles, you’ll confidently schedule plantings like a pro, turning every month into harvest season.


