
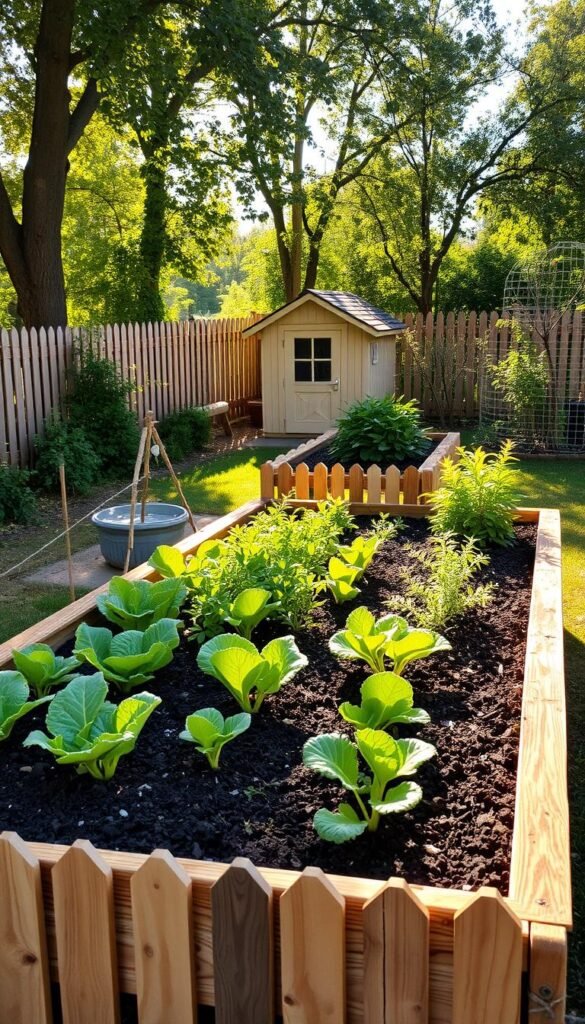
Growing plants in raised beds offers game-changing benefits. Unlike traditional in-ground plots, these structures provide better soil control, earlier planting, and easier maintenance. Families love them because they’re a weekend-friendly project—even kids can help!
Inspired by Mel Bartholomew’s Square Foot Gardening method, modular designs maximize space. You’ll harvest the same yield using 80% less area. The soil warms faster in spring, giving your plants a head start.
No backbreaking digging required. Defined boundaries keep weeds out, and seasonal adjustments are simple. Whether you’re a beginner or a seasoned grower, this approach saves time and boosts productivity.
Need extra guidance? Explore resources like Kitchen Garden Academy or consult experts for personalized tips. Let’s dive into creating your perfect growing space!
Why Choose a Raised Bed Garden?
Elevated gardening transforms your growing experience with unmatched benefits. Whether you’re tight on space or new to planting, these structures solve common challenges effortlessly.
Benefits Over In-Ground Gardening
Loose soil in raised beds lets roots stretch deeper—ideal for crops needing 6″ of growth. Compacted earth can’t compete. *No more sore knees!* Frames at 10-12″ tall make planting and weeding a breeze.
Hardware cloth barriers slash weeds by 90%. Your plants get all the nutrients, not invasive grasses. Plus, soil warms faster in spring, extending your growing season naturally.
Perfect for Beginners and Small Spaces
Square-foot designs pack a punch. Grow 16 carrots or 9 spinach plants in just one square foot. Even urban balconies can host a mini garden.
One gardener harvested salad greens by Mother’s Day—her first try! With 9 hours of sunlight and proper drainage, your success is almost guaranteed.
How to Build a Raised Bed Garden: Essential Tools and Materials

Quality materials and tools ensure your garden frame lasts for years. Whether you’re a DIY pro or a first-timer, the right supplies save time and hassle.
Tools You’ll Need
Power tools like a compound miter saw and drill/driver make cutting and assembly a snap. No fancy gear? A handsaw and screwdriver work too—just add elbow grease.
Don’t forget a staple gun for weed barriers and tin snips for trimming hardware cloth. These extras keep weeds out and pests away.
Best Materials for Longevity
Cedar and redwood naturally resist rot, lasting 5–7 years. Budget-friendly? ACQ-treated lumber is EPA-approved for safe gardening. Always wear gloves when handling treated wood.
For corners, stainless steel screws won’t rust. Galvanized brackets add extra stability. Skip nails—they loosen over time.
Under the soil, hardware cloth blocks burrowing critters. Landscape fabric works too but needs replacement every few seasons.
Picking the Perfect Location

Your garden’s success starts with smart placement. The right spot ensures healthy plants and fewer chores. Focus on sunlight, soil, and convenience.
Sunlight and Drainage Requirements
Vegetables crave 8-hour sunlight daily. Use apps like Sun Seeker to track patterns. Shadows from fences or trees? Move your bed farther away.
*Avoid low spots*—frost lingers there. A gentle slope helps drainage, but steep slopes wash away soil. Test the ground with a hose; puddles mean trouble.
Avoiding Common Site Mistakes
Tree roots steal nutrients and water. Keep beds 10+ feet from oaks or maples. Black walnut trees? Their toxins harm tomatoes and peppers.
Place your backyard bed near a spigot. Hauling buckets gets old fast. High-traffic areas work if kids or pets won’t trample plants.
Designing Your Raised Bed

Smart design turns your raised bed into a powerhouse of productivity. Focus on size, shape, and height to match your needs. A well-planned layout saves effort and maximizes yields.
Choosing the Right Size and Shape
A 4×6-foot space balances reachability and planting area. Standard lumber length (8 or 12 feet) minimizes cuts and waste. Rectangular beds fit tight sides, while U-shaped designs offer wheelchair access.
Curved beds add visual flair but need custom materials. *Pro tip*: Match the shape to your garden’s flow. Deep-rooted crops like carrots thrive in 10-inch depths.
Height Considerations for Easy Access
Tailor height to your comfort. Taller beds reduce bending, while lower ones suit kids. Use this guide:
| User Height | Ideal Bed Height (inches) |
|---|---|
| Under 5’4″ | 10–12 |
| 5’4″–6′ | 12–18 |
| Over 6′ | 18–24 |
“A 24-inch bed lets me garden pain-free—even after back surgery.”
For wheelchair users, aim for 24–30 inches with knee clearance underneath. Pair with wide paths for easy maneuvering.
Step-by-Step Construction Guide

Constructing your frame is easier than you think with these pro techniques. Whether you’re using cedar or treated lumber, precision ensures longevity. Let’s break it down into manageable phases.
Cutting and Assembling the Frame
Start with a cutting list for a 4×6-foot bed:
- 2×10 boards: Two at 6 feet (sides), two at 4 feet (ends).
- Corner posts: Four at 12 inches (optional for extra height).
Pre-drill holes to prevent wood splitting. A 3/32-inch bit works for most screws. Angle cuts at 45°? Save those for decorative touches—straight edges simplify assembly.
Securing Corners for Stability
Use 3-inch exterior screws for joints. Counter-sink them for a flush finish:
- Clamp boards at right angles.
- Drive screws at a slight inward angle for grip.
- Add galvanized brackets if your corner feels wobbly.
Pro tip: Space support posts every 4 feet for heavy soils. Check for warping as you go—adjust clamps to keep everything square.
Preparing the Ground

A solid foundation is key to thriving plants in your new garden space. Proper ground prep stops weeds from stealing nutrients and keeps pests at bay. Start by evaluating your site—remove large rocks and debris that could interfere with roots.
Clearing Grass and Weeds
Two methods work best for clean starts:
- Solarization: Cover the area with clear plastic for 6 weeks. Sun heat kills grass and weed seeds.
- Sheet mulching: Layer cardboard or newspaper (3 sheets thick) under soil. It decomposes in 4 months, blocking light to weeds.
For stubborn roots, dig 8 inches deep with a spading fork. This aerates while removing hidden runners. Pro tip: Sprinkle used coffee grounds—their acidity suppresses new weed growth.
Adding a Weed Barrier
Choose your defense based on longevity:
“Hardware cloth lasts decades and lets earthworms through. Landscape fabric needs replacing every 3 years but is cheaper upfront.”
- Cut your barrier 6 inches wider than the bed bottom.
- Secure edges with a staple gun every 8 inches.
- Overlap seams by 4 inches to prevent gaps.
This extra step saves hours of weeding later. Your plants will thank you!
Filling Your Raised Bed with Soil
The right soil mix makes all the difference in your garden’s success. Unlike regular dirt, custom blends provide perfect drainage and nutrients. Your plants will grow faster and stronger with the right foundation.
Soil Mix Options for Optimal Growth
Mel Bartholomew’s famous compost-based recipe delivers incredible results:
- 1/3 vermiculite (retains moisture)
- 1/3 peat moss (lightens texture)
- 1/3 blended compost (nutrient powerhouse)
Pre-mixed bags cost more but save time. Bulk deliveries work best for multiple beds. Pro tip: Add 2 cups of worm castings per square foot for turbocharged growth.
“Raised garden bed soils should be fluffy—like chocolate cake crumbs. Compacted dirt chokes roots.”
How Much Soil You’ll Need
A standard 4×6-foot bed requires 18 cubic feet. Use this formula:
| Bed Dimensions | Soil Needed |
|---|---|
| 4′ x 4′ x 10″ | 13.3 cu ft |
| 4′ x 8′ x 12″ | 32 cu ft |
| 3′ x 6′ x 18″ | 20.25 cu ft |
One wheelbarrow holds about 3 cubic feet. For big projects, order by the cubic yard (27 cubic feet). Test pH levels before planting—most veggies thrive at 6.0-7.0.
Planting Your Raised Bed Garden
Now comes the fun part—choosing what to grow in your new setup! Whether you crave crunchy veggies or fragrant herbs, smart selections and spacing make all the difference. Start simple for quick wins, then expand as your confidence grows.
Top Picks for First-Time Growers
Begin with these foolproof plants:
- Radishes: Harvest in just 3 weeks—perfect for impatient gardeners.
- Lettuce: Pick leaves as needed for endless salads.
- Basil or thyme: Fragrant herbs that repel pests naturally.
Pair fast growers like spinach with slower ones like carrots. This way, you’ll maximize yield without crowding.
Mastering Plant Placement
Square foot gardening simplifies spacing. Follow this guide per square:
| Plant | Quantity | Spacing (inches) |
|---|---|---|
| Carrots | 16 | 3 |
| Tomatoes | 1 | 12 |
| Spinach | 9 | 4 |
“Plant marigolds near tomatoes—their scent deters aphids. It’s nature’s pest control!”
For vertical space, add trellises for cucumbers or beans. Keep paths clear for easy access to every plant.
Watering and Maintenance Tips
Smart watering keeps your plants thriving with less effort. The right techniques save time while preventing overwatering. Combined with proper mulching, your garden stays healthy through heat waves and dry spells.
Efficient Watering Techniques
Morning is the best way to hydrate plants. Cooler temperatures reduce evaporation by 30%. Target the soil, not leaves, to prevent fungal diseases.
Compare these two systems:
| Method | Water Savings | Installation |
|---|---|---|
| Soaker hoses | 50% less waste | 30 minutes |
| Drip irrigation | 60% efficiency | 2 hours |
For DIY solutions:
- Bury unglazed terracotta pots as ollas—they slowly release water
- Connect rain barrels to downspouts with mosquito-proof screens
“Drip systems cut my watering time in half while doubling tomato yields.”
Mulching to Retain Moisture
A 3-inch top layer regulates soil temperature and moisture. Organic options feed earthworms as they decompose.
Popular choices:
- Straw: Lightweight and weed-free (lasts 1 season)
- Wood chips: Long-lasting but may tie up nitrogen
- Leaf mold: Brew as tea for micronutrient boosts
Adjust mulch depth seasonally:
- Spring: 1 inch (lets soil warm)
- Summer: 3 inches (maximum cooling)
- Fall: 2 inches (protects roots)
Refresh mulch every 6 months to maintain benefits. Your bed will stay moist between rains, reducing stress on plants.
Extending the Growing Season
Cold weather doesn’t have to mean the end of fresh veggies from your garden. With simple tools like row covers and smart planting schedules, you’ll harvest longer—sometimes year-round!
Using Covers for Frost Protection
Lightweight fabrics shield plants from frost while letting sunlight through. Choose the right material for your climate:
| Cover Type | Protection Level (°F) | Best For |
|---|---|---|
| 0.5 oz row cover | Down to 28° | Spring/fall lettuce |
| 1.5 oz row cover | Down to 24° | Winter kale |
| PVC hoop house | Down to 20° | Root vegetables |
Secure edges with rocks or clips. Open vents on sunny days to prevent overheating. A soil thermometer helps track root-zone temps.
“Solar-powered vent openers automate temperature control—no rushing home to uncover plants!”
Seasonal Planting Strategies
Rotate crops every 6 months to keep soil healthy. Try this way:
- Spring: Peas → Summer: Tomatoes → Fall: Spinach
- Overwinter carrots and parsnips under mulch—they sweeten in cold time.
Cold frames extend harvests by 4–6 weeks. Position them south-facing. For years of success, note what works in your bed each season.
Enjoy Your Bountiful Raised Bed Garden
Your backyard oasis is now ready to thrive! With fresh herbs and vibrant veggies, this space will bring joy for years. Celebrate your first harvest by sharing extras with neighbors or hosting a garden-to-table dinner.
Save seeds from your strongest plants for next season. Stagger planting dates every two weeks for continuous yields. In warm climates like Zone 9, try heat-loving varieties for summer success.
Recharge soil between seasons with compost and mulch. Rotate crops to prevent nutrient depletion. Simple care keeps your raised bed productive season after season.
Happy gardening—your fresh, homegrown meals start here!


