
Creating a thriving outdoor space doesn’t require professional skills or expensive supplies. Imagine growing fresh herbs, vegetables, or flowers in a sturdy, custom-sized planter that lasts for years without rotting or warping. This guide reveals a gardener-approved approach to crafting durable structures using basic items from your local hardware store.
Developed by a landscaping expert with decades of experience, this method skips complicated joinery and power tools. You’ll work with cedar boards, metal brackets, and standard screws—materials that cost under $100 for a 4×8-foot design. The focus is on simplicity: no precise measurements or specialty equipment needed.
Why does this technique stand out? It’s been tested in real-world settings, from backyard plots to community gardens. You’ll learn how to adjust dimensions for different plants, manage soil depth, and prevent common construction mistakes. The result? A low-maintenance growing space ready for planting in just a few hours.
Whether you’re new to outdoor projects or refining your DIY skills, this process eliminates guesswork. Let’s turn those materials into a functional, attractive addition to your yard—no carpentry diploma required!
Understanding the Value of Raised Garden Beds
Elevated growing spaces solve common gardening challenges while boosting plant health. Unlike traditional plots, these structures give you precise control over your growing environment—from root protection to nutrient management. Let’s explore why this approach works so well for diverse landscapes and skill levels.
Why Choose Raised Bed Gardening?
Your plants thrive when their roots get exactly what they need. Elevated designs prevent water buildup, keeping roots oxygenated even during heavy rains. No more guessing about soil quality—you mix custom blends suited to tomatoes, herbs, or flowers.
Maintenance becomes simpler with clear edges. Weeds stay contained, and harvesting feels organized. You’ll spend less time battling unwanted growth and more enjoying your garden’s progress.
Health, Accessibility, and Aesthetic Benefits
Bending over becomes optional. The raised height reduces strain on your back and knees, making tasks like planting or pruning comfortable. Families appreciate how children naturally avoid stepping into defined spaces, protecting delicate sprouts.
Visually, these beds create structured beauty in any yard. Arrange multiple boxes to form patterns or color-code crops. Add trellises for vertical interest while keeping tools neatly stored beneath frames.
Benefits of Raised Bed Gardening for Your Home

Customizable garden beds elevate both your landscape’s beauty and productivity. These structures turn cramped yards into organized growing zones while giving you command over soil quality. Unlike traditional plots, you’ll start with fresh, nutrient-rich mixes tailored to your plants’ needs—no battling compacted clay or hidden rocks.
Soil management becomes effortless with contained spaces. Line the bottom with hardware cloth to stop gophers, then add landscape fabric to smother weeds. This layered approach creates a pest-resistant foundation. You’ll notice faster growth since roots access air and nutrients more easily in loose, aerated earth.
Ergonomics shine in raised designs. Kneeling or bending strains disappear when beds sit at waist height. Families love how defined edges keep kids and pets from trampling seedlings. Even better—these beds prevent flooding by lifting plants above soggy ground, a lifesaver during spring rains.
Modular layouts let you reshape your garden yearly. Expand your setup gradually or shift configurations to match new crops. Companion planting thrives in these controlled environments, and rotating vegetables between beds reduces disease risks. For soil guidance, explore research-backed growing techniques from agricultural experts.
Your outdoor space gains visual structure through clean lines and intentional design. Mix bed heights and arrangements to create depth, making small areas feel thoughtfully planned. Whether growing herbs or dahlias, you’ll enjoy a tidy, productive garden that adapts as your skills grow.
Planning Your Project and Setting Goals

Smart planning transforms your gardening dreams into reality. Before grabbing your tools, map out a strategy that balances practicality with creativity. This step saves time, money, and frustration later.
Sketching Your Design and Determining Size
Start by drawing your space. Consider sunlight patterns—most vegetables need 6-8 hours daily. Keep paths between beds at least 2 feet wide for easy access. Size matters: 3-4 feet wide lets you reach plants without stepping into the garden.
Depth affects root growth. Shallow 6-inch beds work for herbs, while 12-inch depths suit carrots and tomatoes. Measure your available area twice to avoid cutting errors. Leave room for future expansions if you catch the gardening bug!
Budgeting and Material Considerations
Costs vary based on materials and dimensions. Cedar lasts longer than pine but costs more upfront. Use this table to compare options:
| Material | Cost per 4×8 Bed | Lifespan |
|---|---|---|
| Cedar | $180-$250 | 10-15 years |
| Pine | $100-$150 | 4-7 years |
| Redwood | $220-$300 | 12-20 years |
Factor in soil expenses—bulk deliveries cut costs by 40% versus bagged supplies. Add hardware cloth ($15-$20) if gophers visit your neighborhood. Track prices at local lumber yards; some offer discounts for untreated wood.
Your garden’s success starts with this blueprint phase. Thoughtful preparation ensures every shovel stroke and screw turn brings you closer to harvest joy.
Choosing the Right Wood and Materials

Selecting quality materials determines how long your garden bed withstands weather and time. The wood species you choose impacts durability, safety, and maintenance needs. Let’s break down your best options for creating a healthy growing environment.
Comparing Cedar, Pine, and Redwood
Cedar tops many gardeners’ lists for its natural rot resistance and aromatic properties. Available widely east of the Rockies, it typically lasts 10-15 years untreated. West Coast growers often choose redwood, which shares similar benefits but costs 20% more. For maximum longevity, seek heart redwood—its tight grain structure resists decay better than standard grades.
| Material | Cost (4×8 bed) | Lifespan |
|---|---|---|
| Cedar | $180-$250 | 10-15 years |
| Pine | $100-$150 | 4-7 years |
| Redwood | $220-$300 | 12-20 years |
Pine offers a budget-friendly alternative if you’re testing your gardening commitment. While lasting only 3-7 years, its lower price lets you experiment with bed layouts before investing in premium lumber.
Sustainable and Safe Material Options
Always verify wood treatments before purchasing. Avoid pressure-treated boards containing arsenic or copper compounds—these chemicals can seep into your soil over time. Instead, look for FSC-certified lumber supporting responsible forestry practices.
New composite materials made from recycled plastics provide another eco-friendly choice. Though pricier upfront, they eliminate rot concerns entirely and come in various colors. Remember: your plants’ health starts with what touches their roots!
Essential Tools for a Successful DIY Project

The right toolkit transforms garden projects from frustrating to fulfilling. You’ll need basic supplies for marking, cutting, and assembling your structure. Focus on versatile items that handle multiple tasks to keep costs low.
Hand Tools vs. Power Tools
Start with manual essentials: a tape measure, carpenter’s square, and digging fork. These form your foundation for accurate layouts and soil preparation. A sturdy shovel becomes your best friend when moving compost or leveling ground.
Power tools shine in time-sensitive steps. A cordless drill with 1/8″ and 3/16″ bits prevents wood splitting during assembly. For cutting boards, consider this comparison:
| Tool | Cost | Speed | Best For |
|---|---|---|---|
| Hand Saw | $15-$30 | Slow | Single projects |
| Circular Saw | $60-$120 | Fast | Straight cuts |
| Miter Saw | $150-$300 | Instant | Precision angles |
Safety glasses protect your eyes during drilling or sawing. If building square-foot gardening setups, use a tarp and wheelbarrow for efficient soil mixing. Rent specialized tools if your DIY ambitions outpace your budget.
Remember: quality beats quantity. Invest in a reliable drill first—it handles 80% of assembly tasks. Add power cutters later as your skills grow. With smart tool choices, you’ll create professional results without emptying your workshop.
How to Build a Raised Garden Bed with Simple Tools and Materials

Transform your backyard into a productive oasis using a modular assembly method that simplifies construction. This approach breaks the project into three clear phases, letting you focus on one manageable task at a time. You’ll start by organizing materials on a flat surface—a critical step for precise alignment.
Begin with the short sides of your structure. Secure boards using corner brackets, creating two identical frames. This method allows quick adjustments if measurements shift slightly. Connect these sections with longer boards to form the full rectangle—no complex math required.
| Phase | Key Actions | Tools Needed |
|---|---|---|
| 1. Frame Prep | Cut boards to size Sand rough edges |
Tape measure Hand saw |
| 2. Assembly | Attach brackets Double-check angles |
Cordless drill Carpenter’s square |
| 3. Final Setup | Secure joints Test stability |
Level Adjustable wrench |
Working in stages reduces errors and keeps the process enjoyable. Make sure each connection feels solid before moving forward. This building-block technique turns what seems complicated into achievable victories.
Your finished bed will stand ready for soil in under two hours. Celebrate by planting quick-growing herbs or flowers—instant rewards for your smart, systematic work!
Measuring, Marking, and Cutting Your Boards
Precision at this stage makes assembly smooth and frustration-free. Unlike typical woodworking projects, garden beds require understanding actual lumber dimensions rather than labeled sizes. This knowledge prevents surprises when stacking boards for your desired height.
Accurate Measurements for a Perfect Fit
Nominal sizes lie. A “2×6″ board actually measures 1.5″ thick and 5.5″ tall. Three stacked boards create 16.5″ walls—not 18”. For a 48″ wide structure, cut end pieces to 45″. This accounts for the 1.5″ overlap on each side where longer boards connect.
| Desired Width | End Board Length | Total Overlap |
|---|---|---|
| 36″ | 33″ | 3″ |
| 48″ | 45″ | 3″ |
| 60″ | 57″ | 3″ |
Cutting Tips for Home Garden Projects
Mark cuts with a sharp pencil and carpenter’s square. Position the square’s edge along your measurement line for razor-straight marks. Double-check numbers before sawing—most errors happen here.
Standard 8-foot boards help minimize waste. Cut two 45″ pieces from one board, leaving 54″ for other sections. Wear gloves when handling rough lumber edges, and sand cuts lightly to prevent splinters.
Constructing the Frame of Your Garden Bed
Your garden bed’s strength starts with precise assembly techniques. Begin by organizing all cut boards and hardware on a flat workspace. This prevents misalignment and ensures smooth progress through each construction phase.
Securing Corners and Aligning Boards
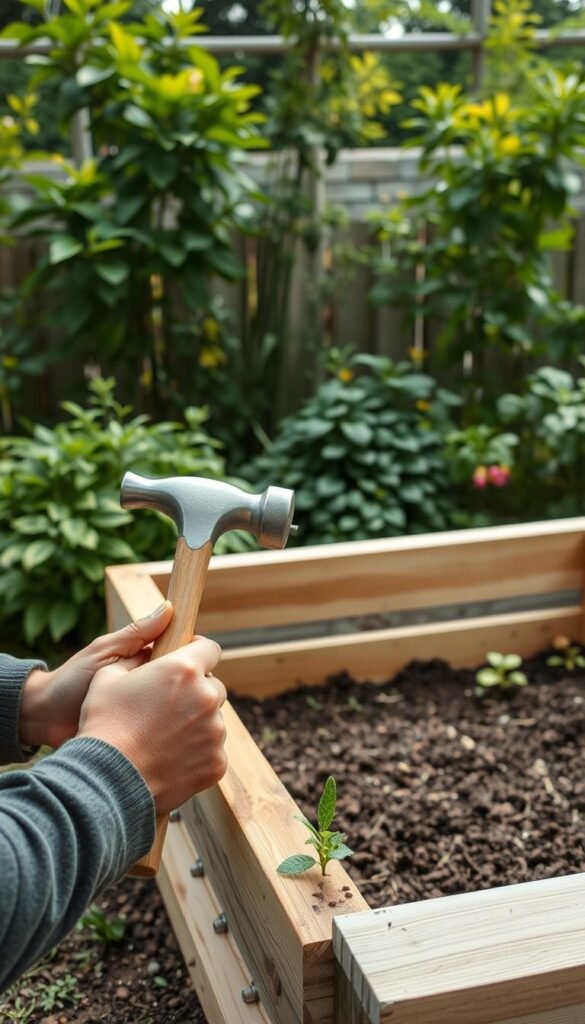
Start with the shorter sides of your structure. Position 4×4 corner posts vertically, spacing them according to your board lengths. Place the first horizontal board flush with the post’s outer edge—this alignment keeps walls straight and visually clean.
Drive two 3-inch deck screws through each board end into the corner post. Keep fasteners centered on the wood and at least 1 inch from edges. This placement prevents splitting while creating rock-solid connections that handle soil pressure.
Repeat the process for the second short side. Check both assemblies for identical dimensions using a tape measure. Matching pieces guarantee your long boards will fit perfectly when connecting the frame.
Attach longer boards to complete the rectangle. Predrill holes if working with knotty wood, though quality screws often bite securely without splitting. Maintain consistent spacing between horizontal pieces for uniform weight distribution.
Your completed frame should sit level on the ground. Test stability by gently rocking the structure—any wobble indicates uneven legs needing adjustment. Tighten any loose screws before proceeding to soil filling.
Preparing Your Garden Site
Your garden’s success begins with smart site preparation. This phase creates the perfect foundation for healthy plant growth while saving hours of maintenance later. Let’s transform your chosen space into a thriving ecosystem using nature-friendly techniques.
Leveling and Marking Your Layout
Outline your bed’s footprint with stakes or a flexible garden hose. This visual guide helps confirm the space receives 6-8 hours of sunlight daily. Adjust curves or angles until the shape complements your yard’s flow.
Large weeds get a surprising second life through the “chop and drop” method. Trim them at ground level and let cuttings decompose naturally. This green mulch feeds earthworms while suppressing new weed growth.
Compacted soil needs attention before bed placement. Water the area lightly, then use a digging fork to aerate the top 6-8 inches. You’ll feel resistance decrease as oxygen reaches deeper layers. This simple step prevents water pooling and strengthens root development.
Your prepared site now balances function and ecology. The leveled ground supports even weight distribution, while decomposed weeds enrich the soil beneath your future garden. All that’s left? Positioning your bed and filling it with life-giving soil!


