
More homeowners are swapping grass for fresh, homegrown food. A well-planned garden offers delicious harvests while reducing water and maintenance costs. It’s a smart way to use your lawn for something truly rewarding.
Growing your own produce brings the family together. Kids learn where food comes from, and everyone enjoys seasonal rewards like juicy tomatoes or vibrant flowers that attract pollinators.
Ready to start? Focus on smart layout planning, proper soil prep, and efficient irrigation. Soon, you’ll enjoy meals straight from your thriving vegetable garden.
Plan Your Garden Layout and Prep the Space

Transforming your outdoor space starts with smart planning and preparation. A well-designed garden maximizes sunlight, water efficiency, and ease of access. Whether you’re working with a lawn or a front yard, these steps ensure success.
Pick the Perfect Spot
Choose a south-facing area for 6–8 hours of daily sun. Track shadows to confirm light patterns. Stay within 25 feet of a water source for easy irrigation.
Measure and Mark Efficiently
Use a hose to outline beds before committing. Allow 3-foot pathways for accessibility. Temporary string markers help visualize spacing.
Secure with Functional Fencing
A 6-foot cedar fence deters animals. Bury the base 12 inches to block digging pests. Solar post lights add nighttime charm.
| Fencing Material | Pros | Cons |
|---|---|---|
| Cedar | Natural pest resistance, durable | Higher upfront cost |
| Vinyl | Low maintenance, sleek look | Less eco-friendly |
| Wire Mesh | Budget-friendly, lightweight | Minimal privacy |
Balance aesthetics and function. Allocate 1/3 of your yard to beds and 2/3 to open space for flexibility.
Remove the Existing Lawn and Grass

Clearing your yard of old turf sets the stage for fresh growth. Eliminating grass and weeds prevents them from stealing nutrients and water from your new plants. It also gives your garden a clean slate to thrive.
Why Sod Removal Matters
Leftover grass competes with crops for resources. Deep roots can regrow, disrupting your soil structure. A thorough removal ensures your plants get all the space and nutrients they need.
Tools and Methods
Choose the right approach based on your lawn size and timeline:
- Sod cutter: Ideal for large areas. Renting a Sun Joe SOD700G removes 1-inch-thick strips efficiently.
- Shovel: Manual but cost-effective. Best for small patches.
- Sheet-mulching: Lay cardboard under 6 inches of soil and compost. Decomposes in 3 months.
| Method | Speed | Cost |
|---|---|---|
| Sod Cutter | Fast (1 day) | $$ (rental) |
| Shovel | Slow (days) | $ (tool purchase) |
| Sheet-Mulching | 3+ months | $ (materials) |
Repurposing Removed Sod
Don’t waste the turf! Turn it into organic matter for your garden:
- Flip sod chunks upside-down in a compost pile. Add coffee grounds to speed breakdown.
- Use strips for erosion control on slopes.
- Create lasagna beds: layer cardboard, grass clippings, and compost.
Test your soil for wireworms if planting root crops. Black plastic smothering works in 60 days for weed-free results.
Build and Fill Raised Garden Beds

Healthy roots start with the right bed—build yours for success. Raised beds offer better drainage, warmer soil, and easier access. They’re a game-changer for growing deep-rooted veggies like carrots or potatoes.
Why Choose Raised Beds?
Elevated garden beds prevent soil compaction and improve airflow. No more bending over—plant at waist height for comfort. Plus, you control the soil mix, avoiding poor native dirt.
Materials You’ll Need
Gather these essentials to build garden beds:
- 2×10 untreated cedar boards (rot-resistant for 5+ years)
- High-quality topsoil and compost (3:1 ratio)
- Cardboard or newspaper (weed barrier)
- Hardware cloth (pest-proofing the base)
Layering for Success
Follow this step-by-step method:
- Line the bottom with cardboard to smother weeds.
- Add hardware cloth to block burrowing pests.
- Mix soil and compost—fill beds 18″ deep for robust roots.
- Top with 2″ of mulch to retain moisture.
“Raised beds extend your growing season by warming faster in spring. They’re worth every penny.”
For extra fertility, sprinkle worm castings between layers. Redwood seats on the edges make tending your garden even easier.
Improve Soil Health for Optimal Growth

Rich, fertile soil is the foundation of every thriving garden. Without healthy dirt, plants struggle to absorb nutrients and water. Testing and amending your earth ensures strong roots and bountiful harvests.
Testing and Amending Soil
Start with a simple pH test. Most veggies prefer slightly acidic conditions (6.0–7.0). Your local USDA extension office provides affordable testing kits. Results reveal missing nutrients and organic matter levels.
Common amendments include:
- Coarse sand (30% mix for clay soils)
- Crushed eggshells for calcium-loving tomatoes
- Used coffee grounds (2% nitrogen boost)
| Soil Type | Amendment | Benefit |
|---|---|---|
| Clay | Sand + compost | Improves drainage |
| Sandy | Peat moss | Retains moisture |
| Loam | Worm castings | Enhances fertility |
Composting Basics
Turn kitchen scraps into garden gold with a 3-bin system. Layer 1 part green materials (vegetable peels) with 2 parts brown (dry leaves). The pile heats to 140°F, killing pathogens in 3–6 months.
“Compost tea brewed with molasses supercharges plant growth. The microbes act like vitamins for your soil.”
Speed up decomposition by:
- Chopping materials into small pieces
- Turning the pile weekly
- Keeping it as moist as a wrung-out sponge
Mulching for Success
A 3-inch straw mulch layer works wonders. It reduces water evaporation by 40% and suppresses weeds naturally. For tomatoes, apply mulch after soil warms to prevent rot.
Discover more soil improvement techniques to maximize your harvest. Mycorrhizal fungi added to planting holes create a living network that feeds roots.
Healthy soil means happy plants. With these simple steps, your garden will produce its best yields yet.
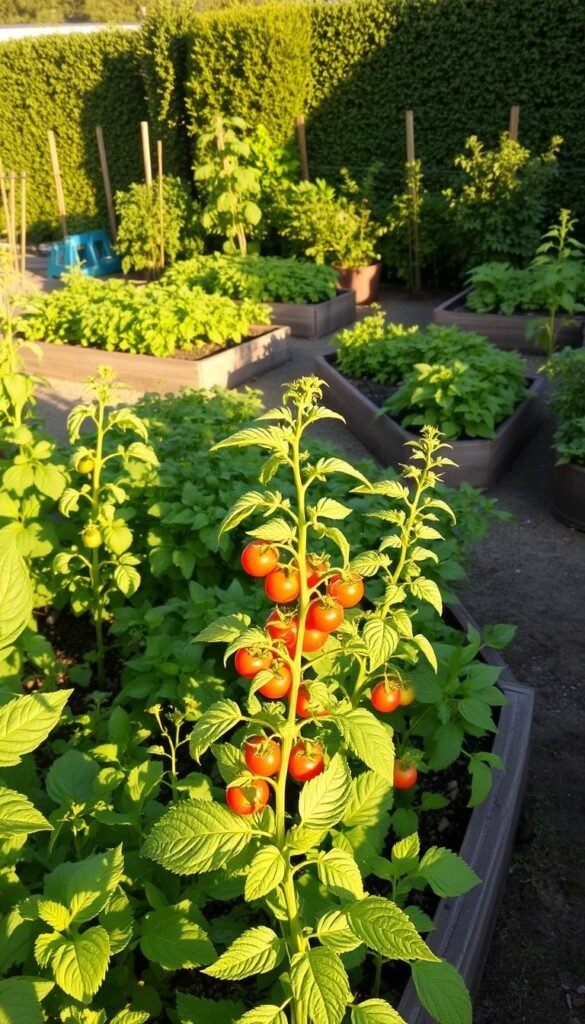
Plant Your Productive Garden

The magic begins when you place the first seed in nutrient-rich soil. Choosing the right plants and techniques ensures a thriving garden that rewards you all season. Whether you’re growing crisp carrots or vibrant marigolds, every step matters.
Select Plants for Your Climate
Match veggies and flowers to your region’s weather. Zucchini loves heat and needs 3 feet between plants. Blueberries thrive in acidic soil (pH 4.5–5.5)—test before planting.
Disease-resistant varieties like ‘Celebrity’ tomatoes slash crop loss by 70%. Pair them with marigolds to repel nematodes naturally. Discover more vegetable options for beginners.
Smart Planting Strategies
Give roots room to grow. Use seed tape for perfect carrot spacing or install bamboo teepees for pole beans. Succession planting radishes between slow-growers maximizes space—they’ll be ready in 22 days!
Companion planting boosts yields. Basil enhances tomatoes’ flavor, while oregano deters pests. Create a pizza-themed circle with these trio for fun and function.
Make It a Family Affair
Get kids excited with lightweight tools like the Radius Garden 201 PRO. Paint river rocks as plant markers or build a sunflower house for playful learning.
“Gardening with kids teaches patience and science—plus, they’re more likely to eat veggies they grow!”
Assign small tasks: watering seedlings or hunting for ripe strawberries. These moments turn into cherished memories and a lifelong love for growing food.
Install an Efficient Irrigation System
Smart watering saves time and boosts harvests—discover the best methods. A well-designed irrigation system delivers moisture directly to plants, reducing waste and labor. Whether you’re growing tomatoes or herbs, precision watering keeps your garden thriving.
Drip Irrigation vs. Sprinklers: Pros and Cons
DIG Corp drip kits use 75% less water than sprinklers. Emitters target plant roots, minimizing evaporation. Sprinklers cover large areas but lose water to wind and runoff.
| Method | Pros | Cons |
|---|---|---|
| Drip | Saves water, precise | Higher upfront cost |
| Sprinklers | Fast coverage | Wastes water |
Step-by-Step Drip Line Installation
Start with ½” mainline tubing and 6″ emitter spacing. Lay lines along plant rows, securing with stakes. Use goof plugs to fix misplaced holes.
- Attach a pressure regulator (25 PSI).
- Install a vacuum breaker to prevent backflow.
- Zone separately for veggies and perennials.
Adding a Timer for Consistent Watering
The Orbit B-hyve smart timer adjusts based on weather data. Set it to water garden beds at dawn for peak absorption. Winterize lines with an air compressor blowout.
“Automated systems cut watering time by 80% while preventing under- or over-watering.”
Calculate each crop’s GPH needs for optimal growth. With the right system, your garden stays lush with minimal effort.
Enjoy the Fruits (and Vegetables) of Your Labor
Your hard work pays off when fresh zucchini and tomatoes fill your kitchen. Pick veggies at peak ripeness—6-8″ zucchini has the sweetest flavor. Nothing beats meals made with homegrown ingredients.
Preserve your bounty for year-round enjoyment. Water bath canning locks in summer tomato flavors. Save seeds from heirloom plants to grow again next season.
Make harvesting fun for the whole family. Turn old crates into rustic baskets for gathering produce. Weekly pest checks teach kids about garden care while protecting your crops.
Celebrate your success with garden-to-table dinners. Expand your space by 10% yearly using sheet-mulching techniques. Document progress in a journal to track improvements.
Discover more harvest tips for small spaces. Every bite reminds you why the hard work was worth it.


