
Ever wondered why seasoned growers rave about their elevated planting systems? Take it from a mom who received one as a Mother’s Day gift – she’s now harvesting twice as much produce from her backyard compared to traditional row planting. This isn’t magic – it’s smart spatial design working in your favor.
Elevated planters offer precise soil management that ground-level plots simply can’t match. Imagine customizing your dirt composition for tomatoes in one box and blueberries in another. Better drainage means no more waterlogged roots after summer storms, while the contained structure prevents nutrient runoff.
Space efficiency becomes your secret weapon. Strategic arrangements let you cultivate 16 carrots or 9 spinach plants per square foot – numbers that make in-ground methods look wasteful. The secret? Eliminating unnecessary walkways through thoughtful planning that maximizes every inch.
Accessibility transforms too. No more backaches from bending over – create working heights matching your comfort. For those considering building your own raised bed garden, standard lumber sizes simplify construction while minimizing material waste.
Whether you’re growing heirloom vegetables or cutting flowers, these systems adapt to your vision. From urban balconies to sprawling yards, the principles remain the same: control your environment, work smarter, and watch your yields soar.
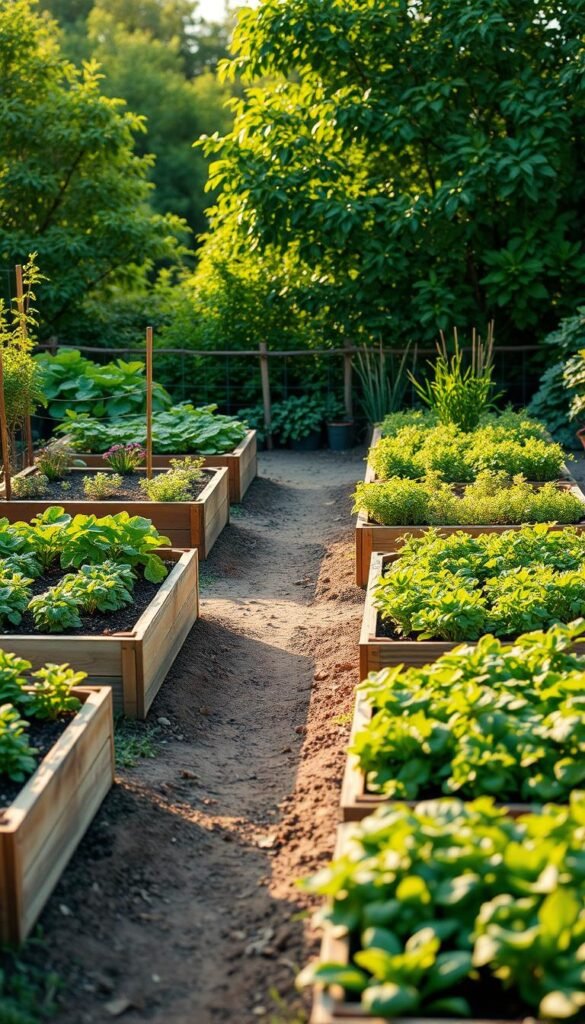
Maximizing Your Garden Space with Raised Beds
What if your backyard could produce three times the veggies without expanding? Elevated planters unlock this potential by letting you customize soil quality and manage root systems with surgical precision. Unlike traditional plots, these setups eliminate wasted space between rows while preventing nutrient loss.
Understanding the Benefits of Elevated Gardening
You’ll notice plants grow faster and stronger in contained beds. The secret? Loose, nutrient-rich soil lets roots spread freely without fighting compaction. Proper drainage stops waterlogging, even during heavy rains – a game-changer for crops like tomatoes or peppers.
Smart spacing means squeezing 16 carrots or 4 heads of lettuce into one square foot. This efficiency isn’t just theory – studies show elevated systems yield 4x more than conventional methods. For those starting affordable raised bed projects, strategic layouts turn limited areas into year-round producers.
Season extension becomes effortless too. Soil in raised beds warms faster in spring, letting you plant weeks earlier. Add cold frames in fall, and harvest kale or spinach through frosts. It’s like giving your plants their own microclimate.
The Advantages of Raised Bed Gardening

Transform your growing experience with systems that put you in the driver’s seat. These setups deliver two game-changing benefits: precision soil management and ergonomic design. Research confirms raised bed gardening benefits include higher yields and reduced physical strain – advantages you’ll notice from your first planting season.
Improved Soil and Drainage
Say goodbye to fighting clay-heavy earth or sandy patches. Contained beds let you mix custom soil blends – acidic for blueberries, nutrient-rich for tomatoes. Loose, uncompacted earth means roots spread freely, accessing oxygen and nutrients more effectively.
Drainage issues vanish as excess water flows through layered soil instead of pooling. No more yellowing leaves from soggy roots! Elevated structures warm faster in spring, giving heat-loving crops like peppers a 2-3 week head start.
Enhanced Accessibility and Productivity
Working at waist height changes everything. No kneeling required – just grab your tools and tend leafy greens without back strain. The comfortable height makes weeding and harvesting feel effortless.
Dense planting becomes your superpower. Grow 4x more herbs in the same footprint compared to traditional rows. With ideal soil conditions, your basil and parsley will outpace anything grown in ground-level plots.
Planning Your Raised Garden Layout

Ready to turn your backyard into a productive oasis? Smart spatial arrangements begin with precise measurements and strategic thinking. Start by grabbing a tape measure – you’ll want exact numbers for length, width, and existing features like trees or slopes.
Assessing Your Backyard Dimensions
A rectangular area measuring 6 feet by 12 feet offers ideal proportions for two planting zones. This configuration allows 360-degree access to both beds – no wasted corners or unreachable plants. Professional designers often pair containers because single isolated units create awkward empty zones and reduce visual harmony.
Consider sun patterns when positioning your setup. South-facing placements capture maximum daylight for sun-loving crops. Leave 30 inches between structures for comfortable movement – enough space for kneeling cushions or a compact garden cart.
Mapping Out Walkways and Spacing
Perimeter paths transform maintenance from chore to pleasure. Frame your growing area with 24-inch walkways using mulch or gravel. These surfaces prevent muddy shoes while directing rainwater away from plant roots.
For those exploring square foot garden plans, remember: access aisles matter as much as planting grids. Three-foot gaps between beds let you harvest tomatoes while someone waters herbs nearby. Smart spacing means never stepping on soil – preserving its fluffy texture season after season.
Sketch your design on graph paper before breaking ground. Mark water sources, tool storage, and shade patterns. This blueprint becomes your roadmap to a thriving edible landscape that grows better each year.
Choosing the Ideal Materials and Kits

Selecting the right foundation for your planting system makes all the difference between fleeting success and lasting abundance. Your material choices impact everything from soil temperature to maintenance needs – let’s break down the options.
Exploring Raised Bed Kits and DIY Options
Pre-built systems like Garden in Minutes offer 20+ years of durability with rust-resistant aluminum construction. Their modular design works seamlessly with the Garden Grid™ watering system – perfect for arid regions. Use code ANGELA10 for $10 off orders over $100.
Handy with tools? Building custom beds lets you control dimensions and materials. Resources like Kitchen Garden Revival provide step-by-step plans for creating affordable cedar or composite structures. You’ll save money upfront but need basic carpentry skills.
| Material | Cost | Lifespan | Best For |
|---|---|---|---|
| Cedar | $ | 7-10 years | Budget-friendly projects |
| Composite | $$ | 15+ years | High-rainfall areas |
| Metal | $$$ | 20+ years | Hot climates |
| Plastic | $ | 5-8 years | Temporary setups |
Consider time investment versus long-term value. Kits arrive pre-cut with assembly instructions, while DIY projects demand weekend labor. Both approaches can yield thriving spaces – choose what matches your schedule and craftsmanship confidence.
How to Grow More in Less Space: Raised Garden Beds Layout & Design Tips

What separates amateur plots from professional-grade setups? The answer lies in intentional arrangements that turn limited areas into lush food factories. Master these spatial tactics, and you’ll harvest basketfuls from corners others waste.
Incorporating Proven Design Techniques
Align your beds north-to-south for balanced sun exposure. This orientation ensures plants receive equal light as the sun crosses the sky. Four-foot widths let you reach center plants without compacting soil – a rule followed by botanical gardens nationwide.
Three-foot walkways transform maintenance. You’ll wheel carts easily while keeping tools within arm’s reach. Narrower paths reclaim valuable growing real estate – crucial for urban spaces. Pair this with square-foot gardening layouts for precision planting.
Rotate crops annually to outsmart pests and preserve nutrients. Try this sequence: tomatoes → beans → greens → root vegetables. Companion planting adds another layer – basil deters tomato hornworms, while marigolds repel nematodes.
Seasoned growers interlace edible flowers like nasturtiums among vegetables. These vibrant allies attract pollinators while confusing pests. Vertical trellises double your output – train cucumbers upward, then plant radishes below.
These methods work together like clockwork. You’ll enjoy continuous harvests without exhausting your soil. Best part? Once established, this system practically runs itself – just add water and sunshine.
Optimizing Sunlight and Shade for Peak Growth

Your garden’s success starts with understanding its light dance. Track shadows across your yard for 3 days each season – you’ll discover surprising patterns. Morning rays in June hit differently than September’s angled glow.
Decoding Your Yard’s Light Language
Use free apps like Sun Seeker to map solar paths. Mark areas getting 6-8 hours of direct light – these become prime real estate for tomatoes and peppers. Partial shade spots? Perfect for leafy greens in small backyard setups.
Smart Shade Solutions That Work
Install 8-foot poles at bed corners – they multitask beautifully. From May to August, drape 30% shade cloth during afternoon hours. Come autumn, swap fabric for twinkling café lights that extend evening harvests.
| Shade Method | Best Use | Season |
|---|---|---|
| Sunflowers | Natural afternoon filter | June-August |
| Shade cloth | Heat wave protection | Peak summer |
| Trellises | Vertical light control | Year-round |
Plant ‘Mammoth Grey Stripe’ sunflowers along eastern edges in May. Their broad leaves create dappled shade by July – exactly when tender basil needs relief. Bonus: goldfinches love the seeds!
Incorporating Vertical Elements with Trellises
What’s the secret to doubling your harvest without expanding your footprint? Look up. Vertical gardening turns unused airspace into a lush canopy of edibles while keeping beds accessible. Trellises transform sprawling vines into tidy columns, letting you grow more in the same square footage.
Sun-Smart Support Systems
Place trellises along the north edges of your beds. This smart placement stops tall structures from blocking sunlight. For most setups, one to three obelisk-style supports work best – space them 2-3 feet apart based on bed length.
Wider beds (3-4 feet) become possible with vertical systems. You’ll reach all plants easily while tomatoes climb skyward. Pole beans and cucumbers thrive on these supports, their leaves creating dappled shade for heat-sensitive greens below.
Pair vertical elements with square foot gardening principles for maximum efficiency. Train peas up nylon nets or use cattle panels for heavier squash. These methods boost airflow, reducing disease risks while making harvests a breeze.
Your garden gains new dimensions – literally. Those 6-foot-tall structures triple growing space without crowding roots. Just remember: match trellis height to plant needs. Cherry tomatoes? 5 feet. Pole beans? 7 feet. Watch your yields soar upward!


