
Imagine harvesting crisp lettuce or juicy tomatoes year-round—no backyard required. Growing plants without soil might sound futuristic, but it’s simpler than you think. This method uses water infused with essential minerals, letting roots absorb nutrients directly. Best part? You don’t need fancy equipment to get started.
Many enthusiasts create thriving systems using everyday items like plastic containers or PVC pipes. By focusing on repurposed materials, you can slash costs while reducing waste. A well-balanced nutrient solution becomes your garden’s lifeline, delivering everything from nitrogen to potassium for robust growth.
This approach isn’t just budget-friendly—it’s space-efficient too. Urban dwellers love how compact these setups fit on balconies or kitchen counters. You’ll also use up to 90% less water compared to traditional farming, making it an eco-conscious choice.
Ready to transform your space? We’ll walk through different system designs, from beginner-friendly wick setups to more advanced flood-and-drain techniques. You’ll discover how to mix custom nutrient blends and troubleshoot common issues like pH imbalances. Let’s turn those empty jars and spare tubing into a thriving green oasis!
Understanding the Basics of Hydroponic Gardening

Think of a garden where roots drink nutrients straight from water—no dirt needed. A hydroponic system skips soil entirely, letting plants absorb minerals directly through their roots. This method speeds up growth because nutrients are always available, unlike traditional setups where roots search through soil.
In these systems, you mix water with essential nutrients like nitrogen and potassium. The solution flows around the roots, giving hydroponic plants exactly what they need. You control factors like light and pH, creating ideal conditions for them to thrive.
Without soil barriers, plants grow faster and produce more. Leafy greens and herbs especially benefit, often ready to harvest weeks earlier. This efficiency means you get bigger yields in smaller spaces.
Grasping these basics helps you customize setups later. Once you know how nutrients and environment affect plant growth, experimenting becomes easier. Next, we’ll explore different system types that fit any budget or space!
Benefits of Growing Plants Without Soil

What if your plants could thrive without the mess of soil? Soilless setups eliminate common headaches like weeds and unpredictable dirt quality. Since there’s no soil, root systems avoid threats like fungi or invasive insects that typically linger underground. This means fewer battles with pests diseases and more energy for your greens to grow strong.
One major perk? You’re in charge of nutrient levels. Unlike traditional methods, where minerals get lost in the ground, these systems let you tweak formulas for each plant’s needs. Leafy greens might crave extra nitrogen, while fruiting plants thrive with higher potassium—adjustments take minutes, not seasons.
Maintenance becomes a breeze too. No more backbreaking weeding or guessing if your soil’s pH is off. Just refresh the water mix regularly and keep an eye on growth. For detailed maintenance tips for healthy plants, focus on consistency—your setup stays cleaner and more efficient long-term.
Finally, imagine harvesting herbs without dirt under your nails! These setups use space smartly and cut water waste, making them ideal for eco-conscious growers. Whether you’re nurturing basil on a windowsill or strawberries in a closet, precise control over nutrient delivery ensures every plant gets exactly what it needs.
Exploring Different Hydroponic System Types

Ever wondered how plants thrive in water alone? It all comes down to choosing the right system. Let’s break down four popular designs so you can pick what fits your space and goals.
Nutrient Film Technique (NFT) uses a shallow stream of water to bathe roots constantly. This method works great for herbs and lettuce. You’ll need pumps to keep the flow steady, but it uses less water than most setups.
Prefer something simpler? Deep Water Culture (DWC) suspends roots in oxygen-rich water. An air stone keeps the solution bubbly, making it ideal for beginners. Just monitor pH levels to keep your greens happy.
| System | Cost | Setup Ease | Maintenance |
|---|---|---|---|
| NFT | $$ | Moderate | Weekly checks |
| DWC | $ | Easy | Daily oxygen monitoring |
| Drip Systems | $$$ | Complex | Timer adjustments |
| Aeroponics | $$$$ | Advanced | Frequent mist checks |
Grow lights become crucial indoors. Leafy greens need 12-16 hours daily, while fruiting varieties crave brighter setups. Position lights 6-12 inches above your plants for best results.
Drip systems deliver nutrients through timed tubes—perfect for larger plants like tomatoes. They’re pricier but offer precise control. Aeroponics, though costly, sprays roots with mist for rapid growth. Your choice depends on how hands-on you want to be!
Remember: plants receive nutrients differently in each system. Pair your setup with the right grow lights and watch your greens flourish. Next, we’ll help you match these options to your budget and space!
Building a Deep Water Culture (DWC) System on a Budget
 setup with a clear plastic container filled with nutrient-rich water, supporting a lush, thriving hydroponic plant. The plant's roots are submerged, while the leafy green foliage emerges from the top. Soft, diffused lighting from above illuminates the setup, creating a serene, verdant atmosphere. The container stands on a simple, minimalist wooden stand, blending seamlessly with the natural aesthetic. The overall composition emphasizes the simplicity and efficiency of a DIY DWC system, showcasing how a low-cost setup can yield bountiful, healthy results.")
What if your greens could grow in water 24/7? A deep water culture setup lets roots soak directly in oxygen-rich liquid, skipping traditional soil entirely. This method works wonders for herbs and leafy greens, and you can assemble it using items from your garage or local hardware store.
Choosing Affordable Containers and Materials
Start with a food-grade plastic bucket or storage bin—these cost under $10 and hold water securely. Cut holes in the lid for net pots, which cradle your plants without letting them sink. Use pvc pipes to create a sturdy frame that keeps everything elevated and organized.
For nutrient delivery, repurpose an old aquarium pump. It’ll keep the water circulating so minerals reach every root. Avoid metal containers—they can rust and disrupt your nutrient mix. Stick to materials that won’t degrade in moisture, like PVC or polypropylene.
Managing Oxygenation and Nutrient Flow
Roots need air as much as nutrients. Add an air stone connected to that aquarium pump—it’ll bubble oxygen into the water nonstop. Check daily to ensure the pump works smoothly; stagnant water invites root rot.
Mix your solution carefully. Too much fertilizer burns roots, while too little starves plants without visible warning. Test pH weekly with strips (cheaper than digital meters) and adjust using baking soda or vinegar. For more affordable DIY projects, balance simplicity with precision.
With pvc pipes supporting your structure and smart oxygenation hacks, you’ll grow lush greens without soil in weeks. Even first-timers nail this setup—just keep the water moving and the nutrients balanced!
DIY Materials Spotlight: PVC Pipes, Plastic Buckets, and More
Your home might already hold the keys to a thriving garden. Everyday items like storage bins and old tubing can become the backbone of your hydroponic gardening setup. With some creativity, you’ll transform overlooked objects into functional tools that slash costs without sacrificing quality.
Repurposing Household Items for Your Setup
Start by raiding your garage or recycling bin. Plastic buckets make excellent reservoirs for water culture systems—drill holes in the lid for net pots, and you’ve got a self-contained grow station. PVC pipes shine as vertical towers or horizontal channels, letting roots access nutrients while saving floor space.
Got empty soda bottles? Cut them into cloning chambers for seedlings. Old shower curtains work as light-reflective liners, boosting growth without fancy equipment. Just ensure materials are food-safe and non-toxic. A quick rinse with vinegar removes residues from reused containers.
Maximizing Durability While Minimizing Costs
Choose UV-resistant plastics for outdoor setups to prevent cracking. Thicker buckets withstand constant moisture better than flimsy ones. For PVC structures, use schedule 40 pipes—they’re sturdier than drainage-grade options and won’t warp under pressure.
Reinforce connections with waterproof glue to avoid leaks. If using wooden frames, seal them with marine-grade varnish. These small upgrades ensure your hydroponic gardening system survives multiple seasons. Pair durable materials with balanced water culture practices, and your plants hydroponic will thrive year after year.
Creating Low-Cost Nutrient Solutions for Your Plants

Feeding your greens doesn’t require expensive store-bought mixes—your kitchen holds all the ingredients. Homemade recipes let you customize nutrients while keeping costs under $5 per batch. A successful hydroponic setup thrives when you balance minerals and pH naturally.
Homemade Recipes for Nutrient Solutions
Try compost tea: steep 2 cups of finished compost in a gallon of water for 48 hours. Strain it and add 1 tsp Epsom salt for magnesium. Leafy greens love this mix! For fruiting varieties, blend 1 part fish tank water with 3 parts rainwater. It’s rich in nitrogen and phosphorus.
Another option: dissolve ¼ tsp baking soda and ½ tsp molasses in a gallon of water. This boosts calcium and iron levels. Stir daily to ensure plants get even distribution.
Balancing Nutrient and pH Levels on a Budget
Test pH using cabbage water: steep red cabbage in boiling water, then add a spoonful of your solution. Blue means alkaline; pink signals acidity. Adjust with lemon juice or wood ash until it turns purple (neutral).
Common mistakes? Over-fertilizing burns roots. Start with half-strength solutions and increase gradually. Always label mixes with dates to track freshness—nutrients lose potency after 2 weeks.
| Aspect | Store-Bought | Homemade |
|---|---|---|
| Cost per gallon | $1.50–$3 | $0.10–$0.50 |
| Nutrient Control | Fixed formulas | Customizable ratios |
| pH Stability | High | Requires monitoring |
| Prep Time | None | 15–30 minutes |
Regular testing helps maintain conditions plants crave. Track growth weekly—yellow leaves often mean low nitrogen. Rotate recipes every 3 weeks to prevent deficiencies. A successful hydroponic garden starts with smart solutions that ensure plants thrive without breaking the bank!
Harnessing Natural Light and Affordable Lighting Options

Ever notice how plants lean toward sunny windows? Positioning your setup near natural light sources gives greens the energy they crave. South-facing windows work best in the U.S., offering 6-8 hours of daily sunlight for leafy varieties. This free resource cuts energy costs while boosting nutrient absorption through photosynthesis.
Smart Placement for Maximum Sun Exposure
Rotate your containers weekly to prevent lopsided growth. Use reflective surfaces like aluminum foil behind plants to bounce light onto shaded areas. Morning sun tends to be gentler—ideal for delicate herbs—while afternoon rays suit sturdier vegetables.
Supplementing With Energy-Efficient LEDs
When days shorten, LED grow lights fill the gap. Full-spectrum bulbs mimic sunlight, promoting flowering and fruiting. Hang them 12-18 inches above your setup using adjustable chains—closer for seedlings, farther for mature plants.
| Light Type | Cost | Lifespan | Best For |
|---|---|---|---|
| Natural Sunlight | $0 | N/A | Leafy greens, herbs |
| LED Panels | $20–$50 | 50,000 hours | All growth stages |
| Fluorescent Tubes | $10–$30 | 10,000 hours | Seedlings |
Set timers for 14-16 hours daily to simulate summer days. Choose bulbs with under 40 watts to keep bills low—many models cost just $3 monthly to run. Pair smart lighting with regular water checks, and watch your greens thrive!
Managing pH Levels and Water Quality Economically

Did you know your plants might starve even with perfect nutrients? The secret lies in water chemistry. pH levels act like gatekeepers—if they’re off, roots can’t absorb minerals effectively. Most greens thrive between 5.5 and 6.5, so regular checks keep your nutrient solution working hard.
Testing doesn’t need fancy gadgets. Use pH strips (under $10 for 100 tests) or DIY cabbage water indicators. Spot acidity? Add a pinch of baking soda. Too alkaline? A few drops of lemon juice balances it. These kitchen staples save cash compared to commercial adjusters.
Water quality matters just as much. Tap water often contains chlorine or heavy metals that harm roots. Run it through a charcoal filter or let it sit uncovered for 24 hours to evaporate chemicals. For stubborn issues, collect rainwater—it’s naturally soft and free!
Keep your system stable with weekly water changes. Stagnant solutions breed algae and bacteria, clogging pumps and starving plants. Mix fresh batches in cleaned containers to avoid residue buildup.
Remember: Consistency beats perfection. Small tweaks maintain balance better than drastic fixes. Pair these hacks with routine monitoring, and your greens will reward you with lush growth—no expensive tools required!
Organic and Budget-Friendly Pest & Disease Control Methods
Ever found aphids invading your greens despite your best efforts? Chemical sprays aren’t your only option. Nature provides powerful allies—like neem oil—to tackle pests without harming your plant growth. Mix 1 tsp of cold-pressed neem with a quart of water and spray leaves weekly. This disrupts insects’ life cycles while keeping your setup toxin-free.
Healthy nutrient levels make plants less inviting to pests. Over-fertilizing stresses roots, weakening their defenses. Test solutions regularly and adjust ratios to match each crop’s needs. Basil thrives with higher nitrogen, while peppers prefer balanced minerals.
Invite beneficial insects to your indoor garden. Ladybugs devour aphids, and predatory mites target spider mites. Pair these helpers with companion planting—grow marigolds or garlic nearby to repel invaders naturally.
Prevent diseases through smart habits. Sterilize tools with hydrogen peroxide between uses. Remove dead leaves promptly—they’re breeding grounds for mold. A 10% bleach solution cleans reservoirs without residue.
Simple routines save money and protect growth. Rotate crops every few cycles to break pest patterns. Use cinnamon powder as a fungicide on seedlings. These earth-friendly tactics keep your greens thriving and your conscience clear!
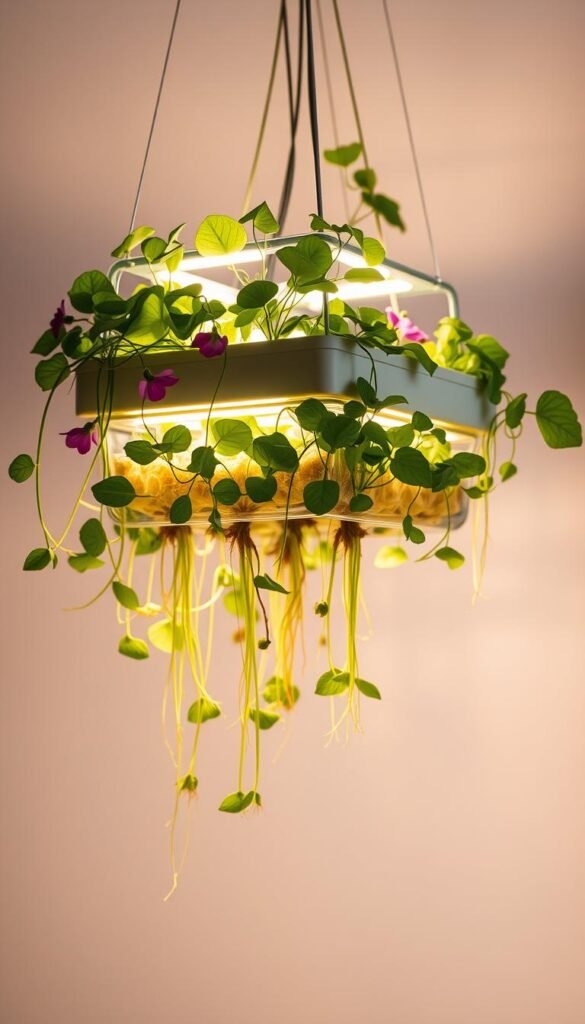
Designing a Vertical Hydroponic Garden for Limited Spaces
Short on square footage? Stack your greens skyward! Vertical setups multiply growing areas while fitting snugly against walls or balconies. They’re perfect for urban spaces where every inch counts—plus, they turn functional systems into living art pieces.
Building with PVC or Gutters
Start by cutting 4-inch PVC pipes into 3-foot sections. Drill 2-inch holes every 8 inches for net pots. Connect pipes vertically using elbow joints, creating a zigzag pattern that saves space. Attach gutters horizontally if preferred—they’re ideal for shallow-rooted herbs like basil or mint.
Mount the structure on a sunny wall or freestanding frame. Use a small pump to circulate nutrient-rich water from a base reservoir to the top pipe. Gravity pulls the solution downward, bathing roots in each tier.
Grouping Plants Strategically
Match crops with similar lighting needs and growth rates. Leafy greens thrive in 12-14 hours of medium light, while strawberries demand 16+ hours of bright exposure. Cluster them in separate sections for easier care.
| Plant Group | Daily Light Hours | Key Nutrients | Examples |
|---|---|---|---|
| Leafy Greens | 12-14 | High Nitrogen | Kale, Spinach |
| Herbs | 14-16 | Balanced NPK | Basil, Cilantro |
| Fruiting Plants | 16-18 | High Potassium | Tomatoes, Peppers |
Rotate vertical panels seasonally to prevent light monopolization. Leave 6 inches between stacked systems for airflow—clip fans nearby to deter mold. Check roots weekly for tangling, and trim as needed.
This approach doesn’t just save space—it creates microclimates tailored to each plant’s needs. Watch your wall transform into a lush, edible tapestry that’s equal parts practical and eye-catching!
Hydroponic Gardening DIY Hacks: Low-Cost Ways to Build a Setup
Who says you need a green thumb to grow vibrant greens? With everyday items and clever tweaks, you can craft a thriving system that fits any space. Repurposed containers, PVC pipes, and even old aquarium pumps form the backbone of an efficient setup. The key lies in balancing creativity with practicality—like using reflective surfaces to amplify natural lights or brewing homemade nutrient blends.
Energy efficiency plays a huge role in keeping costs low. Opt for LED grow lights paired with timers to mimic sunlight cycles without spiking your electric bill. Pair these with DIY solutions—like compost tea or rainwater mixes—to nourish plants while avoiding pricey store-bought formulas.
Success hinges on adaptability. Test pH with kitchen staples like cabbage water, and adjust using vinegar or baking soda. Keep roots oxygenated with repurposed air stones, and rotate plants weekly for even light exposure. These small steps ensure your greens stay healthy without demanding constant attention.
By embracing resourcefulness, anyone can dive into hydroponics. It’s not just about saving money—it’s a sustainable way to grow fresh food year-round. Share your wins (and lessons!) with fellow enthusiasts, and watch your space transform into a lush, edible oasis.
Optimizing Plant Growth With Smart Pruning and Trellising
What if trimming a few leaves could double your harvest? Strategic pruning and trellising unlock healthier growth while keeping costs low. These methods help plants meet their requirements for light and airflow—key factors often overlooked in compact setups.
Effective Pruning Techniques for Maximizing Yield
Remove older leaves shading younger growth every 7-10 days. Use clean scissors to cut at 45° angles—this prevents water pooling on stems. Focus on damaged or yellowing foliage first, as these attract pests and drain energy from fruit production.
For vining plants like tomatoes, pinch off suckers (side shoots) between main stems and branches. This directs nutrients to developing fruits instead of excess foliage. Always leave 2-3 healthy leaves near the root zone to protect against sunburn.
Implementing Affordable Trellis Supports
Bamboo stakes or repurposed wire grids make excellent supports. Secure stems loosely with fabric strips to avoid cutting into tender growth. Vertical training keeps leaves dry and reduces mold risks—critical for disease prevention.
Check root health weekly by gently lifting net pots. White, fuzzy roots signal good oxygenation. Brown or slimy ones need immediate attention—trim affected areas and adjust your nutrient mix. Pair these habits with regular pests checks to maintain thriving plants.
Simple tweaks like rotating plants daily ensure even light exposure. Track growth patterns to refine your approach. With smart cuts and creative supports, you’ll meet each plant’s requirements without expensive gear!
Recycling and Upcycling Materials for a Sustainable Setup
Transform your trash into a treasure trove for plants. Repurposing materials cuts costs and keeps plastic out of landfills—a win for your wallet and the planet. By reusing items like food containers or PVC scraps, you create systems tailored to your space while reducing environmental impact.
Old soda bottles become self-watering planters when cut and stacked. Use yogurt containers for seedlings—their transparent walls let you monitor root health. Even worn-out shoes can house herbs if you line them with coconut coir. This creative approach lets you experiment with a wide range of shapes and sizes.
Store-bought plastics often leach chemicals that harm roots or invite diseases. Recycled food-grade buckets, thoroughly cleaned, provide safer homes. One urban grower converted 50 laundry detergent jugs into a thriving lettuce wall—zero mold issues after six months.
Prevent contamination by soaking repurposed items in vinegar before use. Check for cracks that might trap bacteria. Glass jars work well for small herbs but avoid painted surfaces that could flake into your range of nutrient solutions.
Your next setup could be hiding in the recycling bin. Start with simple swaps like using egg cartons as seed starters. Every reused item means less waste and more resources for your green oasis!
Tips for Monitoring, Automation, and Efficient Resource Use
Smart tools don’t have to break the bank—they can simplify your gardening routine while saving resources. Start with a $10 timer for lights and pumps. This ensures your greens get 12-16 hours of daily light without manual adjustments. Pair it with a smartphone app like SensorPush to track temperature and humidity in real time.
Recirculating nutrient solutions cuts waste and costs. Use a fish tank pump to cycle water through containers, keeping minerals evenly distributed. For pH checks, opt for reusable strips instead of single-use papers. A $15 TDS meter helps monitor nutrient strength, preventing overfeeding.
Choose containers with tight lids to reduce evaporation. Line them with coconut coir or perlite instead of traditional soil—these materials resist mold and improve airflow. Repurpose old baking sheets as drip trays to catch excess water, which you can reuse for other plants.
| Resource-Saving Practice | Cost | Impact |
|---|---|---|
| Timer-controlled lights | $10–$20 | Reduces energy use by 30% |
| Rainwater collection | $0 | Cuts water bills by 50% |
| DIY air stones | $5 | Boosts root oxygenation |
Track progress with a simple spreadsheet. Log pH levels, nutrient changes, and growth weekly. Notice patterns? Adjust light height or solution strength accordingly. Systems thrive when you balance automation with hands-on care.
Group plants by water needs in labeled containers. Herbs like basil thrive in shallow setups, while tomatoes need deeper reservoirs. This prevents overwatering and ensures every drop counts. Swap disposable parts for reusable ones—silicone tubing lasts years, unlike plastic alternatives.
By blending smart tech with DIY ingenuity, you’ll maintain a thriving setup effortlessly. Remember: Consistency beats complexity. Small, steady tweaks yield big results over time!
Final Thoughts for Your Affordable Hydroponic Adventure
You’ve just unlocked the blueprint for turning everyday items into a lush, soil-free oasis. Repurposed buckets, pipes, and basic pumps form the backbone of any thriving system—no hefty investments required. A simple aquarium pump boosts oxygen flow for roots, while PVC pipes create efficient channels for nutrient delivery.
Remember: consistency trumps complexity. Start small, track progress, and tweak as you learn—every adjustment brings better results. Those weekly pH checks and homemade fertilizer mixes? They’re game-changers that keep costs under $10 monthly.
Your journey doesn’t end here. Share your basil harvests or tomato triumphs with fellow growers. Swap pump hacks or pipe configurations to refine your setup. With each experiment, you’ll discover smarter ways to nurture plants while saving resources.
Ready to dive in? Grab those spare containers and let creativity flow. Your green thumb—and wallet—will thank you.


