
Ever wondered how to grow fresh herbs or leafy greens in your studio without sacrificing precious space? I started asking this question after moving into my first city apartment. That’s when I discovered soil-free growing methods—a game-changer for urbanites craving homegrown flavors.
This approach lets you cultivate plants using water-based nutrient solutions instead of traditional soil. Systems like the Kratky method or deep water culture require minimal equipment, making them perfect for tight kitchens or balconies. Best part? You’ll see noticeable growth in weeks, not months.
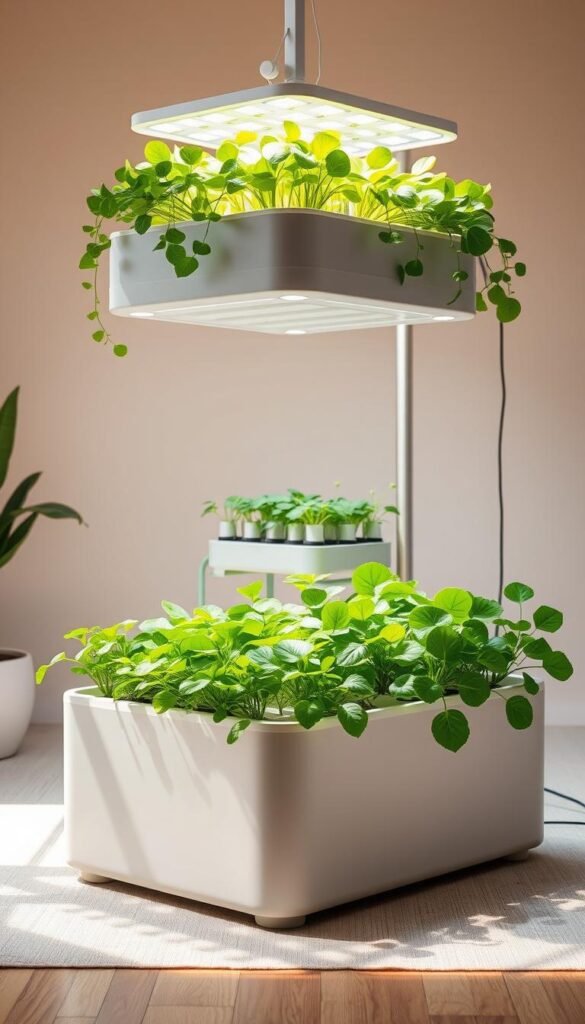
Urban spaces pose unique challenges—limited square footage, uneven sunlight, and noise restrictions. A well-designed hydroponic system solves these issues by using vertical layouts and controlled environments. Imagine harvesting basil from your windowsill year-round while using 90% less water than conventional gardens!
The Permaculture Apartment Garden Design Workbook became my roadmap for creating efficient setups. Its space-smart strategies helped me transform a 4-foot corner into a thriving lettuce station. With basic tools like LED grow lights and pH test strips, you too can achieve restaurant-quality ingredients right at home.
Ready to ditch the grocery store herbs? Let’s explore how to build your personalized oasis—no backyard required.
Getting Started with Indoor Hydroponic Gardening

Ready to turn your apartment into a fresh produce hub? First, map your space. Measure available areas near windows, countertops, or unused corners. Light exposure determines success—most leafy greens need 12-16 hours daily. Use free apps like Lux Light Meter to find spots hitting the ideal range of 2000-3000 lux.
Temperature matters too. Keep your setup between 65-75°F for optimal growth. Avoid placing units near radiators or drafty windows. Compact systems like wick setups or water culture containers work best for tight spaces.
| Best Starter Plants | Growth Time | Light Needs |
|---|---|---|
| Basil | 3-4 weeks | Medium |
| Mint | 4-5 weeks | Low |
| Lettuce | 4-6 weeks | High |
Begin with one or two plants to test your environment. Herbs like oregano or thyme adapt well to indoor conditions. Use pH-balanced nutrients and check water levels every 3 days. Pro tip: Label containers with planting dates to track progress.
Upgrade gradually as you master basics. Add a second tier to vertical towers or swap manual watering for a timed pump. The Urban Leaf’s starter guide offers clever hacks for maximizing 2×2 foot areas. Remember—every thriving leaf proves your space can grow delicious rewards!
Hydroponic Gardening Plans for Small Apartments: Key Benefits

Imagine snipping fresh basil for your pasta while rain pelts your windows—possible with soil-free growing. These systems deliver precise nutrient ratios directly to roots, eliminating guesswork. You’ll use 90% less water than traditional methods, according to the Permaculture Design Workbook’s case studies.
Compact setups thrive in tight spaces because they recycle water efficiently. Unlike outdoor gardens, your plants won’t suffer from summer droughts or winter frosts. Leafy greens like kale and arugula grow year-round under basic LED lights.
Three standout advantages make this approach revolutionary:
- No seasonal limitations: Grow mint in December or lettuce in July
- Faster harvest cycles: Nutrients boost growth rates by 30-50%
- Space-smart designs: Vertical towers fit behind apartment doors
Maintenance takes minutes daily—check pH levels, refill reservoirs weekly. Many urban growers report higher yields than soil gardens, even in 300-square-foot studios. One Brooklyn resident harvested 8 lbs of herbs monthly using a 2-foot-wide system!
New to managing these systems? Our guide to solving common issues helps you avoid early mistakes. Start small, think big, and watch your kitchen transform into a productivity powerhouse.
Understanding the Basics of Hydroponics

What if your favorite greens could flourish without traditional soil? This science-backed approach lets roots absorb nutrients directly from oxygen-rich water. It’s like giving your plants a VIP pass to essential minerals—no dirt required.
What Makes a Soil-Free System Work?
These setups use three core elements: water reservoirs, mineral solutions, and physical support for roots. The Kratky method demonstrates this perfectly—plants sit in net pots while their roots dangle into nutrient-rich water below. As liquid levels drop, air roots develop, creating a self-regulating garden.
Three Non-Negotiables for Success
Water quality comes first. Use filtered or distilled water to prevent mineral buildup. Next, balanced nutrient mixes replace soil’s role—look for formulas with nitrogen, phosphorus, and potassium ratios matching your crop’s growth stage.
Light acts as the engine. Full-spectrum LEDs mimic sunlight, letting you control intensity and duration. A 16-hour daily cycle works for most leafy greens, while herbs might prefer 14 hours.
Online communities like Reddit’s r/hydro share diagrams showing how these pieces interact. One user transformed a bookshelf into a thriving vertical garden using PVC pipes and drip irrigation. Start simple, and let your space guide the design!
Choosing the Ideal Hydroponic System for Your Space

Picking the right setup turns your limited square footage into a powerhouse of fresh greens. Start by measuring your available area—countertops, windowsills, or vertical wall space. Apartment-friendly systems prioritize footprint over expansion, with many models fitting in spaces under 18 inches wide.
Consider these factors when selecting your setup:
- Noise levels: Avoid pumps that disrupt your living space
- Energy draw: LED lights should use ≤20 watts per plant
- Accessibility: Can you reach all plants for maintenance?
| System Type | Space Needed | Best For |
|---|---|---|
| Kratky | 1 sq ft | Herbs |
| NFT | 2-3 sq ft | Leafy greens |
| Wick | Countertop | Beginners |
Urban growers in online forums praise the Kratky method for its silent operation—no electricity required. One New Yorker grows basil year-round using repurposed mason jars. For faster yields, nutrient film technique (NFT) systems circulate water continuously but need slightly more vertical clearance.
Test different configurations before committing. Many communities host equipment swaps where you can try used setups. Reddit’s urban farming group recommends starting with a $25 wick system to learn basics. Your perfect match combines your space limits, budget, and culinary cravings!
Designing Your Indoor Layout for Success

Transforming cramped spaces into productive growing zones starts with smart planning. I learned this the hard way when my first basil crop wilted from poor airflow—a mistake you can avoid with strategic placement.
Assessing Light, Airflow, and Space
Start by mapping light patterns using free apps like Photone. One Brooklyn gardener discovered her “brightest” corner only provided 800 lux—far below the 2000 lux leafy greens need. She added affordable LED strips ($25 on Amazon) to boost light levels without remodeling.
Air circulation prevents mold and strengthens stems. Use USB fans ($12) near your setup if natural airflow is limited. Sensor data reveals hidden issues: A Chicago apartment dweller used a $15 hygrometer to spot 85% humidity spikes near their shower, prompting a relocation.
Selecting the Right Area in Your Apartment
Balance these three factors:
- Sun exposure: South-facing windows work best (if available)
- Walkway clearance: Leave 18″ around systems for maintenance
- Noise considerations: Avoid pump hum near sleeping areas
A San Francisco renter converted their unused closet into a herb haven using stackable trays. They installed reflective Mylar sheets ($7/roll) to amplify existing light and track nutrient levels weekly with test strips.
Remember: Your layout directly impacts plant vitality. Test different configurations for 2-3 weeks before finalizing. Those crisp salad greens taste even better when your setup works smarter, not harder.
The Kratky Method: A Simple Approach to Hydroponics

Looking for the easiest way to grow fresh herbs indoors? Meet the Kratky method—a soil-free technique that lets plants thrive with minimal effort. Developed by Dr. Bernard Kratky, this passive system eliminates pumps and timers, making it perfect for first-time growers.
Here’s how it works: Plants sit in net pots above a nutrient-rich water reservoir. Their roots stretch downward to access the solution while upper roots absorb oxygen from the air gap. As water levels drop naturally, plants develop air roots—no daily monitoring required.
Three reasons this method stands out:
- Zero electricity needed—silent operation
- Ideal for compact spaces like windowsills
- Weekly maintenance takes under 10 minutes
| Feature | Kratky Method | Other Systems |
|---|---|---|
| Setup Time | 15 minutes | 1-2 hours |
| Cost | $10-$20 | $50+ |
| Best For | Basil, mint, lettuce | Larger plants |
Start with mason jars or food-grade containers. Use pH-balanced nutrients and avoid disturbing the water reservoir. One urban gardener grew 12 basil plants in repurposed pickle jars—harvesting weekly for pesto!
This approach proves you don’t need fancy equipment to enjoy homegrown flavors. Just give your plants space to breathe, and they’ll reward you with vibrant growth.
Building Your DIY Hydroponic Garden System
What if your kitchen counter could become a fresh salad station? Let’s create a simple setup that grows crisp greens using basic supplies. This project takes under an hour and costs less than $40—perfect for first-timers.
Essential Materials and Tools
Gather these items before starting:
| Item | Quantity | Purpose |
|---|---|---|
| Plastic storage bin | 1 | Water reservoir |
| Net pots | 6 | Plant holders |
| pH test kit | 1 | Water balance |
| Rockwool cubes | 6 | Seed starters |
| Air stone | 1 | Oxygenation |
Step-by-Step Assembly Guide
- Drill 2″ holes in the bin lid—space them 6 inches apart
- Place air stone at the bottom and connect to aquarium pump
- Mix nutrients following package instructions (1 tsp/gallon)
- Insert net pots with seedlings into lid holes
Pro tip: Start with butterhead lettuce—it thrives in simple setups. Use a timer for consistent lighting cycles (14 hours on/10 off). Reddit users recommend positioning lights 6-8 inches above plants.
Common challenges? Leaks happen if holes are too big. Line edges with waterproof tape. Algae growth? Paint bins black or use opaque containers. Most beginners succeed by checking pH weekly and trimming roots monthly.
Customize your system with stacked trays or colored LEDs. One Denver renter added dollar-store mirrors to reflect light onto lower leaves. Your turn—experiment and taste the difference!
Setting Up Smart Monitoring for Your Garden

Your plants can now text you when they need help. Modern sensor technology turns your growing space into a self-aware ecosystem, automatically tracking what matters most. One Seattle urban farmer increased her basil yield by 40% after catching temperature swings through real-time alerts.
Integrating Sensors and Cameras
Devices like the BME680 sensor pack monitor four factors simultaneously: air quality, humidity, temperature, and pressure. Pair it with a $35 Raspberry Pi camera for daily growth snapshots. Reddit user @CityGreens_2023 shared how this combo helped them spot nutrient deficiencies 5 days faster than visual checks.
| Device | Function | Cost |
|---|---|---|
| BME680 | Environmental tracking | $22 |
| DHT22 | Temp/Humidity | $9 |
| Pi Camera | Time-lapse imaging | $25 |
Leveraging Data to Optimize Plant Growth
These tools create a digital diary of your garden’s environment. A Chicago apartment grower analyzed three months of data to discover their lettuce thrived in a narrower temperature range (68-72°F) than recommended. Custom alerts now ping their phone when levels drift outside this sweet spot.
Key benefits of smart monitoring:
- Receive water-level warnings before roots dry out
- Compare daily growth rates through time-stamped photos
- Adjust LED intensity based on real-time lux readings
Start with basic sensors and expand as you learn. Many systems integrate with free apps like SensorPush or GrowTracker. Time your adjustments using historical graphs—your plants will show gratitude through vibrant leaves and faster harvests!
Nurturing Your Plants: From Germination to Growth
Watching tiny seeds transform into lush greens rewards patience and care. Your journey begins with germination—soak seeds in water for 12 hours to kickstart growth. Place them in Rockwool cubes or starter plugs, keeping temperatures between 70-80°F for best results.
Seedlings emerge in 5-10 days. At this stage, light needs increase dramatically. Position LED lights 4-6 inches above sprouts for 14 hours daily. One urban grower shared how rotating pots daily prevented leggy stems in her Brooklyn studio setup.
| Growth Phase | Key Focus | Solution |
|---|---|---|
| Germination | Moisture control | Use humidity domes |
| Seedling | Root development | Weak nutrient mix (¼ strength) |
| Mature Growth | Nutrient uptake | Full-strength solution |
Reservoir management becomes crucial as plants mature. Check water levels every 3 days—roots should touch but not drown in the solution. If pumps fail, manually aerate water using a turkey baster until replacements arrive.
Spot trouble early. Yellow leaves often signal nitrogen deficiency—add calmag supplements. White crusts on clay pebbles? Flush systems with pH-balanced water. A Chicago gardener saved her basil crop by catching these signs during weekly inspections.
The real magic happens when you harvest your first leaves. That crisp bite of home-grown arugula or the fragrance of fresh dill makes every effort worthwhile. Your care creates life—one thriving plant at a time.
Optimizing Nutrient and Water Management
Your basil’s flavor depends on what’s happening below the leaves. Proper control of nutrient solutions turns good harvests into exceptional ones. Start by testing water quality weekly—aim for pH levels between 5.5-6.5 for herbs like basil. Simple test strips ($8 on Amazon) give instant readings without lab equipment.
Balance is everything. Use half-strength nutrients for young plants, increasing to full strength as roots develop. Signs you’re overfeeding:
- White crust on growing medium
- Leaf tips turning brown
- Slow growth despite ideal light
Reservoir maintenance prevents disasters. Change water every 7-10 days, scrubbing containers with hydrogen peroxide to kill algae. For small systems, mark refill lines with permanent marker to avoid overflow. One urban gardener doubled her basil yield by keeping solution temperatures at 68°F using frozen water bottles.
| Testing Method | Frequency | Target Range |
|---|---|---|
| pH Strips | Weekly | 5.5-6.5 |
| EC Meter | Biweekly | 1.2-2.4 mS/cm |
| Visual Check | Daily | Clear water |
Adjust flow rates based on plant size. Basil thrives with roots partially submerged—leave 1″ air space between water and net pots. Use aquarium air stones if roots appear slimy, boosting oxygen without disturbing your setup.
Consistency separates thriving gardens from struggling ones. Track changes in a notebook or app. Those vibrant leaves and intense flavors? They’re your reward for mastering nature’s recipe book.
Troubleshooting Common Hydroponic Challenges
Even the most efficient setups hit snags—here’s how to keep yours thriving. Quick fixes and smart adjustments turn frustration into fresh harvests. Let’s tackle the top issues urban growers face and how to solve them.
Preventing Overheating and Algae Growth
Heat buildup fries delicate roots fast. Keep water temperatures below 75°F using simple hacks—wrap reservoirs in reflective tape or add frozen water bottles. Algae thrives in light-exposed nutrient solutions. Paint containers opaque or use dark-colored buckets to block sunlight.
| Issue | Signs | Fix |
|---|---|---|
| Overheating | Wilting leaves, slimy roots | Install USB fans, lower room temp |
| Algae | Green water, clogged pumps | Cover reservoirs, use hydrogen peroxide rinse |
| Power failures | Stalled growth, dry pumps | Backup battery, manual aeration |
| Nutrient imbalance | Yellow edges, stunted plants | Test weekly, adjust EC levels |
Power hiccups crash your progress. Use surge protectors and check connections monthly. One Denver gardener saved her basil crop by plugging pumps into smart outlets that sent outage alerts.
Nutrient solution issues? Check these first:
- White crust = mineral buildup—flush systems
- Cloudy liquid = bacterial growth—sterilize tools
- pH swings = unstable roots—calibrate meters
Brooklyn’s rooftop growers swear by weekly maintenance checks. They caught a failing air stone early by tracking oxygen levels with $15 sensors. Your system stays healthy when you spot small issues before they bloom.
Real-Life Experiences from Urban Hydroponic Gardeners
City dwellers across America are proving that limited space doesn’t limit harvests. Meet those who’ve turned cramped corners into lush edible jungles—their victories and stumbles light the path for your success.
Success Stories and Lessons Learned
Ainsley Koldyke transformed her Chicago studio’s 450 sq ft using basic grow lights and determination. “My first crop failed because I placed the LEDs too high,” she admits. Lowering them to 8 inches above her butter lettuce created a 60% yield boost in weeks.
Peggy Whitaker’s Brooklyn vertical tower produces 4 lbs of leafy greens monthly. Her secret? “Start with one shelf. Master it before expanding.” She now teaches neighbors how to rotate crops for continuous fresh produce.
Key takeaways from these pioneers:
- Vertical space beats horizontal sprawl—stack planters upward
- Timers prevent light burn—set LEDs for 14-hour cycles
- Weekly root checks catch issues before plants suffer
These stories show what’s possible. Your balcony or closet could become the next urban farm. Borrow their smart strategies, tweak for your space, and taste the rewards of resilient growing.
Creating a Sustainable Indoor Environment for Fresh Produce
Transforming your living space into an eco-friendly food source starts with smart resource management. Soil-free systems recycle nutrient-rich water continuously, using up to 90% less water than traditional methods. This closed-loop approach minimizes waste while producing crisp greens like butterhead lettuce year-round.
Three pillars define sustainable indoor growing:
- Precise control over light, temperature, and humidity
- Reusable materials like food-grade containers
- Organic nutrient solutions that prevent chemical runoff
| Resource | Traditional Gardening | Sustainable Indoor Setup |
|---|---|---|
| Water Use | 100 gallons/month | 10 gallons/month |
| Space Needed | 10 sq ft | 2 sq ft |
| Yield (Lettuce) | 1 lb/season | 3 lbs/month |
| Waste | Soil disposal | Zero runoff |
Closed systems eliminate pesticides and reduce plastic packaging from store-bought greens. One Boston apartment dweller cut her grocery trips by 40% using indoor setups for herbs and vegetables. Her kitchen now features a self-watering tower that grows 15 plants in 18 inches of vertical space.
Start your eco-journey with these steps:
- Choose LED lights with timers to save energy
- Collect rainwater for nutrient mixing
- Compost plant trimmings for outdoor gardens
Every leafy harvest strengthens your environmental impact. Your countertop garden becomes more than a food source—it’s a daily reminder that small, eco-conscious choices create lasting change.
Wrapping Up Your Hydroponic Journey: Next Steps and Inspiration
You’ve transformed limited space into a vibrant source of fresh flavors—celebrate that progress! From selecting silent air pumps to mastering pH checks, your setup now reflects smart urban growing principles. Keep plants thriving by applying what you’ve learned: track light cycles, refresh nutrients weekly, and prevent algae with opaque containers.
Next steps? Explore advanced sensors to automate watering or join local soil-free gardening groups. One Denver grower doubled her yields after swapping tips at a community workshop. Remember—consistent care lets you ensure plants receive exactly what they need, when they need it.
Your indoor oasis is a living experiment. Tweak layouts, test new crops, or add second-tier towers. Every adjustment teaches something valuable. As you innovate, those crisp basil leaves and peppery arugula will remind you: growth happens where care meets creativity.


