More people are discovering the joy of cultivating their own greens right at home. Even with limited room, you can create a thriving garden using just a sunny spot and simple supplies. It’s a rewarding way to add life to your space.
Tending to plants offers more than just fresh herbs or vegetables. Studies show it reduces stress and boosts mood, making it perfect for city living or chilly seasons. Plus, you get to enjoy homegrown flavors year-round.
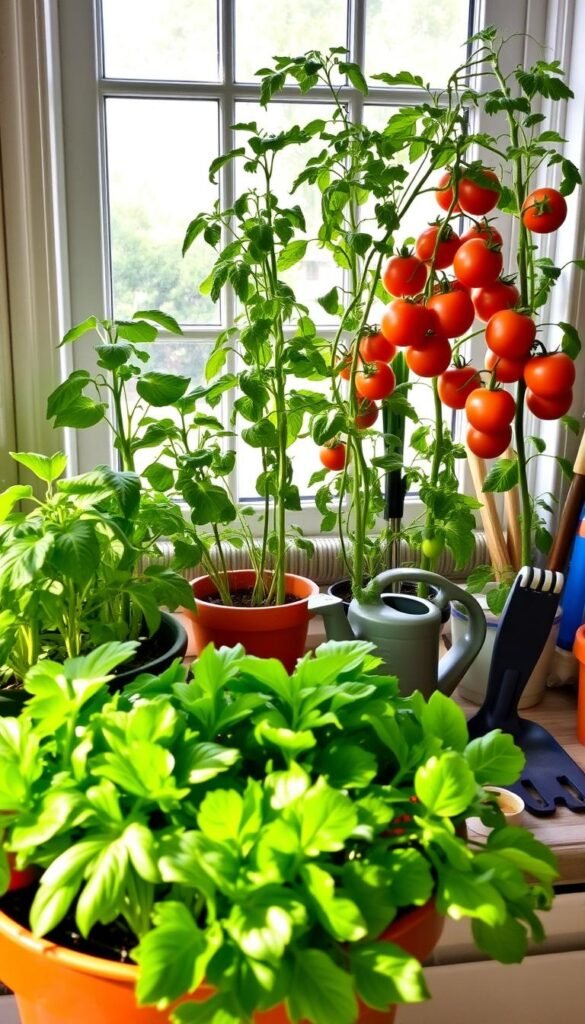
Start with easy-to-grow options like cherry tomatoes or leafy greens. With the right setup—containers, soil, and light—your windowsill can transform into a mini farm. No yard? No problem! Learn space-saving tips to maximize your harvest.
Why Start an Indoor Windowsill Garden?

Beat the winter blues by nurturing life right on your sill. Studies show tending to plants reduces stress, especially during darker months. A patch of green can lift your mood while you wait for spring.
Imagine plucking fresh herbs or leafy greens for your meals. You’ll save time and money—no last-minute grocery runs for wilted produce. A single pot of basil or thyme pays for itself after a few harvests.
Urban dwellers love the space-saving magic of sill gardens. Even a studio apartment can host a mini food forest. Plus, plants naturally purify the air, making your home healthier.
Start small with easy vegetables like cherry tomatoes or spinach. Soon, you’ll upgrade to gourmet salad mixes and rare herbs. It’s a delicious way to build confidence before tackling bigger projects.
Pro tip: Join the modern victory garden movement. Growing your own ensures fresh, organic ingredients—no shortages or supply-chain worries.
Choosing the Perfect Spot for Your Windowsill Garden

Finding the right location makes all the difference for a thriving windowsill setup. Even a tiny space can yield big harvests if you balance light, warmth, and airflow. Start by observing your home’s sunniest spots—your plants will thank you.
Light Requirements: South-Facing Windows and Grow Lights
Most edibles crave 6–8 hours of sunlight daily. South-facing windows are goldmines, especially in winter. No sunny sill? No worries—LED grow lights placed 6 inches above plants mimic natural rays perfectly.
Temperature and Humidity Considerations
Keep your greens cozy with consistent temperatures (65°–75°F). Avoid placing pots near heat vents or stoves—sudden spikes stress roots. Drafty windows in winter? Move plants inward at night.
Mediterranean herbs like rosemary thrive with extra humidity. Place pots on pebble-filled trays with water to create a mini oasis. Watch for curled leaves (too dry) or mold (too damp) and adjust.
*Pro tip:* Cluster pots to create microclimates. Grouping retains moisture and warmth, saving space while preventing over-watering.
Best Plants for Indoor Gardening: Herbs and Veggies

Fresh flavors are just a snip away when you pick the right plants for your setup. Focus on herbs and quick-growing vegetables that thrive in containers. You’ll enjoy harvests in days or weeks, not months.
Easy-to-Grow Herbs: Basil, Mint, and Thyme
Basil loves warmth and bright light—perfect for sunny sills. Snip leaves weekly to encourage bushier growth. For mint, use a deep pot; its roots spread fast. Thyme thrives on neglect, making it ideal for forgetful gardeners.
Want year-round flavor? Try hardy rosemary or cilantro. Both add zest to dishes and need minimal care.
Quick-Maturing Veggies: Microgreens and Lettuce
Microgreens pack nutrients and grow in just 7–14 days. Scatter seeds densely, harvest when 2–4 inches tall. Pea shoots are another speedy option—soak seeds overnight to boost germination.
Butterhead lettuce offers “cut-and-come-again” greens. Pick outer leaves, and new ones sprout in days. Radishes add crunch; their roots mature in 25–30 days. For a health boost, grow wheatgrass—juice its blades weekly.
Setting Up Your Windowsill Garden

Transforming your sill into a productive space starts with smart setup choices. The right containers and growing medium make all the difference for healthy plants. Follow these tips to create an ideal environment for your greens.
Container Choices: Drainage and Size Matters
Pick pots with drainage holes to prevent water buildup. Excess moisture leads to root rot—a common killer of sill-grown edibles. For most herbs, 6-inch-wide containers work well.
Need transplants? Go deeper. Choose pots 6–12 inches tall for tomatoes or lettuces. Start seeds in small cups, then move them as they grow. Reusing old containers? Sterilize with vinegar first to kill lingering pests.
Soil Selection: Why Soilless Mix Wins
Skip garden dirt—it compacts and may harbor bugs. Instead, use lightweight potting blends with perlite or vermiculite. These mixes drain well while holding moisture where roots need it.
Peat-free options like coco coir are eco-friendly winners. Refresh your soil every few months to maintain nutrients. For a DIY blend, combine compost, coir, and perlite in equal parts. Your plants will thrive in this airy, nutrient-rich home.
Want expert container tips? Learn space-saving tricks for small-space growers. Proper setup now means fewer headaches later.
Caring for Your Indoor Garden
Keeping your greens thriving requires simple but consistent care. With the right techniques, you’ll enjoy continuous harvests and healthy plants year-round. Focus on three pillars: watering, feeding, and pruning.
Watering Tips: The Two-Knuckle Rule
Overwatering is the top killer of sill-grown edibles. Use the two-knuckle test: insert your finger into the soil. If it’s dry up to your second knuckle, it’s time to water. For leafy greens, try self-watering pots to maintain steady moisture.
Fertilizing and Pest Control
Feed your garden every 3 weeks with a balanced liquid fertilizer. Mix compost into the soil for slow-release nutrients. Spot pests early—blast aphids off with water or apply neem oil to leaves. Yellow sticky traps work wonders for flying insects.
Pruning and Harvesting for Continuous Growth
Regular pruning keeps plants bushy and productive. Snip herbs in the morning when their oils peak, using sharp scissors to avoid damage. For lettuce, cut leaves 1 inch above the soil to encourage regrowth. Rotate harvest areas to balance growth.
Pro tip: Explore space-saving vegetables to expand your harvests. With these habits, your garden will flourish with minimal effort.
Enjoying the Fruits (and Greens) of Your Labor
Your tiny garden can transform meals with fresh-picked flavors. Toss homegrown microgreens into salads or blend herbs into whipped butter for toast. Every snip adds zest to dishes while saving space and grocery trips.
Preserve surplus harvests by freezing chopped herbs in olive oil cubes. They’ll keep for months, ready to melt into soups or pasta. Share the bounty—gift rooted cuttings to friends and turn them into gardening converts.
Track progress with weekly photos to see how far your greens have come. As spring nears, expand your palette with edible flowers like nasturtiums. Their peppery blooms elevate salads and cocktails.
Pro tip: Host a “windowsill-to-table” night. Feature dishes starring your harvest—it’s a delicious way to celebrate your green thumb!