
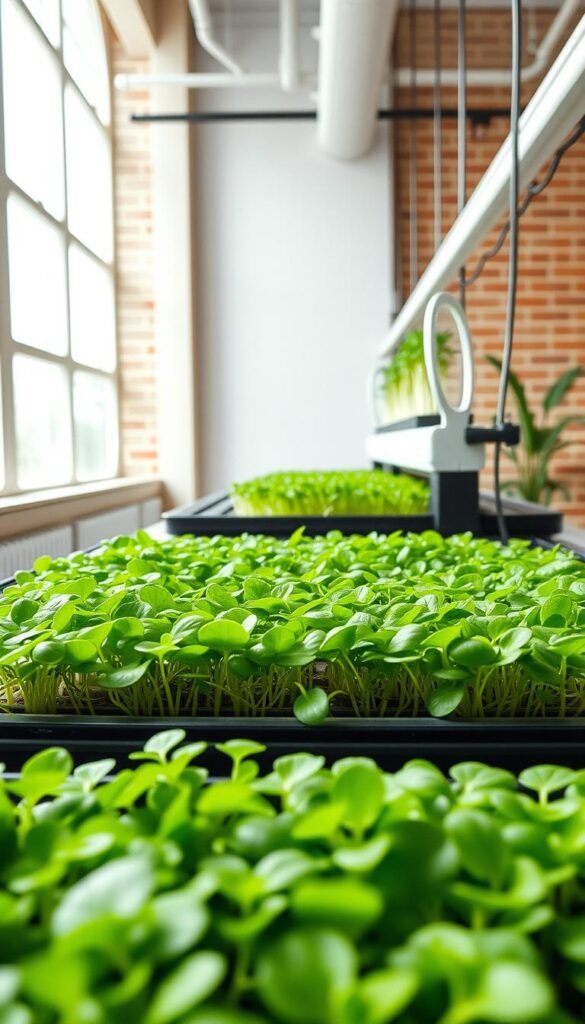
Imagine having vibrant, flavorful greens ready to snip in weeks—no backyard required. Growing plants indoors using water-based systems lets you enjoy fresh produce faster than traditional methods. These compact setups fit perfectly on countertops or shelves, making them ideal for small spaces like apartments or urban homes.
Why choose this approach? It’s simple: you’ll use 90% less water than soil gardening while avoiding messy dirt altogether. Without weeds or pests to worry about, you can focus on what matters—harvesting tender leaves packed with vitamins in as little as 3-4 weeks. Plus, controlling nutrients and light ensures your greens thrive every time.
This guide walks you through everything from selecting seeds to maintaining your system. You’ll learn how hydroponic gardening basics create the perfect environment for growth, even if you’re new to plant care. We’ll also share creative ways to add these power-packed greens to meals, turning everyday dishes into nutrient-rich favorites.
Ready to transform your kitchen into a mini farm? Let’s dive into the tools, techniques, and tips that make growing fresh food at home both rewarding and delicious.
Understanding Indoor Microgreens and Hydroponics

Ever wondered how fresh greens can thrive without a speck of soil? These young seedlings, packed with 4–40x more nutrients than mature leaves, are grown using water-based techniques. Rich in vitamins C, E, and K, they’re like nature’s multivitamin—perfect for boosting salads, sandwiches, or smoothies.
Why Water Beats Soil for Faster Results
Traditional gardening often means battling weeds, pests, and uneven moisture. With hydroponics, roots get direct access to oxygen and nutrients. This method skips soil entirely, cutting germination time by 30% and reducing mold risks. Studies show these systems can accelerate growth rates by up to 50% compared to dirt-based setups.
| Factor | Hydroponic | Soil |
|---|---|---|
| Germination Time | 2–3 days | 5–7 days |
| Water Usage | 90% less | High |
| Space Needed | Compact | Sprawling |
Precision Nurturing for Healthier Greens
Every plant gets exactly what it needs—no guesswork. You control light cycles, pH levels, and nutrient mixes. This precision prevents deficiencies and ensures consistent harvests. For example, mustard greens reach harvest size in 10 days instead of 14 when grown traditionally. Clean roots mean no dirt residue, just crisp, ready-to-eat leaves.
Ready to try? You’ll need trays, growing mats, and quality seeds. Keep water oxygenated and watch your greens shoot up like magic. The best part? You’ll taste the difference in every bite.
Essential Equipment and Materials for Hydroponic Microgreens

Building a thriving greens system starts with the right tools. Let’s break down what you’ll need to create a no-fuss setup that delivers crisp, healthy shoots every time.
Selecting Containers, Meshes, and Seeds
Your container should be shallow and wide—think salad bowls or baking trays. Pair it with a mesh screen (like a repurposed flour sieve) to keep seeds elevated while letting roots access water. The mesh’s holes must be fine enough to prevent seeds from falling through but allow moisture to circulate.
| Container Type | Best Mesh Pairing | Water Capacity |
|---|---|---|
| Glass Bowl | Stainless Steel Sieve | 1–2 cups |
| Plastic Tray | Nylon Netting | 3–4 cups |
| Ceramic Dish | Fiberglass Screen | 2–3 cups |
Water Quality and Setup Tips
Always use filtered or dechlorinated water—tap water works if left out overnight. Fill your container until it barely touches the mesh, creating a humid environment without drowning seeds. For added support, line the mesh with coconut coir or hemp mats as a growing medium.
Check moisture levels twice daily. If roots look dry, mist them lightly. Stick to fast-sprouting seeds like broccoli or radish for best results. Within days, you’ll see tender shoots reaching for the light!
Indoor Microgreens: Quick Harvesting with Hydroponic Methods

Selecting the right greens can turn your windowsill into a nutrient powerhouse. Flavor profiles range from spicy to earthy, while vitamins and antioxidants vary between types. Let’s explore how to match your taste buds and health goals with the perfect picks.
Choosing Microgreens Varieties
Mustard microgreens shine with their peppery zing and vitamin C boost—ideal for adding kick to sandwiches. Their seeds sprout in just 2 days, reaching harvest size in 8–10 days. Fenugreek offers maple-like sweetness and iron, while wheatgrass delivers chlorophyll-rich juicing potential.
| Variety | Germination Time | Flavor Profile |
|---|---|---|
| Mustard | 2 days | Spicy, peppery |
| Fenugreek | 3 days | Sweet, nutty |
| Wheatgrass | 4 days | Earthy, grassy |
Monitoring Germination and Growth
Check trays twice daily during the first 3 days for sprout emergence. Mustard shoots develop true leaves by day 6—your cue to reduce watering. Use a ruler to track height; most varieties hit 2–3 inches when ready for harvest.
Snip greens in the morning when hydration levels peak. Keep a growth journal noting color changes and stem thickness across days. This attention ensures you catch each variety at its flavor peak, making every harvest count.
Preparing Your Home Environment for Optimal Growth

Your home can become a powerhouse for growing vibrant greens with the right setup. Focus on three pillars: light exposure, climate control, and smart organization. These elements work together to create the perfect nursery for tender shoots.
Lighting, Temperature, and Humidity Tips
Position trays near a south-facing window for 4–6 hours of bright, indirect light daily. If natural light is limited, use full-spectrum LED strips 6 inches above plants for 12–14 hours. Maintain 65–75°F—a space heater or fan helps stabilize temps.
Humidity between 40–60% prevents mold while keeping leaves supple. Place a small hygrometer near your setup. For dry climates, group plants together or use a pebble tray with water below containers.
Creating a Space for Easy Harvesting
Choose a dedicated space like a kitchen cart or floating shelf. Keep scissors and trays within arm’s reach. A 2×2 foot area fits six standard containers—plenty for weekly harvests.
Time light cycles to match growth stages: 18 hours daily during germination, reducing to 12 once leaves emerge. Rotate trays 180° each morning for even exposure. Clear countertops of clutter to simplify daily checks and snip greens at peak freshness.
Step-by-Step Growing Process for Mustard, Fenugreek, and Wheatgrass Microgreens

Growing your own greens at home is simpler than you think. Follow these easy steps to turn seeds into fresh, nutrient-packed shoots in less than two weeks. Let’s start with mustard—the fastest sprouter of the trio.
Detailed Procedures for Mustard Microgreens
- Soak seeds for 6 hours in lukewarm water to kickstart germination.
- Spread seeds evenly on a mesh tray lined with coconut coir—no clumping!
- Mist twice daily with filtered water. Roots should stay damp, not soaked.
- Cover trays for 3 days to create a humid environment. Remove covers once shoots appear.
- Provide 14 hours of light daily using LED strips or indirect sunlight.
- Harvest when leaves reach 2 inches (usually day 8–10) using sharp scissors.
Optimizing Fenugreek and Wheatgrass Cultivation
Fenugreek thrives with slightly warmer water (70°F) during germination. Wheatgrass needs deeper trays for its longer roots. Check this comparison:
| Plant | Germination Time | Key Tip |
|---|---|---|
| Fenugreek | 3 days | Use 1/4 tsp baking soda in water to boost growth |
| Wheatgrass | 4 days | Trim at 7 inches for peak sweetness |
Managing Water and Nutrients
Skip chemical fertilizers. Add nutrients naturally by steeping compost tea bags in your water reservoir for 2 hours weekly. Change water every 4 days to prevent stagnation. If shoots yellow, reduce watering frequency by 25%.
From personal experience, check roots daily—healthy ones look white and fuzzy. Adjust light distance if leaves stretch too thin. Within days, you’ll master the rhythm of your successful hydroponic setup, enjoying crisp greens that outshine store-bought versions.
Exploring Hydroponic Systems for Microgreens and Alternative Methods

Which system turns your kitchen into a greens factory without dirt? Let’s break down four popular setups that deliver fresh shoots faster than traditional gardening.
Self-Watering vs. Deep Water Culture
Self-watering containers use wicks to draw moisture upward, perfect for beginners. They require refilling every 3–4 days and work well with pea shoots, which thrive in consistent dampness. Deep water culture (DWC) submerges roots in oxygen-rich water, accelerating growth rates by 25% for heavy feeders like sunflower shoots.
| System | Maintenance | Best For |
|---|---|---|
| Self-Watering | Low | Small batches |
| Deep Water | Moderate | Fast-growing varieties |
Ebb and Flow Meets Nutrient Film
Ebb and flow systems flood trays periodically, mimicking natural rainfall patterns. Pair them with grow lights to boost production by 40% in windowless spaces. Nutrient film technique (NFT) uses shallow streams of water, ideal for high-yield strategies in tight areas—your basil and kale shoots will love the constant flow.
Three factors decide which system wins for your space:
- Time: NFT needs daily pH checks
- Space: Ebb and flow fits under cabinets
- Yield: DWC grows denser foliage
Aquaponic integrations add fish waste as natural fertilizer, though they require more monitoring. Whichever you choose, these soil-free methods let you focus on flavor, not weeds. Now—ready to pick your powerhouse setup?
Creative Ways to Enjoy Your Microgreens in the Kitchen

What if your next meal could burst with fresh flavors you grew yourself? Freshly snipped greens transform ordinary dishes into vibrant, nutrient-rich creations. Let’s explore how to turn your harvest into kitchen magic.
Morning Boosters: Greens-Packed Breakfasts
Start your day with a fenugreek omelette. Rinse ½ cup of greens and pat dry. Whisk two eggs, fold in chopped leaves, and cook on medium heat. The result? A fluffy, iron-rich breakfast ready in 8 minutes.
| Recipe | Prep Time | Key Nutrient |
|---|---|---|
| Wheatgrass Smoothie | 5 mins | Chlorophyll |
| Pea Shoot Salad | 7 mins | Vitamin C |
| Spinach Mix Stir-Fry | 12 mins | Iron |
Flavor Elevators for Every Dish
Top soups or avocado toast with pea shoots for crunch. Blend spinach with basil leaves for a pesto twist. Finely chopped greens melt into sauces, doubling their vitamin content without altering taste.
Store harvested greens in airtight containers—they’ll stay crisp for 3 days. Need a same-day meal? Toss them into wraps or grain bowls. Your kitchen becomes a nutrition lab where every bite delivers homegrown goodness.
Wrapping Up Your Hydroponic Microgreens Journey
You’ve just unlocked a new way to grow fresh, nutrient-rich greens right at home. This soil-free approach proves that delicious results don’t require sprawling gardens—just smart techniques and attentive care.
Adjusting light exposure ensures steady growth, while healthy roots directly impact your plants’ height and vitality. Whether you’re nurturing spicy mustard or earthy wheatgrass, each variety adds unique flavors and nutrients to meals.
Remember: sustainability and simplicity go hand-in-hand here. Experiment with different greens—swap basil for kale or try colorful radish shoots. Even a single tray of vibrant leaves can elevate your cooking while cutting grocery trips.
Share your favorite combinations online and inspire others to join the soil-free revolution! Every snip celebrates progress, so keep refining your methods. Happy growing—your kitchen’s about to get greener than ever.


