
Imagine having fresh flavors at your fingertips while adding a touch of greenery to your living space. Creating a compact growing station using glass containers lets you cultivate aromatic plants without needing a backyard or complex tools. This approach blends practicality with visual charm, making it ideal for urban dwellers and cooking enthusiasts alike.
No more last-minute grocery runs for wilted parsley or dried basil. With a simple setup, you can grow vibrant greens that thrive on sunny windowsills. The process requires minimal materials—most of which you might already own—and delivers satisfying results in weeks.
This guide reveals how to turn everyday items into a lively display that enhances meals and decor. You’ll learn to choose suitable varieties, manage light exposure, and maintain healthy growth cycles. Whether you’re new to gardening or seeking a space-saving solution, this versatile project adapts to any skill level.
By following these steps, you’ll gain a renewable source of ingredients while transforming your cooking area into a mini oasis. Let’s explore how to build a system that’s as functional as it is beautiful.
Introduction to Your Mason Jar Herb Garden Indoor Project

Transforming your kitchen into a fresh ingredient hub is simpler than you think. Glass containers provide an ideal environment for cultivating flavorful greens right where you cook. This method combines convenience with style, letting you harvest ingredients moments before use.
Why Glass Containers Work Wonders
Growing plants in transparent vessels eliminates guesswork. You can monitor root health and moisture levels at a glance. Many leafy varieties flourish in these conditions—basil, thyme, and oregano adapt particularly well.
| Factor | Traditional Pots | Glass Containers |
|---|---|---|
| Space Needed | 12-18″ diameter | 4-6″ diameter |
| Cost per Unit | $8-$15 | $0-$5 |
| Visual Appeal | Standard | Decorative display |
Flavor and Convenience Combined
Nothing beats adding just-picked leaves to simmering sauces or fresh salads. You’ll notice brighter flavors compared to store-bought options. Plus, having plants within reach reduces food waste—snip only what you need.
Maintenance stays simple with proper drainage and sunlight. Most varieties require watering just 2-3 times weekly. Rotate containers near windows to ensure even growth without complicated equipment.
Planning Your Kitchen Countertop Herb Garden

The secret to thriving plants starts with smart placement. You’ll want to balance light access with your cooking workflow. Let’s break down how to create a setup that’s both practical and productive.
Sunlight: Your Plants’ Best Friend
Most leafy greens crave sunshine like morning coffee. A south-facing spot works best, offering 6+ hours of direct light daily. Check for obstructions like trees or awnings that might cast shadows during peak hours.
No perfect window? Rotate jars every few days. This prevents lopsided growth and ensures all sides get equal exposure. Use sheer curtains if intense afternoon rays risk scorching delicate leaves.
Pick Plants That Match Your Plate
Grow what you’ll actually use. Love pasta nights? Basil and oregano become staples. Prefer tacos? Cilantro and lime thyme shine. Start with 2-3 varieties to avoid overwhelm.
| Herb | Best For | Light Needs |
|---|---|---|
| Basil | Pesto, caprese salads | Full sun |
| Parsley | Soups, garnishes | Partial shade |
| Chives | Eggs, dips | Moderate light |
Measure your available space before planting. Leave 4-6 inches between containers for air circulation. Stackable stands maximize vertical areas if counter space feels tight.
Gathering Supplies and Tools for Your DIY Project

Assembling the right materials transforms this idea into reality. Start with wide-mouth quart-size canning jars—their generous opening makes planting and pruning hassle-free. These containers outperform traditional pots by offering better visibility and space efficiency.
Essential Materials for Success
Your shopping list should prioritize functionality. Opt for organic potting soil designed for confined spaces—it retains moisture without suffocating roots. Pair it with perlite to boost airflow and prevent compaction.
Drainage matters as much as soil quality. A base layer of clean pebbles or glass beads keeps water from pooling. For extra protection against mold, sprinkle activated charcoal over the rocks before adding soil.
| Material | Purpose | Pro Tip |
|---|---|---|
| Canning Jars | Root space & visibility | Choose clear glass |
| Potting Mix | Nutrient delivery | Avoid peat-based blends |
| Perlite | Soil aeration | Mix 1:4 with soil |
You’ll need seeds or seedlings suited to container life. Compact varieties like thyme or basil adapt well. With these elements in place, your setup becomes a self-sustaining ecosystem.
Understanding Soil, Drainage, and Amendments
The foundation of healthy plants lies beneath the surface. Without drainage holes, your setup relies on smart layering to prevent root rot and promote growth. A well-structured base keeps roots oxygenated while managing moisture effectively.
The Importance of Drain Rock, Pebbles, and Stones
Start by filling the bottom with a ½-inch layer of clean pebbles or stones. This creates space for excess water to collect, stopping soil from drowning roots. The rocks also act as a visual guide—when watering, stop once you see moisture reach the top of this layer.
Choose smooth, uniform pebbles for consistency. Rough edges can compact over time, reducing airflow. Rinse them thoroughly to remove dust before placing them in your container.
Using Perlite and Activated Charcoal for Better Drainage
Next, add perlite—a porous volcanic mineral—over the stones. This lightweight material improves airflow in your potting soil and prevents compaction. Aim for a ½-inch layer, gently pressing it into place without crushing the granules.
For an extra boost, sprinkle activated charcoal. This dark powder absorbs impurities and balances moisture levels. It’s particularly useful in enclosed spaces where mold might develop. A thin dusting between layers keeps your setup fresh and functional.
Steps to Building Your DIY Herb Garden

Building your own fresh-ingredient station requires careful layering and smart planting methods. Let’s walk through creating a thriving setup that balances form and function.
Layering Your Container from Bottom to Top
Start with clean pebbles at the bottom—they prevent waterlogging. Add perlite next for airflow, then activated charcoal to filter impurities. Finish with nutrient-rich potting soil, leaving space for roots to expand.
| Layer | Material | Purpose |
|---|---|---|
| 1 | Pebbles | Drainage foundation |
| 2 | Perlite | Oxygen flow |
| 3 | Charcoal | Moisture control |
| 4 | Soil Mix | Nutrient base |
Smart Planting Approaches
For seeds, fill nearly to the top with soil. Place 3-4 herb seeds in the center, spaced half an inch apart. Cover lightly—most need just ⅛” soil blanket.
When using seedlings, fill halfway first. Position the plant upright, then add soil around its base. Gently press to eliminate air pockets without crushing delicate roots.
| Method | Depth | Spacing |
|---|---|---|
| Seeds | 1/8-1/4″ | 0.5″ apart |
| Seedlings | Root ball level | Single plant |
Always check seed packets for specific depth needs. Consistent moisture and indirect light kickstart growth in your jar herb garden setup.
Mason Jar Herb Garden Indoor: Easy DIY for Kitchen Countertop Herbs

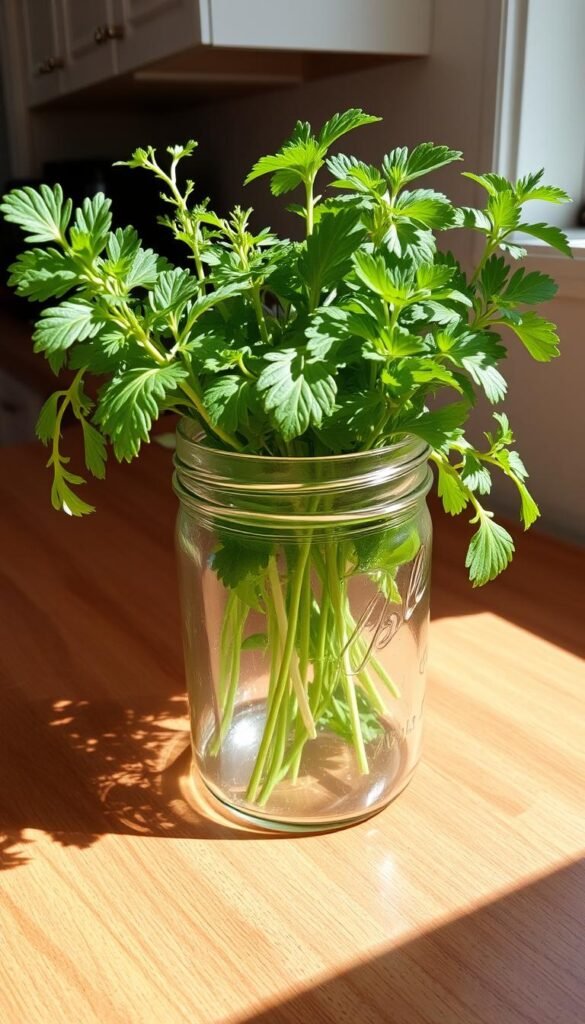
Elevate your cooking experience with a living display that’s as useful as it is beautiful. Glass containers filled with thriving greens add natural elegance to your space while keeping flavors within reach.
This setup adapts effortlessly to your existing decor. Whether your style leans toward sleek stainless steel or cozy cottage vibes, transparent vessels blend seamlessly. Their clean lines and natural elements create visual harmony without overwhelming small spaces.
Involving family members turns this project into a shared learning adventure. Kids gain hands-on experience nurturing plants from seed to harvest. Watching sprouts emerge teaches patience, while regular care routines build responsibility.
You’ll love the freedom to test new varieties seasonally. Swap out peppermint for lemon balm as temperatures change, or grow bold basil alongside delicate chervil. Compact growth habits mean you can curate flavors without sacrificing precious counter space.
Imagine adjusting a sauce’s seasoning with leaves picked seconds earlier. Fresh additions elevate everyday meals into culinary experiences. No more dried substitutes—your dishes will burst with vitality straight from the source.
Choosing the Best Herbs for Indoor Growing
Picking the right plants turns your compact setup into a flavor powerhouse. Some varieties naturally excel in confined spaces, offering quick harvests and minimal fuss. Focus on species that adapt well to limited root areas and consistent indoor conditions.
Top Performers for Compact Spaces
Basil reigns supreme in glass environments. Its shallow roots and rapid growth deliver weekly clippings for pesto or garnishes. Curly parsley also thrives, bouncing back quickly after each trim.
Thyme proves nearly indestructible. This rugged plant handles occasional dry spells better than moisture-sensitive types. For those exploring space-saving solutions, rosemary offers fragrant leaves year-round with proper pruning.
| Herb | Light Needs | Water Frequency | Growth Speed |
|---|---|---|---|
| Basil | Full sun | Every 3 days | Fast |
| Parsley | Partial shade | Twice weekly | Moderate |
| Thyme | Bright indirect | Weekly | Slow |
Cilantro requires extra attention. It prefers cooler temps and bolts quickly in warm kitchens. “Patience pays off with this one—harvest leaves early before flowering,” suggests an urban gardening enthusiast.
Rotate your selections seasonally. Mint thrives in summer humidity, while oregano prefers drier winter air. Match your choices to both your climate and favorite recipes for best results.
Troubleshooting Common Issues in Mason Jar Herb Gardens
Growing plants in glass containers brings unique challenges, especially when balancing hydration needs. Without drainage holes, every drop counts—literally. Master these techniques to keep your greens thriving.
Mastering Moisture Control
Check soil before watering. Press your finger an inch deep—if it feels damp, wait. Light weekly watering often works better than fixed schedules. Watch the pebble layer: visible moisture means you’ve added enough.
| Symptom | Likely Cause | Quick Fix |
|---|---|---|
| Yellow leaves | Excess water | Skip 1-2 waterings |
| Drooping stems | Dehydration | Mist soil lightly |
| White fuzz | Mold growth | Increase airflow |
Fighting Fungus Naturally
Activated charcoal isn’t just decorative. A thin layer between soil and rocks absorbs toxins and suppresses mold. If spots appear, scrape off affected soil and replace it with fresh mix.
Rotate containers weekly to ensure even drying. “My rosemary bounced back after I moved it away from humid dishwashing areas,” shares a home cook. Keep plants near breezy windows but shield them from direct gusts.
Remember: Underwatering is easier to fix than root rot. When in doubt, wait a day. Your plants will thank you with vibrant growth.
Tips for Maximizing Your Indoor Herb Growth
Light and warmth act as silent partners in your plant’s journey from soil to plate. Nurturing vibrant flavors requires more than regular watering—it’s about creating conditions where your greens can truly flourish. Small adjustments to their environment often yield dramatic improvements in taste and vitality.
Optimizing Lighting and Temperature
Position leafy varieties near a south-facing window for consistent brightness. Rotate containers every three days to prevent lopsided growth. If direct sunlight feels intense, diffuse it with sheer curtains during peak afternoon hours.
Most herbs prefer daytime temperatures between 65-75°F. Avoid placing them near radiators or drafty areas. A stable climate prevents stress, keeping flavors robust and growth steady.
| Condition | Ideal Range |
|---|---|
| Light Exposure | 6-8 hours daily |
| Night Temp | 55-65°F |
During winter, supplement natural light with LED grow lights positioned 12 inches above foliage. This mimics summer conditions, encouraging year-round harvests. Your windowsill setup becomes a self-renewing spice rack with these simple tweaks.


