
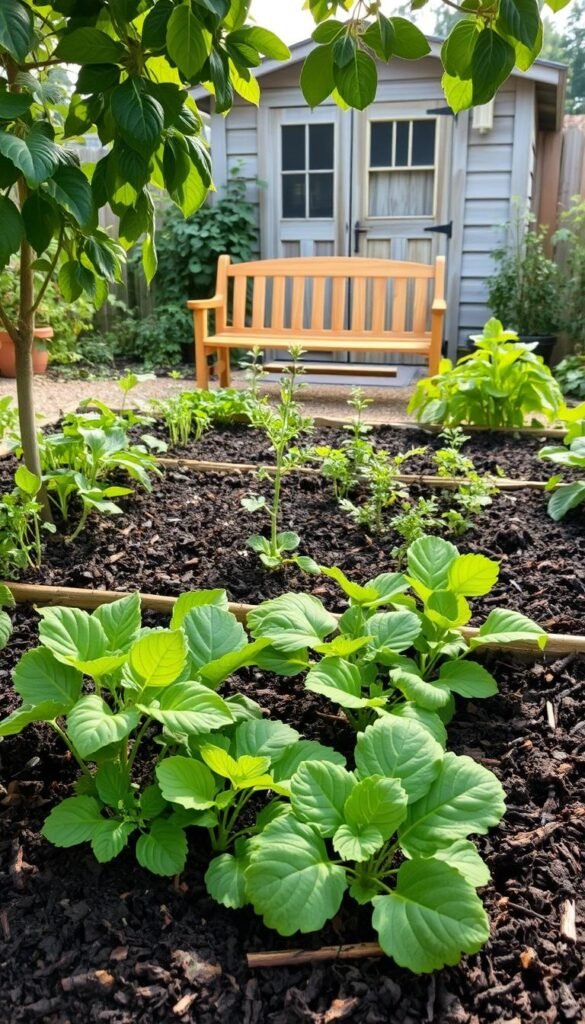
Imagine growing vibrant plants without the backbreaking work of traditional methods. This approach flips conventional wisdom by letting nature do most of the heavy lifting. Instead of tilling, you layer organic materials like compost or straw directly on your garden beds. Over time, these layers break down naturally, creating a thriving ecosystem beneath the surface.
Why does this matter? Disturbing the earth less means microbes, worms, and fungi can flourish undisturbed. These tiny helpers aerate the ground, recycle nutrients, and even suppress diseases. A long-term trial showed undisturbed plots retained 4% more carbon than dug areas—a win for both your plants and the planet.
You’ll also spend less time battling weeds. Thick mulch blocks sunlight, stopping most seeds from sprouting. What does sneak through is easier to pull since roots don’t anchor deeply in loose, fluffy soil. Plus, water stays where it’s needed instead of evaporating from exposed dirt.
Key Takeaways
- Builds fertile ground by mimicking natural decomposition processes
- Protects beneficial organisms that boost plant health
- Dramatically cuts weeding time through strategic mulching
- Improves moisture retention, reducing watering frequency
- Supports sustainable practices by locking carbon underground
Introduction to No-Dig Gardening
Ever wondered how to grow lush plants while skipping the endless digging? This method flips the script by building up, not breaking down. Think of it as creating a lasagna-like bed: you stack compost, leaves, or straw directly on the ground. Over time, these layers feed the earth naturally.
What Is This Approach?
Instead of tilling, you layer organic materials like kitchen scraps or grass clippings. These additions decompose slowly, creating a nutrient-rich environment. A study comparing plots found undisturbed areas developed 30% more earthworms in three years—key players in soil health.
Why It Works Better
Less digging means roots and microbes stay unharmed, which keeps your garden’s ecosystem balanced. You’ll also notice fewer weeds because thick mulch blocks sunlight. One gardener reported cutting weeding time by half after switching methods.
Preparing beds takes minutes each season. Just refresh the top layer with compost in spring. Over time, your ground becomes softer and more fertile—no heavy machinery or sore muscles required.
Understanding the No-Dig Philosophy
Did you know that avoiding the shovel can boost your garden’s underground ecosystem? When you leave soil untouched, you’re protecting a hidden world of helpers. Tiny organisms and earthworms thrive in stable environments, creating natural pathways for air, water, and nutrients.

The Science Behind Undisturbed Soil
Microbes and fungi form intricate networks beneath your feet. These organisms break down organic matter into plant-ready nutrients. Disturbing the ground disrupts their homes—like wrecking a city’s infrastructure overnight. Research shows undisturbed plots develop 40% more fungal threads than tilled areas, acting as nature’s internet for plant communication.
Earthworms also prefer peace. They aerate soil naturally, leaving behind nutrient-rich castings. One study found worm populations doubled in no-dig plots over two seasons. These wriggly engineers improve drainage while preventing erosion—a win for heavy rains and dry spells alike.
Layering compost mimics forest floors. Fallen leaves and debris decompose slowly, feeding plants over time. This method releases nutrients gradually, unlike synthetic fertilizers that flood roots then vanish. Your top layer becomes a self-renewing buffet for crops.
Better moisture retention is another perk. Compacted soil from digging repels water, while fluffy no-dig beds absorb it like a sponge. You’ll water less frequently, and roots stay hydrated longer during heatwaves. It’s like giving plants a steady IV drip instead of occasional gulps.
Historical and Modern Perspectives
How did ancient growers cultivate crops without tractors or tillers? For centuries, farmers relied on natural processes—leaving fallen leaves and plant debris to decompose. This changed with the rise of plows, which promised faster results through turning soil. But modern research reveals hidden costs to this “progress.”
Traditional Tilling vs. No-Dig Methods
Conventional digging temporarily aerates ground and mixes nutrients. However, it’s like hitting a reset button on your garden’s ecosystem. One study found tilled plots lost 15% more organic matter annually compared to undisturbed areas. As soil biologist Dr. Elaine Ingham notes:
“Every time you till, you’re destroying fungal networks that plants rely on for communication.”
Personal stories echo this science. A vegetable grower in Oregon reduced spring weeding by 70% after stopping tilling. Their carrots grew straighter in loose, unturned earth. Meanwhile, their neighbor’s tilled plot struggled with compacted soil and stunted roots.
No-dig methods rebuild what traditional practices disrupt. By adding compost as a top layer, you feed microbes without burying them. Over time, earthworms drag organic matter downward naturally. This creates richer soil structure than any rototiller could achieve.
History’s lesson is clear: working with nature beats forcing short-term gains. Modern gardens thrive when mimicking ancient wisdom—less disturbance, more trust in natural cycles.
No-Dig Gardening: Healthier Soil and Fewer Weeds
What if your garden could thrive with minimal effort year after year? Long-term growers report 80% fewer weeds after switching to layered beds. One 10-year study showed untouched plots doubled earthworm populations while increasing organic matter by 3% annually.

Here’s how it works: add 2-3 inches of compost to your bed each spring. Let worms and microbes incorporate it naturally. For winter prep, spread shredded leaves or straw as insulation. This protects roots and keeps soil life active even in colder months.
| Method | Weeds per Sq Ft | Soil Organic Matter | Annual Labor Hours |
|---|---|---|---|
| Traditional Digging | 12 | 2.1% | 45 |
| Layered No-Dig | 3 | 5.8% | 18 |
| Difference | -75% | +176% | -60% |
Notice how top layers suppress weeds while feeding plants? A Vermont gardener shared their results: “Year one had some dandelions, but by season three, I spent 10 minutes weekly weeding.”
Roots stay undisturbed, letting them access nutrients more efficiently. Over time, beds become self-sustaining ecosystems. You’ll save time and energy while growing stronger crops naturally.
Planning Your No-Dig Garden
Starting your garden journey begins with smart planning. Choosing the right spot ensures your plants thrive while minimizing maintenance. Let’s break down how to set up a space that works with nature, not against it.
Site Selection and Layout Considerations
Look for areas with at least six hours of daily sunlight. Test drainage by pouring water on the ground—if it pools, add organic matter to improve absorption. Flat or gently sloping spots prevent erosion and simplify bed design.
Group plants by water needs to streamline care. Leave 18–24 inches between beds for easy access. Raised beds work well for poor-quality ground, while in-ground plots suit existing fertile areas. A Vermont grower shared: “Wider paths saved my knees—I can kneel while tending crops.”
Consider these factors when designing:
- Proximity to water sources for efficient irrigation
- Wind protection from fences or tall plants
- Room for compost storage nearby
Match seed choices to your region’s growing season. Cool-weather vegetables like kale thrive in spring beds, while tomatoes need summer heat. Rotate crops annually to maintain nutrient balance naturally.
With thoughtful preparation, your garden becomes a low-effort, high-reward space. You’ll spend less time fixing problems and more enjoying fresh harvests.
Choosing the Right Organic Matter and Materials
Ever feel overwhelmed by the endless options for garden amendments? The secret lies in selecting materials that work with your local ecosystem. Organic matter like compost, straw, or even shredded newspaper can transform your growing space into a nutrient powerhouse.
Types of Compost and Fertilizers
Not all compost works the same. Kitchen scraps provide quick nitrogen boosts, while aged manure offers slow-release nutrients. A Vermont grower found mixing leaf mold with coffee grounds increased tomato yields by 25% compared to store-bought blends.
| Material | Nitrogen Content | Decomposition Time | Best For |
|---|---|---|---|
| Alfalfa | High | 2-4 weeks | Quick nutrient release |
| Straw | Low | 3-6 months | Moisture retention |
| Yard Waste | Medium | 4-8 weeks | Soil structure |
| Newspaper | None | 6-12 months | Weed suppression |
Worm castings shine for container plants, releasing 11 essential minerals. One teaspoon contains more microbes than Earth’s human population! For heavy feeders like corn, try fish emulsion—it’s packed with phosphorus for strong root development.
Utilizing Straw, Alfalfa, and Newspaper
Start with a base of 5-10 newspaper sheets to smother grass. Top with 3 inches of alfalfa pellets (they’re 20% protein for microbes) followed by straw. This “lasagna” approach creates ideal conditions for earthworms. An Oregon gardener reported 90% fewer dandelions using this method.
Alfalfa’s triacontanol hormone stimulates plant growth naturally. Pair it with straw’s insulating properties to protect roots from temperature swings. Recycled newspaper breaks down slowly, keeping beds weed-free for months.
Pro tip: Source materials locally. Check farms for spoiled hay (cheaper than straw) or coffee shops for free grounds. One grower swapped peat moss with fallen leaves—saving $120 annually while improving water retention.
Building Your No-Dig Garden Beds
Ready to create garden beds that work smarter, not harder? This hands-on approach uses simple materials to build fertile growing spaces in hours. You’ll recycle household items while giving plants a nutrient-packed home.
Step-by-Step Bed Preparation
Start by clearing the area of large debris. No need to remove grass or weeds—they’ll become compost underground. Follow these steps:
- Lay cardboard or newspaper (5-10 sheets thick) to block sunlight. This smothers existing vegetation naturally.
- Add 3 inches of coarse material like straw or wood chips. It creates air pockets for earthworms and drainage.
- Top with 4-6 inches of compost. This becomes your planting layer, rich in ready-to-use nutrients.
Water each layer lightly as you build. A Maine gardener shared: “I used old pizza boxes as my base—free and effective!” The cardboard breaks down in 6-8 weeks, feeding microbes while keeping weeds at bay.
For immediate planting, spread 2 inches of finished compost on top. Seeds and seedlings thrive in this loose, crumbly texture. If starting in fall, let beds rest over winter. Frost action helps materials blend naturally.
Pro tips for success:
- Use grass clippings between layers for nitrogen boosts
- Edge beds with logs or stones to contain materials
- Refresh compost annually to maintain fertility
Layering Techniques for Maximum Soil Health
Want to turn ordinary ground into a nutrient powerhouse? Layering organic materials creates rich, fertile earth without digging. This method mimics how forests build soil naturally—one fallen leaf at a time.
Establishing a Newspaper Base
Begin with 5-10 sheets of newspaper or cardboard. This barrier stops weeds by blocking light while letting water through. As it decomposes, worms transform it into humus—like nature’s recycling program.

Sequential Organic Layers
Build up materials in specific order and thickness for best results. Follow this recipe:
| Layer | Thickness | Purpose | Breakdown Time |
|---|---|---|---|
| Straw | 3 inches | Airflow & drainage | 6 months |
| Compost | 2 inches | Immediate nutrients | 8 weeks |
| Leaves | 1.5 inches | Slow-release food | 4 months |
Water each layer lightly as you stack. Winter frosts help compress materials into a spongy texture. A Michigan gardener notes: “After one season, my beds felt like chocolate cake—soft and rich.”
Measure layers using a ruler for consistency. Too thin? Weeds might sneak through. Too thick? Decomposition slows. Aim for 6-8 total inches initially, topping up 2 inches yearly.
Managing Weeds in a No-Dig System
Tired of battling weeds every season? The secret lies in working with nature’s rhythms rather than against them. By leaving soil undisturbed, you create conditions where unwanted plants struggle to compete.
Suppressing Weed Growth Naturally
Traditional digging often backfires. When you turn soil, you expose buried weed seeds to sunlight—like ringing a dinner bell. One study found tilling increased weed germination by 300% compared to undisturbed plots.
Thick mulch layers solve this problem. Spread 3-4 inches of compost or straw over beds. This blocks light while feeding earthworms that naturally aerate the ground. A Michigan grower shared: “After switching to mulch, I went from daily weeding to weekly spot-checks.”
For persistent weeds:
- Pull seedlings by hand when soil is moist
- Use a sharp hoe to slice stems at ground level
- Spot-treat with vinegar spray on sunny days
Smart bed design adds extra protection. Plant crops closer together to shade soil, or use low-growing herbs like thyme as living mulch. Cover crops like clover during off-seasons prevent bare spots where weeds might take root.
Remember: every time you avoid digging, you’re keeping millions of weed seeds safely buried. Over time, your garden becomes a fortress that unwanted plants can’t penetrate.
Watering and Irrigation Strategies
What if your plants could drink smarter, not harder? Layered beds naturally hold moisture longer, letting you water less often. The secret lies in their sponge-like structure—organic matter absorbs rainfall while preventing runoff.

Optimizing Moisture Without Overwatering
Check soil moisture by sticking your finger 2 inches deep. If it feels damp, hold off. Overwatering drowns roots and washes away nutrients. Instead, aim for slow, deep sessions that encourage roots to grow downward.
| Method | Water Efficiency | Best For | Frequency |
|---|---|---|---|
| Drip Irrigation | 90% | Vegetable patches | Weekly |
| Soaker Hoses | 85% | Established plants | Every 5 days |
| Watering Can | 75% | Seedlings | As needed |
Morning watering reduces evaporation. Avoid splashing leaves to prevent disease. In winter, water early to let plants absorb moisture before frost hits.
Compost-rich beds need 30% less water than tilled plots. Their crumbly texture acts like a reservoir. One gardener reported cutting watering time by half after switching to layered beds.
Pro tip: Mulch with straw around plants. It keeps soil cool and reduces surface drying. Your garden stays hydrated, even during summer heatwaves.
Seasonal Considerations and Planting Times
Timing is everything when working with nature’s calendar. Sync your efforts with seasonal rhythms to boost productivity while keeping chores manageable. Let’s explore how to align tasks with temperature shifts and daylight changes.
Ideal Times for Planting and Maintenance
Early spring is prime for refreshing beds. Spread 1-2 inches of compost before sowing seeds. Cool-weather crops like spinach and peas thrive when soil reaches 40°F. A Maine grower notes: “I plant lettuce two weeks before last frost—it handles light chills like a champ.”
Summer demands light mulch to retain moisture. Use straw or grass clippings around heat-loving tomatoes and peppers. Check beds weekly—warmth speeds decomposition, so top up organic matter as needed.
| Season | Key Tasks | Recommended Crops |
|---|---|---|
| Spring | Add compost, sow cool crops | Kale, radishes, carrots |
| Summer | Mulch, water deeply | Beans, squash, basil |
| Fall | Plant cover crops | Clover, rye, vetch |
Autumn prep begins after harvest. Sow cover crops to protect beds—their roots prevent erosion while adding nutrients. Let winter frosts break down materials naturally. Microbes slow activity below 50°F, so apply final compost 4-6 weeks before ground freezes.
Track local frost dates using USDA zone maps. Pair planting schedules with rainfall patterns—seedlings need consistent moisture during establishment. With smart timing, you’ll work less while reaping bigger harvests.
No-Till and No-Dig Gardening Methods Compared
How do two soil-friendly techniques stack up in real-world growing? Both approaches prioritize minimal disturbance, but their applications differ. While they share core principles, understanding their nuances helps you choose the best fit for your space.

Key Differences and Similarities
No-till often refers to large-scale farming using specialized equipment to plant seeds without breaking ground. No-dig focuses on layering materials in home plots. A Texas gardener shared: “I tried no-till tools first, but stacking compost felt simpler for my backyard.”
| Aspect | No-Till | No-Dig |
|---|---|---|
| Primary Use | Large farms | Home gardens |
| Labor | Equipment-dependent | Hands-on layering |
| Materials | Cover crops | Compost & mulch |
| Weed Control | Crop rotation | Thick organic layers |
Both methods:
- Protect microbial networks
- Reduce erosion
- Require less weeding over time
Why do most home growers lean toward no-dig? It’s easier to manage without machinery. You build beds once, then refresh the top layer annually. Compost feeds plants while suppressing weeds naturally. Over three seasons, a Michigan gardener saw her tomato yields increase by 40% after switching from tilling.
Whether you’re growing herbs or vegetables, both strategies keep your garden’s underground ecosystem thriving. Choose based on your space, resources, and how hands-on you want to be.
Enhancing Soil Biology Naturally
What’s the secret behind thriving plants that need little upkeep? Your garden’s hidden workforce—microbes, fungi, and earthworms—does most of the heavy lifting. By avoiding disruptive practices, you create a bustling underground community that feeds plants and strengthens their defenses.
Boosting Microbial Life and Earthworm Activity
Every spoonful of healthy ground contains billions of microorganisms. These tiny helpers break down organic matter into nutrients plants can absorb. For example, mycorrhizal fungi form partnerships with roots, extending their reach for water and minerals by up to 1000%.
Earthworms act as nature’s tillers. Their tunnels aerate the earth while their castings enrich it. A study comparing methods found:
| Factor | Traditional Plots | Undisturbed Areas |
|---|---|---|
| Microbe Count | 8 million/gram | 22 million/gram |
| Worm Population | 12/sq ft | 31/sq ft |
| Water Infiltration | 1.2 inches/hr | 3.8 inches/hr |
Layering compost and mulch provides a steady food source. Over time, this builds crumbly, well-drained earth. One gardener reported zucchini yields doubling after switching to this approach.
To support these allies:
- Add 1-2 inches of compost each spring
- Use leaf mold or straw as protective blankets
- Skip chemical fertilizers that harm delicate networks
Your crops will reward you with vigorous growth and natural pest resistance. It’s like running a five-star hotel for soil’s VIPs—they’ll keep your garden flourishing year after year.
Incorporating Cover Crops and Mulching
Harnessing nature’s partnership between cover crops and mulch creates a self-sustaining garden ecosystem. These allies work underground to suppress weeds while feeding your plants. Think of them as a living blanket and nutrient factory rolled into one.
Benefits of Mulch Layers
Thick organic blankets do more than smother weeds. They regulate soil temperature and retain moisture—key during summer droughts. A Michigan case study showed gardens with 3 inches of straw mulch needed 35% less watering than bare plots.
Choose materials based on availability and season:
| Material | Thickness | Breakdown Time | Best Use |
|---|---|---|---|
| Straw | 3-4 inches | 6 months | Vegetable beds |
| Shredded leaves | 2 inches | 4 months | Perennial areas |
| Pine needles | 1-2 inches | 1 year | Acid-loving plants |
Refresh mulch every 6-8 weeks during peak growth. Combine with compost or aged manure for a nutrient boost. One Oregon gardener layered leaf mold under straw, reducing weeds by 60% while doubling carrot yields.
Cover crops like clover add nitrogen naturally. Let them grow until flowering, then cut and leave residues as green manure. This “chop and drop” method feeds microbes while protecting bare soil.
Your garden becomes resilient through these layered partnerships. Less work for you, more bounty from the earth—a true win-win.
Learning from Gardening Experts
Ever wish you could tap into decades of wisdom without trial-and-error? Pioneers like Charles Dowding and Ruth Stout spent lifetimes perfecting methods that make growing easier. Their insights help you skip common pitfalls while boosting yields.
Charles Dowding’s Practical Wisdom
Dowding’s 40-year experiments prove timing matters. He plants seedlings in fresh compost during early spring, letting nutrients feed roots immediately. “Feed the soil, not the plant,” he advises. Follow his three golden rules:
- Refresh beds with 1-inch compost each season
- Space plants wider for better air circulation
- Rotate crops annually to prevent disease buildup
Ruth Stout’s Mulching Legacy
Stout’s “no-work” method uses thick straw layers year-round. She famously said: “I just throw seeds where I want them and step on the ground.” Her approach reduces watering by 60% while suppressing weeds naturally.
| Material | Layer Depth | Best For |
|---|---|---|
| Hay | 8 inches | Winter protection |
| Leaves | 4 inches | Spring moisture |
| Grass Clippings | 2 inches | Summer mulch |
Both experts agree: start small. Try one raised bed this season. Track growth patterns and adjust materials based on what thrives. As Dowding notes: “Your garden teaches you more than any book.”
Conclusion
Transforming your outdoor space starts with working smarter, not harder. By layering organic materials like compost and straw, you create a thriving underground network. Beneficial organisms flourish, roots access nutrients effortlessly, and weeds struggle to take root.
Experts like Ruth Stout proved decades ago that thick mulch layers slash maintenance. Charles Dowding’s trials show undisturbed beds yield stronger plants season after season. You’ll spend less time battling weeds and more enjoying fresh harvests.
Remember these essentials: refresh compost annually, space plants for airflow, and let earthworms handle soil structure. Whether growing herbs or vegetables, this approach builds resilience naturally.
Ready to simplify your routine? Start with one raised bed this year. Observe how materials decompose and adjust based on what thrives. As your ground becomes richer, you’ll see firsthand why so many growers swear by this method.
Give your garden the gift of balance. With patience and the right layers, you’ll cultivate vibrant plants while nurturing the earth beneath them.


