
Imagine growing healthier plants without breaking your back digging or weeding. That’s the promise of no-till gardening—a natural approach gaining fans across backyards nationwide. Instead of tilling, you’ll layer materials like cardboard, compost, and mulch to create rich, living soil. This method works with nature, not against it, saving time and effort while boosting your harvests.
Fall is the perfect season to start. Cooler temperatures and autumn leaves create ideal conditions for building beds that’ll thrive come spring. By adding organic matter now, you’ll improve soil structure, suppress weeds, and lock in moisture. Your future self will thank you when planting season arrives!
Why does this approach work so well? It mimics how forests naturally renew their soil. Layers of decaying leaves and plant matter feed earthworms and microbes, creating a nutrient-rich environment. You’ll see benefits like fewer pests, better water retention, and plants that grow stronger roots. Plus, you’re protecting the underground ecosystem that keeps your garden productive.
Ready to transform your space? You’ll need simple materials like newspaper, straw, and kitchen scraps. The process takes less effort than traditional methods but delivers bigger rewards. Whether you’re growing tomatoes or tulips, this strategy helps your plants thrive while keeping your tools stored away.
Embracing No-Till Gardening: An Introduction
Picture a garden where earthworms do the heavy lifting while you enjoy bigger harvests. This approach skips disruptive digging, focusing instead on building soil health through natural processes. Let’s break down why this method is reshaping how gardeners work with nature.
What Is No-Till Gardening?
Instead of overturning earth, you layer materials like compost, leaves, or straw directly onto beds. These additions decompose slowly, feeding microbes and creating a thriving underground ecosystem. Traditional tilling disrupts fungal networks and brings buried weed seeds to the surface – a problem this method avoids entirely.
| Traditional Gardening | No-Till Approach |
|---|---|
| Annual soil disruption | Layered organic matter |
| Weed seed exposure | Natural weed suppression |
| Compacted soil over time | Improved water retention |
Why Go No-Till?
Your soil becomes richer each season as earthworms mix in organic matter. Studies show these no-till gardening systems can yield 20% more vegetables while requiring less watering. The secret? Undistrupted soil holds moisture better and resists erosion.
Farmers using proven techniques report spending 30% less time weeding. Your back will thank you too – no more endless digging. Just add mulch each fall, and let nature handle the rest!
Preparing Your Garden for a Thriving Spring

Autumn’s crisp air signals your garden’s most crucial preparation window. Strategic work now creates fertile planting zones that’ll burst with life when warmer days return. Let’s explore how timing and technique combine to build next year’s bounty.
Fall Prep Essentials
Start six months before your first spring seed goes into the ground. Layer cardboard over cleared areas – winter moisture helps it decompose into nutrient-rich humus. Leave plant roots intact when clearing spent crops; they’ll feed soil organisms as they break down.
“Autumn is the gardener’s secret weapon – nature’s slow cooker for soil transformation.”
Timing Your Garden Tasks
Beat the frost clock: sow cover crops like clover by mid-September. These green blankets protect earth while adding nitrogen. Check this seasonal roadmap:
| September Focus | Winter Process | Spring Reward |
|---|---|---|
| Plant soil-builders | Microbes break down mulch | Ready-to-use beds |
| Cut plants at base | Roots enrich soil | Strong seedling starts |
| Layer organic matter | Cardboard decomposes | Fewer weeds |
Smart timing means your layered materials integrate fully before planting season. Come spring, you’ll find loose, crumbly earth teeming with life – no digging required!
No Till Gardening Methods: Fall Prep for an Abundant Spring

Your garden’s success story starts with understanding its unique needs. Unlike rigid formulas, no-till practices thrive on flexibility. What works in a rainy coastal area might flop in arid clay soils – and that’s okay! Your local climate, soil type, and even budget shape which methods will shine.
Struggling with heavy clay? Try mixing in shredded leaves for better drainage. Sandy plots benefit from extra organic matter like compost. Urban gardeners often use straw bales, while rural growers might tap into local wood chips. The magic lies in adapting materials you can source easily and affordably.
Consider these factors when planning:
- Annual rainfall patterns
- Existing weed pressure
- Access to compost or manure
- Time available for bed maintenance
One Midwest gardener combines cardboard layers with grass clippings, while a Texas grower uses cactus pads as mulch. Both approaches protect soil structure while addressing regional challenges. Your system might blend sheet mulching with lasagna gardening – whatever solves your specific problems!
Remember, even small changes make a difference. Start with what you have, observe results, and tweak your method each season. Those experiments turn into a personalized roadmap for thriving plants and richer earth.
Exploring Proven No-Till Techniques

Three revolutionary strategies dominate the no-till movement, each offering unique solutions for thriving gardens. Whether you’re battling clay soil or seeking water conservation, these approaches adapt to your needs while keeping soil intact.
Back to Eden Method
Paul Gautschi’s system mimics forest floors using wood chips as primary mulch. Spread 4-6 inches initially, with finer sifted material around seedlings. This layer decomposes into pH-neutral soil (7.0) over two years. Refresh with 2 inches of fresh chips biannually – nature’s slow-release fertilizer!
No-Dig Gardening Insights
Charles Dowding champions cardboard as a weed barrier. Lay sheets over grass, then add 3 inches of compost annually. Roots penetrate easily while microbes feast underneath. Ideal for urban spaces, this method turns lawn scraps into fertile beds.
Ruth Stout’s Mulch Approach
The “Mulch Queen” used hay/straw blankets up to 8 inches thick. Her system slashes watering by 50% and smothers weeds naturally. Rotting material becomes instant plant food – just lift a handful to drop seeds!
| Method | Key Material | Maintenance Cycle | Best For |
|---|---|---|---|
| Back to Eden | Wood chips | 2 years | pH balancing |
| No-Dig | Cardboard + compost | Annual | Weed control |
| Ruth Stout | Hay/straw | Seasonal | Moisture retention |
Choose based on local resources: abundant wood waste? Try Gautschi’s approach. Access to stable compost? Dowding’s system shines. Stout’s method thrives where hay is plentiful. All three build soil while saving your back!
Step-by-Step Guide to Building Your No-Till Garden Beds

Transforming your outdoor space into rich planting zones starts with smart layering techniques. Follow this foolproof method to create thriving ecosystems where plants flourish naturally.
Layering Organic Materials Effectively
Begin by clearing existing vegetation. Leave roots intact – they’ll decompose and feed earthworms. For stubborn grasses, use double cardboard layers soaked thoroughly. This smothers weeds while inviting beneficial microbes.
Your foundation matters:
- Remove all tape from cardboard boxes
- Flatten sheets for seamless coverage
- Overlap edges by 6 inches
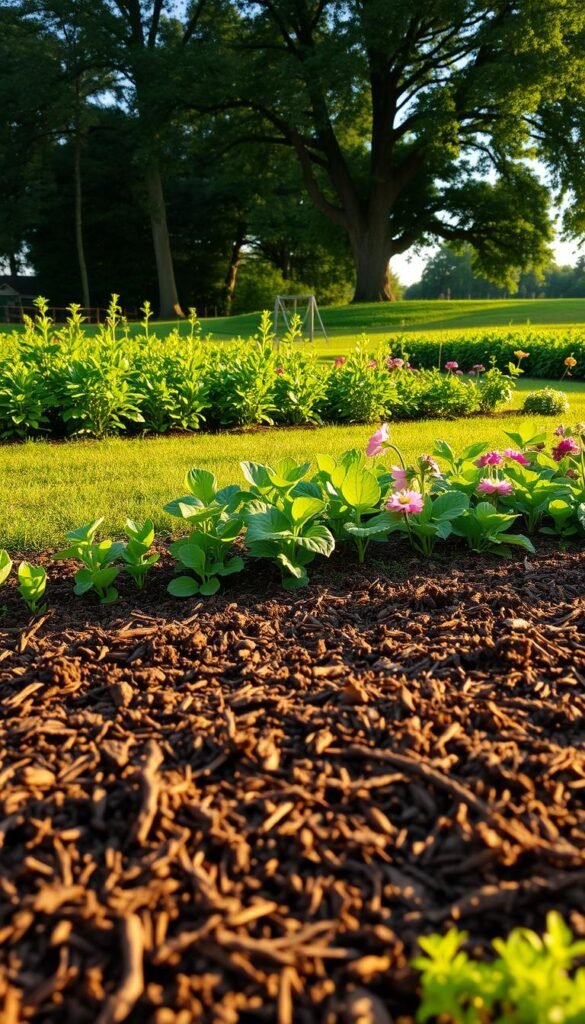
Cardboard and Mulch Setup
Water each layer like you’re making lasagna. Start with soaked cardboard, then add 3-4 inches of compost. Top with straw or wood chips. This sandwich method creates ideal conditions for root growth.
| 6-Month Method | Quick-Build Approach |
|---|---|
| Cover with garden sheeting | Water every other day |
| Decomposes slowly | Ready in 2 weeks |
| Ideal for new vegetable garden spaces | Perfect for existing bed renewal |
Maintain moisture during setup – damp layers break down faster. For clay soils, mix shredded leaves into compost. Sandy areas benefit from extra organic matter. Your patience pays off in spring with crumbly, nutrient-rich beds!
Tools, Supplies, and Tips for Success

What separates thriving no-till gardens from struggling ones? Your toolkit choices make all the difference. Focus on earth-friendly gear that works with your soil rather than against it. Let’s explore the essentials that’ll keep your beds productive with minimal effort.
Essential Tools to Minimize Soil Disturbance
Ditch the rototiller and grab these gentle helpers instead. A garden fork aerates without flipping layers, while a hand trowel plants seedlings precisely. For watering, choose a long-spout can or soaker hose – both deliver moisture right where roots need it.
- Broadfork for deep aeration (no soil inversion)
- Sturdy wheelbarrow for moving compost
- Sharp hori-hori knife for cutting through cardboard
Selecting Quality Compost and Mulch
Your soil’s best friends come in two forms: immediate nutrients and long-term protection. Dark, crumbly compost should smell earthy – avoid anything sour or slimy. For mulch, use what’s locally abundant. Grass clippings work wonders between rows, while shredded leaves protect perennial beds.
| Material | Best Use | When to Apply |
|---|---|---|
| Finished compost | Seed starting mix | Early spring |
| Straw | Summer moisture lock | After planting |
| Wood chips | Pathways | Any season |
Don’t fear fresh wood chips if they’re your only option – just keep them away from tender stems. Collect autumn leaves in garbage bags for next year’s mulch stash. And remember: double your cardboard estimates – gaps invite weeds!
Tillage Alternatives to Enhance Soil Health
Your soil thrives when treated gently—discover tools that protect its hidden ecosystem. Gentle aeration maintains the underground networks plants need while preventing common issues caused by aggressive digging.
Broad Fork Benefits
A broad fork solves compaction without destroying soil structure. Push the tool into the ground, rock it back, and watch air pockets form. This method keeps fungal networks intact while letting roots penetrate deeper.
Strategies to Reduce Over-Tilling
Mechanical tillage exposes weed seeds and dries out earth. Instead, layer compost on top and let worms mix it naturally. You’ll preserve moisture and maintain the “three-legged stool” of soil health: structure, biology, and nutrients.
Every time you avoid tilling, you protect water retention and prevent erosion. Your plants develop stronger root systems, accessing nutrients more efficiently. Healthier soil means fewer weeds and happier harvests—all with less backbreaking work!


