
Living in a compact urban area doesn’t mean you have to sacrifice fresh, homegrown food. With thoughtful planning, even the smallest backyard or balcony can become a lush, self-sustaining ecosystem. By working with nature instead of against it, you’ll unlock surprising potential in every corner of your property.
The secret lies in organizing your green space based on how often you use each area. High-traffic zones, like herb beds near your kitchen, save time and energy. Less-visited spots can host fruit trees or composting systems. This approach mirrors permaculture design principles, where every element serves multiple purposes.
Vertical growing techniques turn walls into edible displays, while companion planting creates natural pest control. You’ll notice your outdoor area becomes more productive with less watering, weeding, and waste over time. Even better? These methods help local pollinators thrive while reducing your environmental footprint.
Smart layouts transform challenges into advantages. A well-planned setup means you’re not just growing plants—you’re cultivating relationships between sunlight, soil, and seasons. The result? A vibrant, low-maintenance haven that feeds both your family and the ecosystem around you.
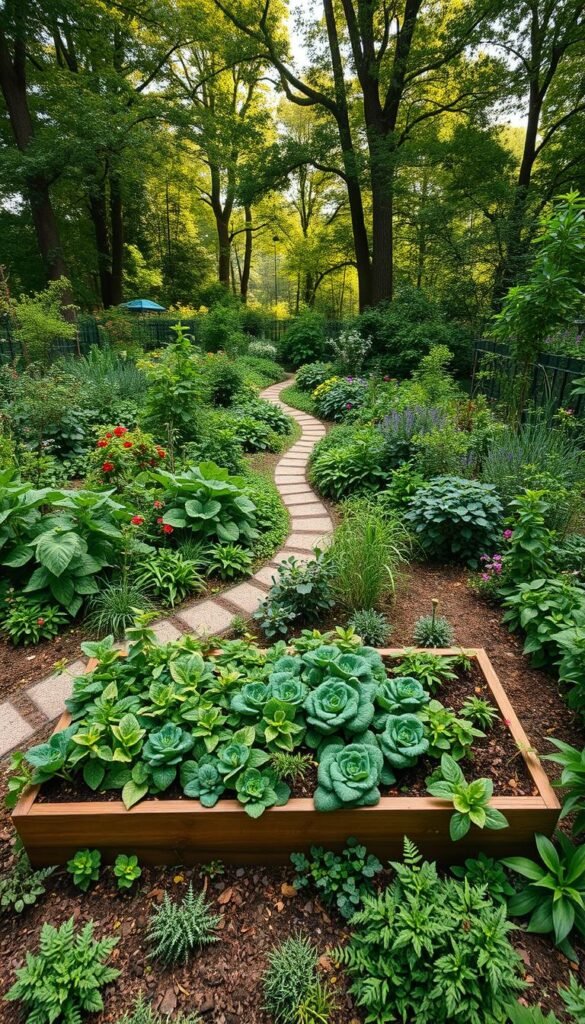
Overview of Permaculture Garden Zoning Principles
, Zone 2 (Orchard/Shrubbery), Zone 3 (Pasture/Woodland), Zone 4 (Managed Forest), Zone 5 (Unmanaged Wild). The background showcases a lush, verdant permaculture landscape with rolling hills, a winding stream, and an abundance of diverse flora and fauna, illuminated by soft, natural lighting and a warm, earthy color palette.")
Transforming your outdoor space starts with grouping plants by how often you interact with them. Think of it like organizing your kitchen—daily-use items stay within reach, while seasonal tools get stored further out. This approach turns chaos into order, letting you focus energy where it matters most.
High-traffic areas near your home might hold herbs and veggies you harvest daily. Less-visited corners could house fruit trees or composting systems. By arranging elements this way, you’ll cut maintenance time and create natural workflows.
| Zone | Visits Per Week | Key Elements |
|---|---|---|
| 0-1 | Daily | Herbs, seating, tool storage |
| 2 | 3-4 times | Vegetables, irrigation controls |
| 3-5 | Weekly/monthly | Fruit trees, wildflowers, compost |
These invisible boundaries adapt to your unique layout. A balcony might combine zones vertically—hanging planters (Zone 1) above railing trellises (Zone 2). The design philosophy works anywhere, from postage-stamp yards to sprawling properties.
True efficiency comes when zones support each other. A rain barrel in Zone 2 waters nearby edibles while feeding distant flower beds. This interconnected thinking reduces waste and multiplies yields without extra effort.
Defining Zones in Your Limited Space

Your daily habits hold the key to unlocking hidden potential in tight quarters. Start by sketching where you naturally walk, pause, and work outdoors. These patterns reveal prime spots for high-use features like herb boxes or tool stations.
Track sunlight patterns and foot traffic over a week. You might discover a sunny windowsill perfect for morning harvests or a forgotten corner ideal for composting. Even fire escapes can become vertical growing zones with proper planning.
Mapping Functional Areas
Divide your property into activity-based sections using simple labels. A balcony might combine:
- Daily-use containers near the door
- Weekly-maintained climbers on railings
- Seasonal storage under seats
| Space Type | Primary Zone | Key Features | Usage Frequency |
|---|---|---|---|
| Apartment balcony | 1 | Rail planters, foldable table | Daily |
| Small backyard | 2 | Raised beds, rain barrel | 3x/week |
| Community plot | 3 | Fruit bushes, compost bin | Weekly |
Public spaces become extensions of your system. A shared courtyard could host perennial herbs, while nearby parks might offer foraging opportunities. Always consider accessibility—place frequently used items within arm’s reach and create clear pathways.
Document your layout with photos and notes about microclimates. This living map evolves as you discover which areas get afternoon shade or morning dew. Remember: effective zoning adapts to your rhythm, not rigid rules.
Permaculture Garden Zoning: Making the Most of Limited Space

Effective space management begins with recognizing what elements last longest in your landscape. PA Yeoman’s framework teaches us to work with nature’s unchanging features first—like climate and terrain—before adding movable components. This approach creates resilient designs that grow better with time.
Key Principles Behind the Zoning Strategy
Yeoman’s Scales of Permanence help prioritize decisions. Start by observing your local weather patterns and land shape—these set the stage for everything else. Only then consider where to place paths, storage areas, or trellises.
| Scale | Permanence Level | Key Elements | Design Considerations |
|---|---|---|---|
| Climate | Most permanent | Rainfall, temperature | Choose drought-resistant plants |
| Landform | High | Slopes, valleys | Control water flow naturally |
| Structures | Moderate | Raised beds, sheds | Position for easy access |
| Plants | Adjustable | Annuals, perennials | Rotate based on needs |
Zone placement follows this hierarchy. Keep daily-use herbs near doorways (Zone 1), while berry bushes needing weekly care belong further out (Zone 3). Wild spaces (Zone 5) stay untouched to support local wildlife.
Balance is crucial. Pair thirsty vegetables with water collection barrels. Place tool stations between planting areas to minimize trips. This strategic arrangement lets you care for plants efficiently while respecting nature’s boundaries.
Your layout should evolve as you discover what works. A sunny wall might become a vertical herb garden next season. The best designs adapt to your routine while honoring the land’s natural rhythms.
Observing Your Garden and Understanding Patterns

Great growing starts with watching more than doing. Permaculture expert Amy Stross suggests spending nearly half your garden time simply noticing details: “Seven minutes of observation for every fifteen minutes of work reveals hidden connections.”
Daily Garden Observations
Set a timer during morning walks to track three key details:
- Where sunlight hits your lettuce at 10 AM
- How water pools near the rosemary after rain
- Which plants bees visit first
| Observation Technique | Tools Needed | Weekly Time | Key Benefit |
|---|---|---|---|
| Photo journaling | Smartphone | 5 minutes | Tracks growth patterns |
| Soil moisture check | Finger test | 2 minutes | Prevents overwatering |
| Wildlife spotting | Notebook | 3 minutes | Identifies pest issues |
Holistic Thinking for Design Success
Ask one question about every change: “How does this affect the entire system?” A new trellis might shade your tomatoes but could also protect tender greens from afternoon sun.
Bill Mollison taught that early observation prevents big mistakes. Notice where leaves collect naturally—that’s nature’s compost pile. See bare soil? Maybe groundcover plants belong there. Your space will tell you what it needs if you listen.
Evaluating Climate and Microclimates for Strategic Zoning

Your garden’s microclimates are secret tools for year-round harvests. These small weather pockets—warmer near walls, shadier under trees—let you grow plants that shouldn’t survive in your region. One creative grower in Malaysia even cultivates kale beneath an air conditioner’s drip line, using constant cool mist in tropical heat.
Identifying Your Microclimates
Walk your space with a thermometer at different times. Notice where morning dew lingers longest or where wind whips around corners. These subtle differences create unique growing zones:
| Microclimate Type | Key Features | Ideal Plants | Modification Tips |
|---|---|---|---|
| South-Facing Wall | Warm, sheltered | Tomatoes, Peppers | Add reflective surfaces |
| Shaded North Corner | Cool, moist | Lettuce, Spinach | Use moisture-retaining mulch |
| Windy Exposed Area | Dry, rapid evaporation | Lavender, Rosemary | Install windbreak fencing |
| Low-Lying Spot | Water collects | Mint, Cabbage | Create drainage channels |
Monitoring Local Weather Patterns
Track more than just temperature spikes. Note where hail damages plants first or which beds dry out fastest after storms. Free apps like WeatherSignal turn your smartphone into a microclimate tracker, measuring humidity changes across your area.
Stone walls aren’t just decorative—they’re thermal batteries. By absorbing daytime heat and releasing it at night, they protect tender seedlings from frost. Pair these structures with water features to amplify their climate-moderating effects.
Analyzing Topography and Water Management in Your Garden
Water becomes your silent partner when you learn to work with your land’s natural curves. Every slope and dip tells a story about where moisture travels—and where it escapes. By reading these patterns, you transform runoff into a resource that nourishes plants instead of washing away nutrients.
Mapping Your Garden’s Contours
Grab two wooden stakes and a level to build a simple A-frame tool. Walk your property holding this device parallel to the ground—when the bubble centers, you’ve found a contour line. These level paths become nature’s irrigation channels, slowing water’s journey across slopes.
Digital tools offer precision for tech-savvy growers. Google Earth’s elevation profiles reveal subtle land changes, while GIS apps overlay soil types and drainage patterns. Combine these insights to create a water-wise design that matches your terrain’s personality.
| Mapping Method | Tools Required | Best For |
|---|---|---|
| Manual | A-frame, stakes | Small gardens |
| Digital | Smartphone + apps | Complex landscapes |
Channeling and Capturing Water Effectively
Turn hard surfaces into water allies. Route downspout runoff into swales—shallow ditches along contours—that feed thirsty fruit trees. Line walkways with permeable gravel that filters rain into the soil below your feet.
Compact spaces thrive with stacked solutions. A rain barrel connected to drip irrigation waters herbs while excess flows to a self-watering planter below. This chain reaction turns one rainfall into multiple hydration events across your garden zones.
Watch how puddles form after storms—these become ideal spots for water-loving plants like mint or taro. Over time, strategic placement reduces manual watering and builds richer soil through natural moisture retention.
Designing Accessible Pathways and Structures for Optimal Use
Ever notice how you naturally walk through your yard? Those worn patches of grass reveal smarter route options than any graph paper plan. Start by tracking where feet naturally gravitate—these organic trails become the blueprint for your pathway design.
Existing driveways or patios often dictate flow patterns. Instead of fighting them, enhance these routes with permeable materials like gravel or stepping stones. One urban grower transformed their narrow side yard into a functional corridor using staggered planters that double as seating and storage.
Planning Efficient Movement Routes
Map high-traffic zones first. Place daily-use structures like compost bins and tool racks along primary walkways. A three-foot-wide path accommodates wheelbarrows, while eighteen-inch trails suit tucked-away herb spirals.
| Path Material | Best For | Maintenance Level |
|---|---|---|
| Wood chips | Fruit tree zones | Annual refresh |
| Flagstone | Main access routes | Low |
| Gravel | Drainage areas | Monthly raking |
Integrate vertical elements strategically. A trellis arch over a pathway supports beans while creating shade for heat-sensitive greens below. This approach aligns with permaculture zoning strategies that maximize efficiency.
Consider all-season access. Slightly elevated paths prevent muddy shoes during rains, while curved routes slow movement near delicate seedlings. Remember: good design feels intuitive—if you need signs to navigate your property, simplify the layout.
Leveraging Vertical Gardening and Space-Saving Techniques
Turn blank walls into edible masterpieces with smart vertical solutions. By growing upward instead of outward, you’ll squeeze three times more plants into the same square footage. Start with simple modular planters for herbs like basil and mint—these thrive in shallow soil pockets near sunny windows.
Wooden trellises aren’t just for ivy. Train cucumbers and pole beans to climb these structures, creating living curtains that provide shade and snacks. One urban grower in Portland transformed their fire escape into a vertical strawberry farm using repurposed rain gutters.
| Vertical Structure | Best Plants | Maintenance Level |
|---|---|---|
| Living Walls | Leafy greens, herbs | Weekly watering |
| Trellis Systems | Peas, tomatoes | Seasonal pruning |
| Stackable Planters | Radishes, carrots | Monthly rotation |
| Hanging Baskets | Strawberries, flowers | Daily inspection |
Columnar apple trees prove you don’t need orchards for fresh fruit. These slender varieties grow just eight feet tall but produce full-sized harvests. Pair them with compact blueberry bushes in tiered planters for a layered edible display.
Remember light needs when stacking plants. Place sun-loving cherry tomatoes at the top of your structure, with shade-tolerant spinach beneath. This arrangement mimics natural forest layers while maximizing every inch of available space.
“My vertical tomato cages now yield twice as much fruit as my old ground beds,” shares Maria Gonzales, a rooftop gardener from Chicago.
Integrate function and beauty by training grapes along balcony railings—they’ll sweeten your grapes while softening harsh city views. With these techniques, even the tiniest patio becomes a productive oasis.
Integrating Natural Elements for Soil Health and Companion Planting
Plants thrive best when they’ve got good neighbors. By pairing species that support each other, you create a living network that boosts yields and reduces upkeep. This approach turns your growing area into a self-sustaining community where every plant plays multiple roles.
The Role of Companion Plants
Tall crops like tomatoes make perfect sunshades for basil, which repels aphids while flavoring your sauces. Try these winning combinations:
| Primary Crop | Companion | Benefits |
|---|---|---|
| Tomatoes | Basil | Deters flies, improves flavor |
| Cucumbers | Nasturtiums | Traps beetles, attracts pollinators |
| Carrots | Chives | Confuses root pests |
The Three Sisters method shows how corn, beans, and squash work together. Corn stalks become bean poles, beans fix nitrogen, and squash leaves suppress weeds. For year-round pest control, mix in thyme and oregano—their strong scents mask vulnerable plants’ aromas.
Enhancing Soil with Organic Methods
Healthy soil grows resilient plants. Spread kitchen scraps and leaves as sheet mulch—it decomposes into rich humus while blocking weeds. Clover makes excellent green manure when planted between vegetable rows, adding nitrogen without chemicals.
Rotate heavy feeders like lettuce with nitrogen-fixing plants to maintain fertility. A simple compost bin in Zone 2 turns waste into black gold for your herbs and veggies. Remember: diverse soil life means fewer pests and better harvests.
Step-by-Step Guide to Fine-Tuning Your Permaculture Garden
Perfecting your green space becomes simpler when you treat adjustments like seasonal recipes—small tweaks yield big flavor. Start with weekly observation walks to spot what’s thriving versus struggling. Jot notes about sunlight shifts or areas where water pools naturally.
Next, rotate crops based on your findings. Move shade-loving greens to spots where afternoon shadows lengthen. Swap tired soil in high-use beds with compost from your Zone 3 system. These minor changes keep your setup dynamic and responsive.
Finally, streamline workflows. Place a small tool caddy near frequently tended plants. Install drip lines during dry spells using leftover rainwater. Your evolving design will mirror natural cycles better each season.
Celebrate progress through measurable wins—fewer watering cans carried, more pollinators visiting. With consistent refinements, you’ll spend less time maintaining and more time enjoying your self-sustaining edible landscape.


