
Imagine turning empty lots into vibrant gathering spots where neighbors grow fresh food and friendships. These collaborative green areas do more than beautify streets—they create bonds between people from all walks of life. Through shared effort, participants cultivate both plants and a deeper sense of belonging.
Successful projects start by listening to local needs. Whether it’s vegetable beds for families or flower patches for pollinators, every element serves a purpose. Smart space organization allows personal growing areas while leaving room for benches, tool sheds, and pathways that invite conversation.
You’ll discover how these green hubs become classrooms under the open sky. From seasoned growers teaching seed-saving techniques to kids learning about nutrition, knowledge blossoms alongside zucchini and sunflowers. Seasonal harvest festivals and composting workshops turn strangers into teammates.
This guide shows how to navigate zoning rules, soil testing, and volunteer schedules without overwhelm. We’ll break down cooperative models that work for urban apartments or suburban neighborhoods. You’ll gain practical tips for overcoming challenges like water access and plot rotation.
Ready to dig into creating a thriving green heart for your area? Let’s explore how thoughtful preparation leads to spaces that feed bodies, minds, and community spirit for years to come.
Laying the Groundwork for a Thriving Garden Community

Transforming unused spaces into green oases begins with strategic preparation. The right location becomes the foundation for growth, while early teamwork ensures long-term success. Let’s explore how to turn raw land into fertile ground for plants and relationships.
Finding and Preparing Your Land
Start by scouting areas with 6+ hours of daily sunlight and easy water access. Test soil pH levels – most veggies thrive between 6.0-7.0. Clear invasive weeds in late winter when roots are weakest. This timing makes cleanup easier and gets neighbors excited before spring planting.
Consider these factors when choosing your site:
| Factor | Ideal Condition | Benefit |
|---|---|---|
| Sun Exposure | Full-day sunlight | Supports diverse crops |
| Water Access | Within 50 ft of spigot | Reduces irrigation costs |
| Soil Quality | Loamy texture | Requires less amendment |
| Proximity | 0.5 mile radius | Encourages daily visits |
Engaging Neighbors from the Start
Host weekend cleanup events with free coffee and gloves. Assign tasks based on ability – some can haul branches while others label tools. Shared sweat equity builds ownership. One participant from Portland recalls: “We bonded over wheelbarrow races more than any block party.”
These gatherings naturally spark conversations about plot layouts and crop choices. Keep a suggestion box onsite – ideas from multiple people often create better solutions than individual plans. Remember, a space loved by many stays vibrant through seasons and challenges.
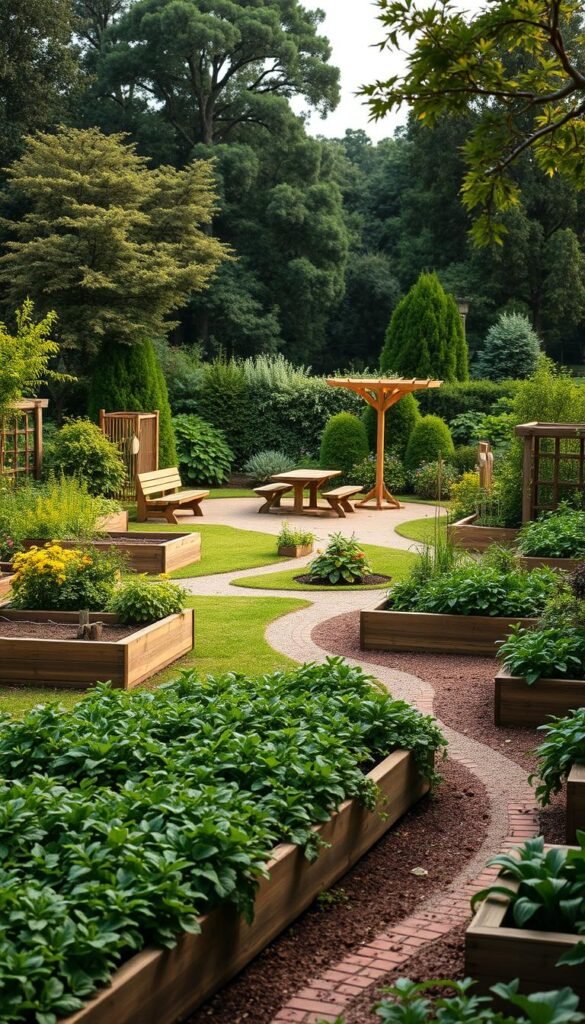
Designing a Functional Garden Layout

Creating spaces that feel both personal and shared starts with smart arrangement. Many growers want their own patch to tend while still enjoying collaborative areas. The secret lies in blending individual creativity with group resources.
Mapping Out Private and Communal Plots
A quarter-acre space can comfortably host 35 family plots measuring 10×20 feet each. Numbered beds let gardeners personalize their crops while keeping organization simple. Leave 20% of the area for shared projects like berry bushes or sunflower mazes that everyone maintains.
Consider these size guidelines:
| Plot Size | Suitable For |
|---|---|
| 100-150 sq ft | Single grower herbs/salads |
| 200-300 sq ft | Couple’s vegetable patch |
| 400-500 sq ft | Family food production |
Planning Pathways and Accessibility
Three-foot-wide walkways prevent crowding during harvest time. Crushed gravel surfaces allow wheelchair access and reduce mud. One gardener notes: “Our wide paths let grandparents and toddlers explore safely side by side.”
Mark clear boundaries with low fencing or stones. This prevents accidental trampling while keeping sightlines open. Accessible layouts invite more participants, turning solitary hobbies into neighborhood traditions.
Incorporating Raised Beds and Core Structures
Elevated growing spaces offer practical solutions for urban soil challenges while creating visual harmony. When installing multiple units, pre-built cedar boxes with interlocking joints save time and ensure uniformity. One coordinator from Chicago shares: “Our matching beds made the space look intentional rather than haphazard.”
Choosing Durable Materials
Cedar stands out for its natural resistance to rot and insects. Compare it to composite options that last longer but cost 40% more. Recycled plastic works for budget projects but lacks cedar’s earthy aesthetic. Consider this breakdown:
| Material | Durability | Cost | Maintenance |
|---|---|---|---|
| Cedar | 7-10 years | $$ | Annual oiling |
| Composite | 15+ years | $$$ | None |
| Recycled Plastic | 10-12 years | $ | Occasional scrubbing |
Ensuring Level Installation
Use a 4-foot carpenter’s level during setup. Uneven beds cause water pooling at one end—tomatoes rot while peppers parch. Volunteers in Austin fixed this by adding sand under low corners until their bubble centered.
Line bed bottoms with permeable landscape fabric before adding soil. This blocks weeds but lets excess moisture drain. Twelve-inch depths suit herbs, while 24-inch versions accommodate carrot roots. Well-built structures become garden landmarks that inspire care for generations.
Optimizing Water Access and Irrigation Systems

Keeping plants hydrated shouldn’t feel like a daily chore. Automated irrigation systems act as silent partners, delivering precise moisture without constant oversight. These setups prove especially vital in shared spaces where commitment levels vary—your tomatoes thrive whether you’re on vacation or stuck at work.
Installing Automated Drip Systems
Start with these essentials for a worry-free setup:
- Pressure regulators (30 PSI max) protect delicate emitters
- Filter systems prevent clogging from sediment
- Programmable timers sync with local weather patterns
Buried PVC pipes deliver water to strategic spigots, while above-ground tubing connects to individual beds. Zone valves let thirsty squash get daily drinks while drought-tolerant herbs receive weekly sips. “Our smart timer cut water use by 40% last summer,” shares a Denver coordinator.
Maintaining Efficient Water Flow
Check filters monthly during peak growing seasons. Flush lines before frost arrives using compressed air—this prevents cracked pipes. Rain sensors automatically skip cycles after storms, but always test their responsiveness during spring setup.
| Issue | Quick Fix |
|---|---|
| Low pressure | Clear mineral deposits from emitters |
| Overwatering | Adjust timer duration by season |
| Frozen lines | Install shut-off valves 12” below frost line |
Group plants with similar needs on shared lines. This simple step lets you customize schedules without overhauling the entire system. Consistent moisture means happier roots and fewer arguments about neglected plots.
Planning a Community Garden Design: Layouts for Shared Outdoor Spaces

Crafting a vision that grows with your neighborhood starts with strategic blueprints. Map out plots while leaving room for future upgrades—even simple chalk marks help visualize tomorrow’s projects today. A Minnesota group saved 15% of their area for later additions, which became a popular strawberry patch three years later.
Mark zones for essentials like compost stations and tool sheds early. Temporary signs work until funds emerge for permanent structures. One organizer suggests: “Our ‘future picnic area’ became the first spot neighbors improved through bake sale funds.”
Design educational plots near gathering spaces. Kids learn soil science while adults swap pruning tips nearby. These zones naturally become knowledge exchange hubs, with sunflowers acting as both decor and bird feeders.
Perimeter plantings boost visual appeal while defining boundaries. Consider flowering shrubs that match your gardening aesthetic—they’ll attract pollinators and sidewalk admirers. Shared storage racks near common areas reduce duplicate tool purchases.
Leave pathways wide enough for wheelbarrows and strollers. Adjustable irrigation lines let you expand watering systems as new beds get added. Remember, great plans evolve like seasons—plant the seeds of possibility now.
Enhancing Soil Health and Organic Growth

Healthy soil forms the foundation of every thriving garden. Unlike regular dirt, a custom blend gives roots room to breathe while holding essential moisture. Let’s explore how to mix living earth that grows prize-winning tomatoes and keeps neighbors asking for your secret recipe.
Mixing the Ideal Soil Blend
Professional landscapers swear by this raised bed formula: Start with one bale of Pro Mix. Hydrate it until the color shifts from light brown to deep black—this fluffs the texture. Add Sweet Peat for water retention, premium compost for nutrients, and Turface MVP for drainage. Finish with Myoplex fertilizer and gypsum to balance minerals.
This lightweight mix outperforms heavy garden soil. Roots spread easily, and water distributes evenly instead of pooling. One gardener reports: “Our zucchini doubled in size after switching to this recipe—we had to give extras to the food pantry!”
Replenishing Nutrients Seasonally
Heavy feeders like tomatoes and squash drain soil fast. Each spring, top beds with 2 inches of fresh mix to replace settled material. Check levels monthly—if soil drops below 1.5 inches from the bed’s edge, add more compost blend.
Create a maintenance schedule:
- Early spring: Test pH and add gypsum if needed
- After harvest: Mix in worm castings
- Winter: Cover with mulch to protect microbes
This approach keeps earth productive for 3-5 years before needing full replacement. Healthy soil means fewer pests, bigger yields, and plants that bounce back from summer heat waves. Your initial effort pays off through multiple growing seasons of abundant harvests.
Establishing Robust Infrastructure and Tool Storage
When your green space matures, smart storage solutions keep tools accessible and enthusiasm high. After three growing seasons, our team chose a pre-built cedar shed that mirrored our raised beds. Though assembling required a full day’s effort, the unified look justified every minute spent leveling the concrete base.
Sturdy infrastructure evolves with your needs. What begins as temporary shelving often becomes permanent through neighbor feedback. Lockable cabinets prevent misplaced trowels, while open racks let everyone grab shovels quickly. One member recalls: “Our shared sharpening station tripled tool lifespan—no more rusty pruners!”
Consider these upgrades as participation grows:
Weatherproof bins protect organic fertilizers from rain
Wall-mounted hose reels eliminate tripping hazards
Solar-powered lights extend evening work sessions
Durable structures become the backbone of flourishing spaces. They transform scattered efforts into coordinated care, ensuring your collaborative project thrives for decades. When gear stays organized, energy flows into what matters—nurturing plants and connections alike.


