
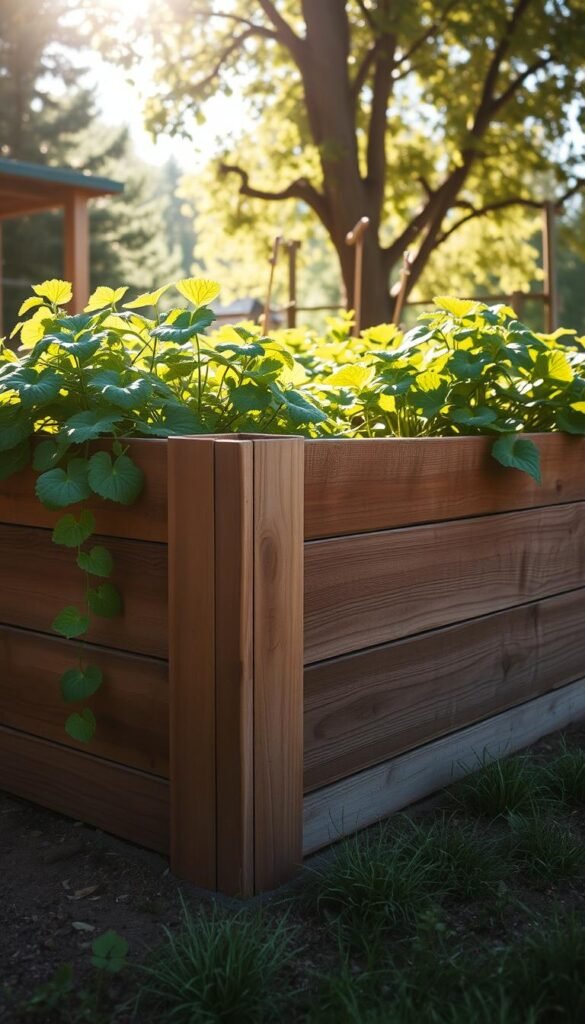
Creating a thriving outdoor growing area starts with smart design choices. Elevated planting spaces offer better soil control and easier access compared to traditional ground plots. These structures let you manage moisture levels effectively while keeping your plants organized in defined areas.
Protective barriers play multiple roles in maintaining your green oasis. They shield delicate vegetation from curious animals and create clear boundaries for foot traffic. Many gardeners find these features double as decorative elements that complement their backyard aesthetics.
When planning your setup, consider materials that balance durability with visual appeal. Modern composite options withstand weather changes better than untreated wood, while metal accents add contemporary flair. Proper connections at joint points ensure your structure stays secure through growing seasons.
You’ll discover how thoughtful design impacts plant health and yields. Strategic barrier placement can create sheltered microclimates for sensitive crops while supporting vertical growth for climbing varieties. These techniques help maximize your harvest potential in limited spaces.
Understanding Raised Garden Beds: A Solid Foundation

Growing plants above ground level offers surprising advantages. These elevated systems give you full control over your growing environment, from soil composition to water management. Let’s explore why they’re a game-changer for home growers.
Benefits of Elevated Gardening
Traditional ground plots often struggle with compacted earth from foot traffic. Raised beds eliminate this issue, keeping soil loose and oxygen-rich. You’ll notice roots spread freely, leading to stronger plants and better harvests. Custom soil mixes let you match exact needs – acidic for blueberries or sandy for carrots.
Improved Drainage and Soil Quality
Excess water drains quickly through elevated setups, protecting roots from rot. The table below shows key differences between raised and ground-level systems:
| Feature | Raised Beds | Ground Plots |
|---|---|---|
| Soil Warmth | Warms faster in spring | Slower to heat |
| Drainage Speed | 2-3x faster | Depends on soil type |
| Root Depth | Up to 18″ growth | Often restricted |
Want to build your own? Our step-by-step guide makes it simple. You’ll extend your growing season by weeks while keeping plants healthier through optimal conditions.
Benefits of Fenced Raised Garden Beds

Smart barriers do more than mark property lines – they create safe havens for your greenery. Enclosed planting areas offer dual advantages, shielding crops while boosting visual harmony in your yard.
Guarding Your Greens from Unwanted Guests
Hungry critters love fresh produce as much as you do. A sturdy barrier stops rabbits from nibbling lettuce and deer from trampling tomatoes. It also keeps playful pets from digging up your herbs.
Consider these common intruders and effective deterrents:
| Pest Type | Minimum Fence Height | Best Material |
|---|---|---|
| Rabbits | 2 feet | Chicken wire |
| Deer | 8 feet | Metal mesh |
| Toddlers | 3 feet | Picket design |
Proper barriers do more than exclude pests. They create sheltered zones where delicate seedlings thrive. One gardener noted: “My fenced area reduced wind damage by 40% compared to open plots.”
Beautifying Your Outdoor Canvas
Functional fences can become stunning landscape features. Paint wooden slats to match your patio furniture or add climbing roses to metal grids. These touches turn practical structures into artistic statements.
When building raised beds, consider how barrier colors and textures complement your home’s exterior. A well-chosen design makes your growing space look intentional rather than makeshift.
Vertical elements like trellises double as decorative supports for beans and peas. This approach merges beauty with purpose, maximizing both yield and curb appeal.
Essential Tools and Materials for DIY Raised Garden Beds

Building your own elevated planting space starts with gathering the right gear and supplies. Quality tools save time and frustration during assembly, while smart material choices ensure your creation withstands seasons of growth.
Must-Have Tools for Construction
Power saws like compound miter or circular models make precise cuts in wood planks. Pair these with a drill/driver for assembling frames – exterior-grade screws hold better than nails in outdoor conditions. Essential measuring tools include:
- Tape measure for accurate dimensions
- Rafter square for perfect 90° angles
- Staple gun for securing mesh barriers
Don’t forget safety essentials: thick work gloves prevent splinters, while safety glasses shield your eyes during cutting. Many builders recommend hearing protection when operating loud saws.
Quality Materials and Lumber Options
Wood selection impacts your project’s lifespan and appearance. Cedar and redwood resist rot naturally but cost more upfront. Budget-friendly options like hemlock or pine work well when treated with weatherproof sealant.
| Material | Durability | Cost |
|---|---|---|
| Cedar | 15-20 years | $$$ |
| Pressure-Treated | 10-15 years | $$ |
| Pine | 5-7 years | $ |
For pest control, wide-mesh hardware cloth forms an underground barrier against burrowers. Pair this with heavy-duty plastic sheeting to prevent soil contact with untreated wood. Follow this how-to guide from Lowe’s for proper assembly techniques using your chosen materials.
Planning and Designing Your Raised Garden Bed Layout
Mapping out your growing space sets the stage for success. A well-planned layout helps plants thrive while making maintenance simpler. Let’s explore how to create an efficient setup tailored to your yard’s unique conditions.
Site Assessment and Sunlight Optimization
Start by observing your yard’s light patterns. Track how shadows move across your space at different times. South-facing locations typically get the most sun – perfect for heat-loving tomatoes and peppers.
Use this simple method to test sunlight:
| Time | Sun Exposure | Best For |
|---|---|---|
| Morning | Partial shade | Leafy greens |
| Midday | Full sun | Fruiting plants |
| Afternoon | Dappled light | Herbs |
Leave 18-24” between beds for comfortable access. Avoid placing structures where tree roots might invade your planting area. One gardener shared: “Moving my beds just 3 feet away from our oak tree doubled my zucchini yield!”
Drafting Your Custom Garden Plan
Sketch your design using graph paper or digital tools. Consider these elements:
- Pathways wide enough for wheelbarrows
- Vertical structures for climbing plants
- Future expansion space
Group plants with similar needs together. Place tall crops on the north side to prevent shading. Remember to include access points for watering and harvesting – your back will thank you later!
Using Raised Garden Bed Corners, Fencing, and Other Structural Essentials

Your plant sanctuary’s security starts with smart barrier choices. The right materials protect crops while complementing your outdoor style. Let’s compare popular options and explore modern connection solutions.
Material Matchup: Finding Your Perfect Fit
Wood remains a top pick for its natural charm. Cedar and redwood stand out for resisting rot and pests without chemical treatments. These options blend seamlessly with most landscapes but require occasional sealing.
Modern alternatives offer unique benefits:
| Type | Cost | Durability | Maintenance |
|---|---|---|---|
| Chicken Wire | $ | 5-7 years | Yearly checks |
| Vinyl | $$ | 15+ years | Wipe clean |
| Composite | $$$ | 20+ years | None |
Metal mesh works best for deer-prone areas, while plastic barriers suit rainy climates. One gardener reported: “Switching to composite saved me 10 hours yearly on repairs!”
Revolutionary Connection Solutions
Modern joint systems simplify assembly and strengthen structures. Powder-coated steel brackets withstand heavy loads, while UV-resistant plastic clips allow quick reconfiguration. These options prevent warping and loosening over time.
Key features to consider:
- Tool-free installation for easy adjustments
- Weatherproof coatings for longevity
- Adjustable angles for custom shapes
Step-by-Step Guide to Building a Raised Garden Bed Fence

Building protective barriers around your planting area combines practicality with creative expression. This walkthrough breaks down the process into manageable phases, ensuring your barrier serves its purpose while enhancing your landscape.
Preparing the Site and Setting the Posts
Start by clearing the perimeter of rocks and roots. Use wooden stakes and string to outline your barrier’s path. Follow these critical measurements:
- Space posts 6-8 feet apart
- Dig holes 24″ deep (or 1/3 post height)
- Mix concrete with gravel for stability
Secure posts using a level and temporary braces. Allow 48 hours for concrete to cure before attaching panels. One DIY enthusiast noted: “Taking time to align posts perfectly saved me hours of adjustments later.”
Attaching Panels and Installing the Gate
Measure twice before cutting materials to size. Use corrosion-resistant screws for outdoor durability. Consider these installation tips:
| Material | Fastener Type | Spacing |
|---|---|---|
| Wood | Deck screws | Every 12″ |
| Vinyl | Plastic clips | Manufacturer specs |
| Metal | Self-tapping screws | Every 18″ |
For gates, position hinges 8″ from top and bottom. Test swing clearance before final tightening. Apply weatherproof sealant to wooden components, checking for sharp edges that could snag clothing.
Creative Raised Garden Bed Fence Design Ideas
Transform your outdoor space with barrier concepts that blend style and practicality. Material choices set the tone for your landscape while protecting crops. Let’s explore options that turn functional features into artistic statements.
Material Showdown: Style Meets Substance
Each fencing type brings unique character to your growing area. Consider these popular choices:
| Type | Cost | Style | Best For |
|---|---|---|---|
| Reclaimed Wood | $$ | Rustic | Country landscapes |
| Powder-Coated Metal | $$$ | Modern | Urban settings |
| Vinyl Composite | $$ | Clean | Low-maintenance yards |
Metal options bring modern flair but need rust-proof coatings. Composite materials mimic wood grain without annual sealing. One gardener shared: “Switching to vinyl saved me 5 weekends yearly on upkeep!”
Dual-Purpose Features That Impress
Smart designs merge beauty with usefulness. Try these clever additions:
- Woven willow branches for natural pest barriers
- Painted lattice panels supporting climbing peas
- Built-in herb boxes along fence tops
Vertical elements maximize small spaces. Attach hanging planters to fence posts for strawberries or flowers. Elevate your outdoor aesthetics by matching fence colors to patio furniture.
Consider tiered arrangements for visual depth. Stack planting boxes at different heights along barriers. This approach creates eye-catching displays while keeping herbs within easy reach.
Maintenance Tips for a Long-Lasting Garden
Keeping your outdoor growing space in top shape requires regular care. Seasonal inspections prevent small issues from becoming big headaches. Check connections every spring for tightness, and replace rusted fasteners before they compromise stability.
Clean protective barriers annually with mild soap and water. This removes dirt buildup while helping you spot wear patterns. Apply weatherproof sealant to wooden components every two years – it doubles as a fresh finish for your landscape.
Monitor soil health through simple tests. Compacted earth needs aeration, while nutrient-deficient mixes benefit from compost. Address pest control promptly by sealing gaps in barriers and trimming nearby vegetation.
With consistent attention, your outdoor structures will thrive for years. Simple habits like tightening loose screws and clearing debris make all the difference. Your efforts now mean better yields and curb appeal tomorrow.


