
Imagine growing fresh vegetables without battling rabbits or worrying about deer trampling your tomatoes. Structured growing spaces offer back-saving benefits while keeping pests at bay, but traditional setups often lack flexibility. What if you could adjust protection levels as easily as watering your plants?
Removable barriers solve the accessibility dilemma many growers face. These systems let you tend to crops without stretching over permanent walls, then quickly restore defense against hungry visitors. No more sacrificing convenience for security!
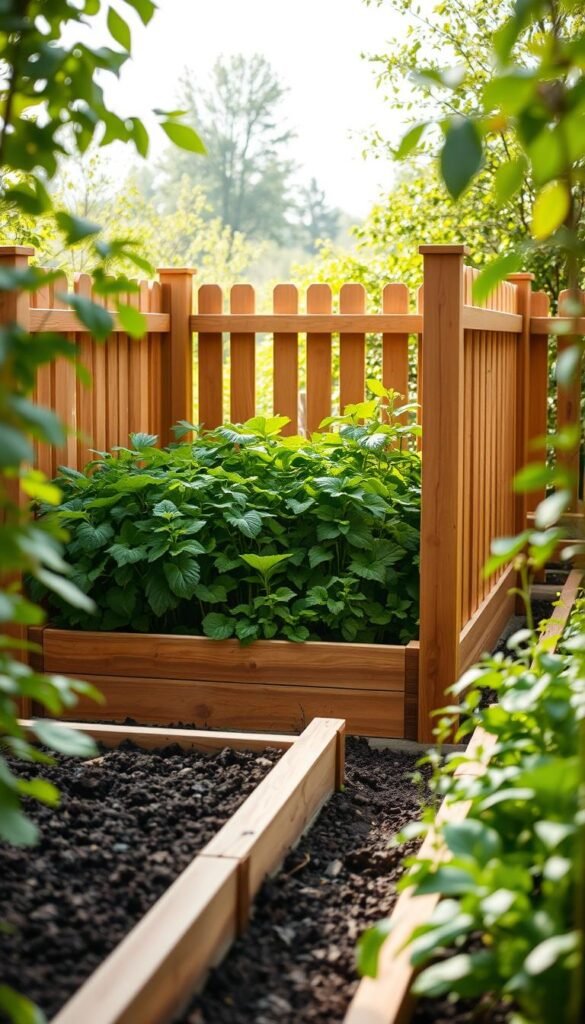
Modern designs combine practicality with visual appeal. Durable materials like cedar and galvanized steel withstand weather while complementing your landscape. For extra pest resistance, some protective fences for garden beds extend underground to block burrowing animals.
This approach transforms your outdoor space into a dynamic ecosystem. Adjust panel heights seasonally – lower for spring greens, taller for summer squash. You’ll enjoy easier harvesting while discouraging critters from claiming your kale.
The best setups grow with your skills. Start simple with basic enclosures, then add features like locking gates or decorative posts. Your planting area becomes both fortress and showcase, proving protection doesn’t require compromising beauty.
Understanding the Benefits of Raised Garden Beds and Removable Fences

Transform your outdoor space into a productive sanctuary that works smarter, not harder. Structured planters paired with adaptable barriers create a versatile system where convenience meets defense. Let’s explore how this setup simplifies maintenance while keeping your greens safe.
Ergonomic Design for Effortless Care
Elevated planters reduce bending by 70% compared to ground-level plots. This design lets you tend to herbs or tomatoes without straining your back. One gardener shared: “I finally enjoy pruning again since I’m not kneeling in mud.”
Smart Defense for Hungry Visitors
Groundhogs and rabbits can’t climb smooth surfaces, while deer avoid narrow spaces. A two-tiered approach works best:
| Feature | Traditional Fence | Removable System |
|---|---|---|
| Installation Effort | High | Low |
| Flexibility | Fixed height | Adjustable panels |
| Pest Control | Partial | Layered |
| Maintenance | Seasonal repairs | Quick swaps |
Pair structured planters with temporary barriers to stop diggers and jumpers. When building raised beds, consider adding underground mesh for root protection. Rotate fence heights as crops grow—lower for seedlings, taller for mature plants.
This adaptable system grows with your skills. Start with basic panels, then add locking latches or decorative trellises. Your greens stay safe, and you gain a stress-free growing experience.
Planning Your Removable Garden Fence Project

Creating a thriving edible landscape starts with smart spatial planning. Whether you’re growing basil or beefsteak tomatoes, your setup should balance plant needs with practical access. Let’s map out a strategy that works for your unique yard.
Assessing Your Space and Needs
Start by tracking sunlight patterns. Most vegetables need 6-8 hours daily. Use a sun calculator app or mark shadows every two hours. One gardener noted: “Shade from my maple tree completely changed where I placed my peppers.”
Consider these factors when choosing locations:
| Feature | Ideal Range | Plant Examples |
|---|---|---|
| Bed Width | 3-4 feet | Lettuce, carrots |
| Path Width | 2-3 feet | Wheelbarrow access |
| Fence Height | 18-36 inches | Deer vs rabbit protection |
Determining Layout and Measurements
Use stakes and string to outline potential bed shapes. For rectangular planters, keep length under 8 feet to prevent soil compaction. Curved designs? Maintain 24-inch minimum radius for easy reaching.
Measure twice using this approach:
- Mark bed boundaries with spray paint
- Verify level ground with a 4-foot carpenter’s tool
- Test reach by kneeling at edge – can you touch center?
Leave 18-inch gaps between multiple planters for kneeling space. For climbing plants like beans, allocate extra vertical space in your layout. Your future self will thank you during harvest season!
Choosing Materials and Essential Tools

Selecting the right components transforms your growing space into a lasting investment. The perfect balance of durability and style starts with understanding your options. Let’s break down what works best for your needs and budget.
Wood, Metal, or PVC: Weighing the Options
Natural wood brings earthy charm to planters. Cedar and redwood resist rot naturally, lasting 10-15 years untreated. Pressure-treated pine costs 40% less but requires sealing to prevent chemical leaching. One gardener remarked: “My cedar fence still looks new after three rainy seasons!”
Metal choices offer rugged protection. Aluminum won’t rust and weighs half as much as steel. Wrought iron suits traditional landscapes but needs anti-rust paint yearly. For coastal areas, powder-coated options handle salt air better.
PVC and vinyl shine in low-maintenance setups. These plastics won’t warp or splinter, maintaining their color for decades. Though pricier upfront, they save time on staining and repairs.
Must-Have Tools for a DIY Success
Build like a pro with these essentials:
- Tape measure – accuracy prevents wasted materials
- Rubber mallet – secures posts without denting
- Level – ensures proper drainage angles
- Galvanized screws – resist weather damage
Specialty hardware makes systems adaptable. Heavy-duty brackets allow panel swaps in minutes. For underground pest barriers, stainless steel mesh pairs well with any frame material. Local hardware stores often cut lumber to size, saving you time and effort.
Step-by-Step Guide to Building Your Fence

Building your own adaptable barrier combines hands-on creativity with practical pest control. Let’s transform those materials into a sturdy yet removable defense system that grows alongside your plants.
Preparing and Assembling the Frame
Start by marking your wood strips every 12 inches using a carpenter’s pencil. This spacing creates optimal support for hardware cloth while maintaining flexibility. Pro tip: Clamp boards together to mark multiple pieces simultaneously for perfect alignment.
Drill 5/8″ holes at marked spots using a spade bit. Insert dowels with light mallet taps – they should slide smoothly without splitting the wood. One DIYer noted: “The PVC sleeves made fence removal easier than changing planters in my square-foot gardening layout.”
Installing Hardware Cloth and Secure Fittings
Lay hardware cloth flat against the assembled frame. Use a staple gun every 4 inches, pulling the mesh taut as you work. Trim excess material with tin snips, leaving 1/2″ clearance around edges.
Attach conduit brackets to your planter using 3/4″ screws. These holders keep panels upright during storms yet release with gentle upward pressure. For extra stability:
- Sand rough edges on PVC sleeves
- Apply weatherproof sealant to wooden parts
- Check alignment with a 4-foot level
Your finished system should slide in/out effortlessly while blocking critters. Test the fit before planting season – adjustments now prevent headaches later!
Elevating Design with “Raised Garden Beds with Fence: Blending Security and Aesthetics”

Your outdoor space deserves both beauty and brains. Smart protective structures can become striking focal points when designed with intention. Let’s explore how to merge practicality with artistry in your growing area.
Balancing Functionality with Visual Appeal
Think beyond basic barriers. A farmhouse-style setup might use cedar planks with copper accents, while modern spaces shine with powder-coated metal frames. One homeowner shared: “Guests now compliment my vegetable patch as much as my flower beds!”
Consider these design strategies:
- Match post caps to your home’s exterior lighting fixtures
- Use lattice panels as trellises for climbing roses or beans
- Paint horizontal rails to mirror your patio furniture’s hue
Height variations create rhythm in your layout. Try shorter sections near seating areas and taller panels around prized tomatoes. This approach defines spaces while maintaining full protection.
Color ties everything together. Stain wooden components to complement decking, or choose metal tones that echo outdoor sculptures. Your planters become part of a cohesive landscape rather than standalone features.
Customizing Your Fence for Style and Practicality
Your protective barrier can become a canvas for creativity while boosting plant growth. Personal touches turn functional elements into design features that reflect your personality and gardening goals.
Color Schemes and Decorative Finishes
Bold hues like sunflower yellow or robin’s egg blue create cheerful accents among greenery. For subtle elegance, try weathered gray stains or crisp white paints that let your plants take center stage. Durable outdoor-grade finishes protect materials while adding visual interest – think textured sealers or metallic flecks in coatings.
Natural wood tones blend seamlessly with landscapes but consider unexpected twists. One gardener achieved stunning results by “matching my fence’s sage green to my patio umbrella – it ties the whole yard together.” Test samples on small sections first, as sunlight can alter colors dramatically.
Innovative Features for Climbing Plants
Lattice panels do double duty as artistic elements and support climbing plants. Attach removable trellises using hook-and-loop straps for seasonal adjustments. This approach works perfectly for low-maintenance blooms that thrive in vertical spaces.
For heavier vines, install horizontal wires between posts using screw eyes. These nearly invisible supports let beans or clematis create living walls. Vertical growing saves space and adds depth to your layout – imagine scarlet runner beans flowering beside your tomatoes!


