
Transforming your outdoor space doesn’t require endless hours of upkeep. Imagine a landscape where rugged textures meet sleek simplicity, creating a balanced blend of earthy charm and contemporary style. These spaces thrive with minimal effort, making them ideal for homeowners who value beauty without the hassle.
Whether you’re working with a sprawling yard or a cozy corner, stone features add height, depth, and visual drama to flat areas. They’re perfect for spots where grass or flowers struggle to grow, offering a creative solution that feels intentional. Pairing stones with drought-tolerant greenery creates a cohesive look that harmonizes with nature.
You can start small—think gravel pathways or clusters of river rocks—or go bold with layered arrangements that become your yard’s focal point. The key is balance: mixing sizes, shapes, and textures to craft a space that feels both organic and polished. For more ideas on elevating your space with a gardening, explore how subtle details elevate the overall design.
Best of all, these landscapes stay vibrant year-round. They’re built to withstand weather changes, ensuring your outdoor area remains inviting through every season. With thoughtful placement and a focus on natural elements, you’ll create a retreat that’s as functional as it is striking.
Embracing Natural Elements in Your Rock Garden
Stones aren’t just decorations—they’re problem-solvers for tricky outdoor spaces. By blending practical uses with artistic arrangements, you can turn challenging spots into stunning features that require little upkeep.
Understanding the Role of Rocks and Stones
Large boulders or flat slabs work wonders for stabilizing slopes or replacing thirsty grass areas. In spots where plants struggle, like under trees or in rocky soil, stones become your go-to solution. They define edges along paths or flower beds, giving your yard structure without constant maintenance.
Creating a Cohesive Landscape with Earthy Textures
Mix pebbles, gravel, and jagged stones to add depth. Varying sizes create natural movement—think small river rocks hugging larger focal pieces. This contrast draws the eye while keeping things grounded. For inspiration, explore expert rock garden designs that balance function and style.
Earthy tones like slate gray or warm terracotta help materials blend seamlessly. Add personality with DIY garden crafts using leftover stones. The result? A space that feels intentional yet effortlessly connected to its surroundings.
Planning Rock Garden Design Inspiration: Natural Elements for a Modern Look

A well-planned layout turns scattered ideas into a polished outdoor retreat. Start by exploring online galleries or nearby public spaces to spark inspiration. Pro tip: Snap photos of arrangements that catch your eye—these become valuable references later.
Setting Your Creative Vision
Organize your favorite concepts using a digital collage or physical mood board. Group textures, color schemes, and plant varieties that complement your property’s existing features. As landscape designer Mia Miller notes: “The best layouts feel intentional, not forced—like they’ve always belonged there.”
Grab graph paper and sketch rough outlines of your area. Mark sunlight patterns, drainage zones, and existing trees. This step helps visualize how stones and plants will interact over time. Focus on balance—cluster smaller rocks near pathways, save statement boulders for focal points.
Allowing extra time during this phase prevents headaches down the road. You’ll spot potential issues early, like overcrowding or mismatched materials. The result? A cohesive space that ages gracefully with minimal upkeep.
Selecting the Perfect Site and Assessing Environmental Conditions

Finding the right spot transforms ordinary spaces into eye-catching features. Start by walking your property at different times of day. Notice where sunlight lingers and where shadows dominate—these patterns shape plant choices and stone arrangements.
Evaluating Sunlight, Soil, and Water Access
Full sun areas (6+ hours daily) suit drought-resistant plants like sedum or lavender. Shaded spots work for moss-covered stones or ferns. Test your soil’s drainage by digging a 6-inch hole—fill it with water. If it drains in 1 hour, you’ve got fast-draining ground perfect for succulents and alpine species.
Water access matters most for mixed gardens with flowering plants. If your hose can’t reach the site, consider self-sufficient options. As rock garden layouts often show, grouping thirsty plants near existing water sources saves effort.
| Sun Exposure | Soil Type | Plant Examples |
|---|---|---|
| Full Sun | Sandy/Gravelly | Hen-and-chicks, Yarrow |
| Partial Shade | Loamy | Coral Bells, Hosta |
| Full Shade | Clay-Rich | Japanese Painted Fern |
Utilizing Natural Terrain and Slopes
Steep yards become assets with tiered stone walls. Use existing dips for dry creek beds lined with smooth pebbles. Flat backyards gain depth through raised mounds of earth capped with angular boulders.
Front yard spaces near walkways? Frame them with low-growing thyme between stepping stones. Remember: Sloped areas need secure anchoring. Bury one-third of each large stone to prevent shifting during storms.
Gathering Creative Rock Garden Ideas and Inspirations

Unlock hidden potential in tricky corners of your yard by exploring fresh approaches to stone arrangements. Whether you’re transforming a sun-baked slope or adding intrigue to a shaded nook, these spaces thrive where traditional lawns falter. Start by browsing Pinterest boards or local botanical gardens—they’re goldmines for unexpected combinations of textures and colors.
Desert climates shine with gravel beds and sculptural cacti, but even humid regions benefit from clever stone placements. Try stacking flat stones near a patio for seating or arranging mossy boulders under trees. Pro tip: Use light-colored pebbles to brighten dark corners naturally.
| Style | Key Features | Plant Pairings |
|---|---|---|
| Naturalistic | Irregular shapes, native stones | Wildflowers, creeping thyme |
| Contemporary | Geometric patterns, uniform gravel | Ornamental grasses, succulents |
| Desert | Sand-colored boulders, dry creek beds | Agave, lavender |
Notice how public parks blend functionality with artistry—a winding path here, a strategically placed boulder there. Bring that energy home by mixing practical elements like erosion control with eye-catching focal points. Your space might feature a spiral of river rocks or a cluster of volcanic stones.
Bookmark photos that make your heart race, then adapt those concepts to your climate and lifestyle. Remember: the best gardens solve problems while sparking joy. What story will your stones tell?
Sketching a Functional Layout for Your Rock Garden

Crafting a layout that works starts with understanding your space’s potential. Think of it as a puzzle—every stone and plant has a role in creating harmony. Begin by marking key zones on paper: seating areas, pathways, and focal points.
Mapping Out Plant and Rock Placement
Use graph paper or digital tools to plot larger stones first. These anchors define your layout’s structure. Leave room for greenery between them—drought-tolerant perennials like sedum thrive in narrow gaps. Pro tip: Label each element with sticky notes to test arrangements before committing.
For slopes or uneven ground, position flat stones as steps or terraces. This adds visual interest while preventing erosion. Remember: Once heavy boulders are placed, moving them costs time and effort. Measure twice, dig once!
Incorporating Scale and Proportion
A two-story home needs bold features, while cottages shine with delicate gravel paths. Match stone sizes to your yard’s dimensions—pebbles suit compact spaces, while sprawling landscapes demand statement boulders. Landscape architect Luis Diaz advises: “Let your house guide the scale. Your outdoor areas should feel like a natural extension, not a separate entity.”
Balance heights by pairing low-growing thyme with vertical stones. Want more ideas? Explore creative gardening ideas that blend practicality with artistry. Complex projects? Consult a pro—they’ll spot issues like drainage or overcrowding early.
Taking time to sketch saves headaches later. You’ll create a space that feels intentional, inviting, and uniquely yours.
Choosing the Right Materials: Rocks, Stones, and Gravel

The foundation of any stunning outdoor space lies in material selection. Start by visiting local suppliers to touch and compare textures—this hands-on approach helps you visualize combinations. Budget-friendly options? Check community boards for free or low-cost stones. One homeowner’s leftover slate could become your focal point!
Mixing Sizes, Shapes, and Colors for Visual Interest
Lighter-toned boulders prevent your layout from feeling gloomy. Pair them with darker gravel for contrast. Think creamy limestone against charcoal pebbles—it’s like nature’s yin and yang. Pro tip: Place your largest stones first, then fill gaps with medium rocks and finer materials.
| Material Type | Size Variation | Color Tip |
|---|---|---|
| Boulders | 12-24 inches | Ivory, sandstone |
| Stepping Stones | 8-16 inches | Muted grays |
| Gravel | 1/4-3/4 inch | Mix warm/cool tones |
Avoid clashing shapes by sticking to one dominant style. Angular granite works with geometric layouts, while smooth river rocks suit flowing designs. As landscape artist Elena Torres notes: “Your materials should whisper, not shout. Let their textures do the talking.”
Need inspiration? Observe how mountain slopes layer sizes naturally—massive outcrops anchor smaller debris. Recreate this hierarchy using varied stone sizes to guide the eye through your space. The result? A balanced composition that feels both wild and intentional.
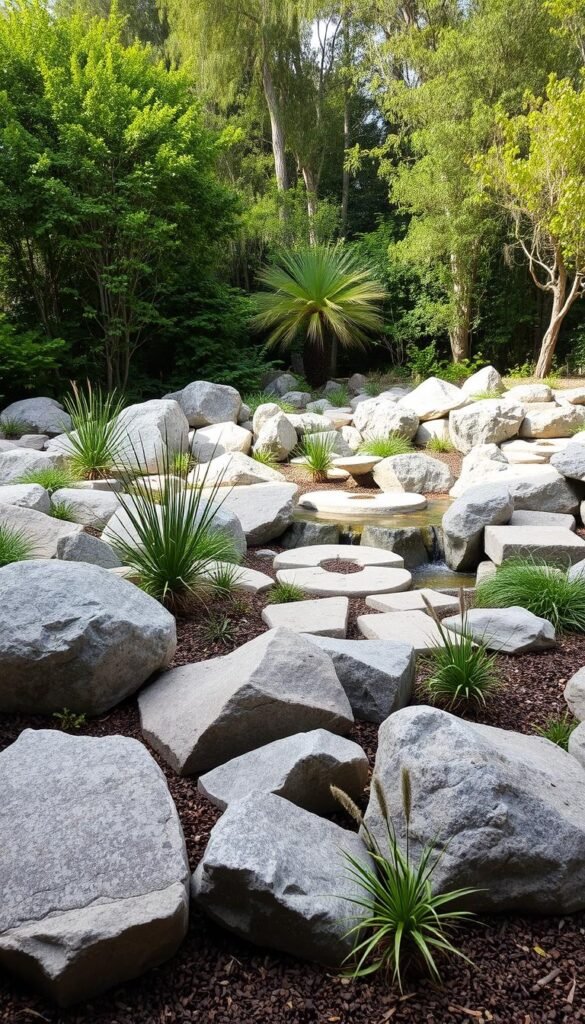
Incorporating Water Features for a Lush, Natural Appeal
Adding movement to your landscape brings tranquility and life to every corner. Stone-built elements like cascading fountains or shallow ponds blend durability with earthy charm, avoiding the wear-and-tear of metal or synthetic materials. Their timeless appeal grows richer with age, becoming a natural extension of your outdoor space.
Selecting and Placing Water Elements
Choose materials that match your yard’s existing textures. Flat slate works for sleek, modern basins, while rugged boulders suit cascading waterfalls. Burying one-third of larger stones ensures stability while creating a grounded look. A low-profile fountain can soften expansive areas, guiding the eye without overwhelming.
Enhancing the Sound and Movement of Water
Subtle trickles from stacked stones or gentle pond ripples add calming white noise. Position pumps near seating areas to amplify relaxation. For evening ambiance, pair flowing streams with strategic lighting to highlight water’s reflective qualities.
These features thrive in shaded nooks or sun-drenched spots, adapting to your environment. With thoughtful placement, you’ll craft a retreat that feels both intentional and effortlessly serene—a space where nature’s rhythm takes center stage.


