
Transforming ordinary dirt into thriving earth might seem challenging, but it’s simpler than you think. Healthy soil isn’t just dirt—it’s a living ecosystem teeming with worms, microbes, and beneficial insects. By working with nature instead of against it, you’ll create a foundation that supports vibrant plants and reduces reliance on store-bought solutions.
Did you know your soil’s structure is half mineral particles, a quarter water, and a quarter air? The remaining 5-10% is organic matter, which acts like a buffet for soil life. When you focus on feeding these organisms through compost or mulch, they’ll repay you by breaking down nutrients into forms plants can easily absorb. This approach builds resilience against pests and droughts while saving money over time.
Whether your ground feels sticky like clay or gritty like sand, simple chemical-free methods can improve its texture and fertility. Layering organic materials encourages earthworms to aerate compacted areas naturally. Over seasons, this process creates a self-sustaining environment where your tomatoes and zinnias flourish without synthetic additives.
The best part? Gardens nurtured this way attract 50% more pollinators and reduce pest issues by nearly a third. You’re not just growing plants—you’re cultivating a miniature wilderness that gets better every year.
Understanding Your Garden Soil Basics

The secret to lush growth isn’t just what you plant, but what lies beneath your feet. Your earth contains mineral particles, decomposed materials, and countless living creatures working in harmony. Let’s dig into what makes this underground world tick.
Exploring Soil Components and Organic Matter
Nearly half your dirt consists of mineral fragments from ancient rocks. These weathered particles determine texture – whether water drains quickly or pools on the surface. The real magic happens in the 5-10% that’s organic matter, acting like a sponge that holds moisture and feeds life below ground.
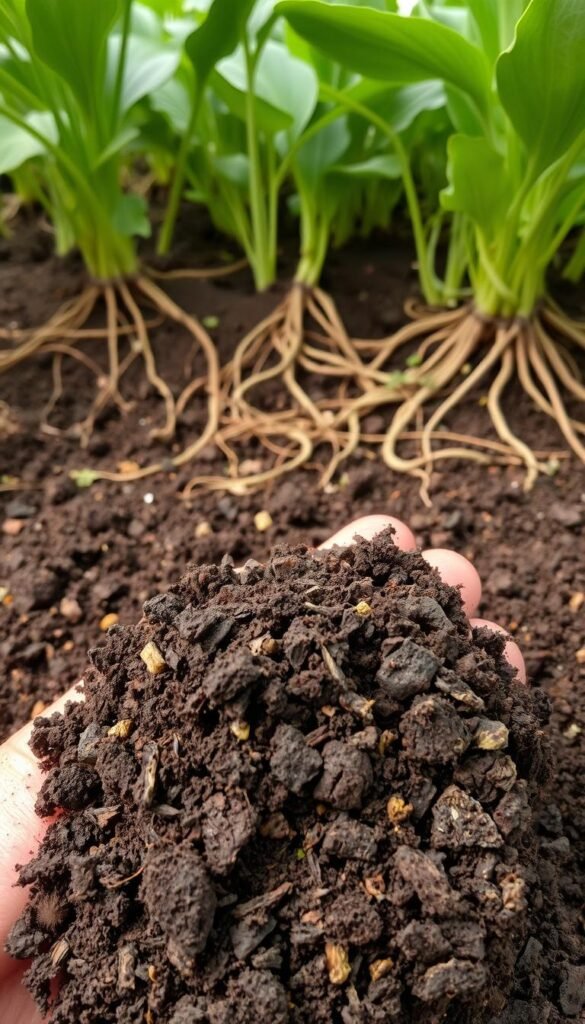
Here’s why that dark, crumbly humus matters:
- Traps 90% of its weight in water during dry spells
- Creates air pockets for roots to breathe
- Releases nutrients slowly over months
The Role of Soil Organisms in Garden Health
Your shovel might reveal earthworms, but millions of invisible helpers work harder. Bacteria and fungi transform dead leaves into plant food, while nematodes patrol for harmful pests. Did you know? A single teaspoon holds more microbes than people on Earth.
These tiny allies:
- Produce natural antibiotics against diseases
- Form partnerships with plant roots
- Break down chemicals into safe compounds
Chemical fertilizers disrupt this delicate balance, but organic methods let nature’s workforce thrive. When you feed the soil life, they’ll nourish your plants better than any bottle from the store.
Evaluating Your Native Soil Type

Your plants’ success begins with knowing what’s under your fingernails after gardening. Different earth types behave uniquely—some hold water like a sponge, while others let it slip through like sand through a sieve. Let’s explore how to decode your dirt’s personality.
Conducting Simple Soil Texture Tests
Rub moist earth between your fingers. Gritty? You’ve got sandy soil. Smooth as flour? That’s silt. Sticky like playdough? Hello, clay! For exact measurements, try the jar method:
- Fill a clear container ⅓ full with topsoil
- Add water, shake hard, then wait 24 hours
- Measure each settled layer with a ruler
Identifying Sand, Clay, and Silt Characteristics
Each soil type has distinct traits affecting your garden’s needs. Check this quick-reference table:
| Type | Texture | Drainage | Amendments Needed |
|---|---|---|---|
| Sand | Gritty | Too fast | Compost every 6 weeks |
| Silt | Powdery | Moderate | Mulch to prevent crusting |
| Clay | Sticky | Slow | Gypsum + organic material |
Most gardens have mixed soils. If your jar shows equal sand/silt/clay layers, you’ve got loam—the gardening gold standard! For other blends, adjust amendments based on your dominant type. Clay-heavy areas might need raised beds, while sandy spaces could benefit from frequent compost layers.
Starting a New Natural Garden: Building Fertile Soil from Scratch

Ever wonder why some plots burst with life while others struggle? The answer lies in partnering with nature’s underground workforce. When you nourish the microscopic helpers beneath your feet, they transform ordinary earth into a powerhouse of plant nutrition.
Why Natural Soil Building Works for You
Healthy earth becomes your garden’s best employee, working overtime to protect your plants. By feeding organic matter to soil organisms, you create a living network that:
- Recycles nutrients continuously
- Stores rainwater like a sponge
- Fights plant diseases naturally
This approach cuts fertilizer costs by up to 60% over three years. Your tomatoes will develop thicker stems, while flowers bloom longer through summer heatwaves. Earthworms till the ground for free, and fallen leaves become next season’s plant food.
Gardens managed this way adapt better to climate swings. During dry spells, moisture stays locked in the earth’s crumbly structure. When storms hit, water infiltrates instead of washing away your topsoil. Each season adds more organic material through decaying roots and mulch breakdown.
You’ll spend less time battling pests and more enjoying vibrant growth. Beneficial fungi form partnerships with plant roots, boosting nutrient uptake. Ladybugs and bees flock to these chemical-free zones, creating a buzzing ecosystem right outside your door.
Creating a Thriving Raised Bed Environment

Imagine harvesting veggies without bending over or fighting stubborn clay. Raised beds offer smarter growing spaces that work with your lifestyle. These elevated planters create ideal conditions for roots while saving your back from constant kneeling.
Benefits and Design Tips for Raised Beds
Four-foot-wide beds let you reach every plant without stepping on soil. Depth matters most—aim for 8-12 inches to accommodate vegetable roots. For clay-heavy areas, mix one part sand with two parts compost in your soil blend. This combo improves drainage while feeding earthworms.
Why choose raised garden beds?
- Warmer soil jumpstarts spring planting
- Targeted pest control protects specific crops
- Custom soil mixes suit blueberries or tomatoes
Step-by-Step Construction Guidelines
Start with untreated cedar boards or concrete blocks—durable materials that resist rot. Assemble a simple frame, then line the bottom with cardboard to smother weeds. Fill your new beds with layered organic matter: twigs, leaves, and quality topsoil.
Follow this clay soil recipe per shovel:
- 1 native soil
- 1 coarse sand
- 2 mature compost
Need visual guidance? Our raised bed construction tutorial walks through measuring, securing corners, and preventing wood rot. You’ll have fresh lettuce growing before the next rainfall!
Amending Your Soil with Organic Matter for Growth

The key to a thriving garden lies in enriching the earth with nature’s own amendments. By strategically adding organic materials, you create a self-replenishing system that feeds plants while improving earth structure. Focus on the top 6 inches—this active zone houses 85% of feeder roots and microbial activity.
Using Compost and Green Manures
Compost acts like a multivitamin for your plot. This decomposed material releases nutrients slowly while improving drainage in clay and water retention in sand. Mix 2-3 inches into planting beds each season. For organic garden success, try green manures like clover or rye. These cover crops suppress weeds while growing, then become nutrient-rich mulch when tilled under.
Incorporating Manures, Mulch, and Other Materials
Aged animal manures pack nitrogen but require proper handling. Let cow or chicken droppings cure for 6 months before use to prevent root burn. Mulch choices matter—grass clippings add nitrogen, while wood chips improve structure over time. Balance carbon-heavy materials with green waste using this guide:
| Material | Benefits | Best For | Application Tip |
|---|---|---|---|
| Compost | Balanced nutrients | All soils | Mix 3″ annually |
| Aged Manure | Nitrogen boost | Vegetable beds | Apply pre-planting |
| Leaf Mold | Moisture retention | Clay soils | Layer 2″ in fall |
| Straw | Weed suppression | Pathways | Combine with greens |
Timing matters. Add bulk materials in fall for winter decomposition. For sandy plots, refresh mulch every 8 weeks to maintain moisture. Clay gardens benefit from annual gypsum applications alongside organic matter. Watch earthworm activity—their presence confirms your amendments work!
Adjusting Soil pH for Healthy Plant Roots
The key to vibrant plants lies in mastering the invisible chemistry beneath your feet. Most nutrients become available when your earth hits the sweet spot between 6.5 and 6.8 pH. Think of it as tuning a radio—get the dial right, and your plants suddenly “hear” all the goodness you’ve added.
How to Test Your Soil pH
Grab an affordable test kit or digital meter to avoid guesswork. Spring or fall testing works best—simply mix soil samples from multiple spots. Results show whether your plot leans acidic (common east of the Mississippi) or alkaline (typical in western states).
Techniques for Raising and Lowering pH Naturally
For acidic soils: Sprinkle powdered limestone—3-4 lbs per 100 sq ft in sand, up to 10 lbs in clay. Wood ash acts faster but use sparingly (2 lbs max) to prevent overshooting. Alkaline soils? Ground sulfur becomes sulfuric acid via soil microbes. Apply 1-2 lbs per 100 sq ft based on texture.
Pair this knowledge with understanding plant nutrient needs for optimal results. Remember: pH shifts take months. Test annually and adjust gradually—your tomatoes’ roots will thank you with plump fruits!


