
Imagine crisp lines framing your flower beds that prevent weeds while adding timeless charm to your yard. Brick landscape borders offer surprisingly simple solutions for homeowners seeking polished outdoor aesthetics without professional costs.
This method works wonders whether you’re refreshing existing flower beds or designing new planting areas. You’ll need basic tools like a shovel and rubber mallet – no expensive equipment required. Most installations take under half a day, making it perfect for weekend warriors.
Two approaches suit different needs: a beginner-friendly sand base for flexibility, or mortar for permanent structures. Both methods create clean barriers that stop grass invasion and define your green spaces beautifully. Proper planning ensures straight lines and level placement, crucial for that professional finish.
Beyond functionality, these borders introduce textural contrast to your landscape design. The rich red tones of clay bricks complement various garden styles, from cottage charm to modern minimalism. Best of all, you’ll gain lasting results that evolve gracefully with your outdoor vision.
Understanding the Benefits of Brick Garden Edging

Brick garden edging brings structure and sophistication to any landscape. This classic solution acts like jewelry for your yard, framing flower beds while delivering practical advantages. Let’s explore how this method elevates both appearance and functionality.
Beauty That Grows With Time
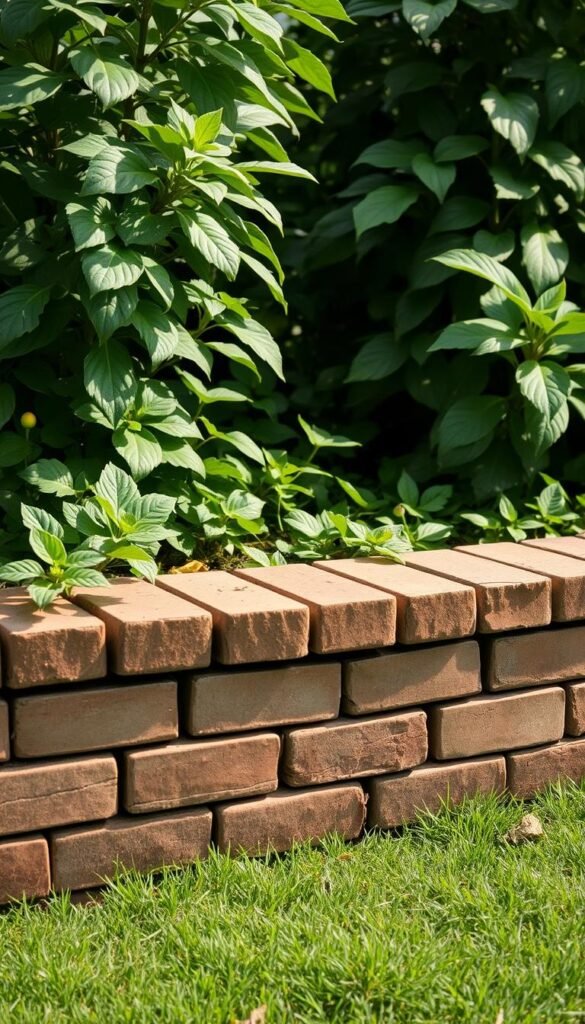
Freshly installed brick edging creates instant visual impact with clean lines that make plants pop. The real magic happens over seasons as bricks develop a warm patina, blending naturally with your evolving garden. This aging process adds character you can’t replicate with plastic or metal alternatives.
Unlike temporary solutions, brick borders maintain crisp edges through heavy rains and foot traffic. They create natural pathways that guide the eye through your landscape design. For those seeking customizable options, consider combining different installation methods to match your home’s architecture.
Nature’s Fence Against Invaders
Say goodbye to weekly border battles with creeping grass and weeds. Brick edging forms a physical barrier that stops invaders at the lawn’s edge. Your flower beds stay pristine while mulch remains contained – even during vigorous mowing sessions.
The raised profile helps prevent soil erosion and protects delicate plant roots. You’ll spend less time trimming edges and more enjoying your outdoor oasis. Best part? These benefits last for decades with minimal upkeep, making brick borders a smart long-term investment for any homeowner.
Essential Tools and Materials for Your Project

What separates wobbly edges from polished borders? The right combination of equipment and supplies. Whether you’re reshaping existing beds or starting fresh, these essentials ensure crisp results that hold their shape season after season.
Your Toolbox Heroes
A rubber mallet becomes your best friend for adjusting bricks without chipping. Pair it with a sharp shovel or lawn edger to carve clean trenches – crucial for stable placement. Two types of levels keep everything aligned: long models for straightaways and compact torpedo versions for curves.
Don’t forget measuring tapes for layout accuracy and gloves to protect your hands. Eye guards shield against flying debris when cutting materials. For under $10, these basics transform chaotic edges into intentional designs.
Building Blocks of Success
Quality bricks or stones form your border’s backbone. Paver sand lets you fine-tune heights while locking pieces in place – perfect for temporary setups. For permanent installations, mix mortar at a 4:1 sand-to-cement ratio.
Budget-conscious creators can repurpose old bricks or shop clearance materials. Local hardware stores offer building sand from $3 per bag and mortar mixes under $7. Whether choosing flexibility or permanence, these components adapt to your vision and budget.
Step-by-step guide to garden edges and borders DIY with raised bricks

Creating clean lines begins long before the first brick touches soil. Thoughtful layout design separates amateur attempts from polished results, giving your outdoor space intentional structure that withstands weather and time.
Blueprinting Your Border Design
Map your vision using bricks as temporary markers along the proposed edge. For organic curves, lay a garden hose on the ground – its flexibility helps shape flowing lines that mirror natural landscapes. This dry-run reveals material needs and prevents mid-project surprises.
Building Foundations for Lasting Results
Carve a trench measuring 2-3 inches deep, using your brick width as a depth guide. A lawn edger creates precise edges while removing excess soil. Test-fit bricks every 36 inches – they should sit halfway underground with consistent exposure.
Spread paver sand across the trench, compacting it with a tamper until firm. This layer becomes your adjustment tool – add more sand under low spots, remove it from high areas. Set bricks individually, tapping them with a rubber mallet until your level confirms perfect alignment.
Complete your installation by filling gaps with native soil, creating a seamless blend between lawn and border. The compacted earth locks bricks in place while allowing natural drainage around each unit.
Tips for Achieving a Durable and Professional-Looking Edge

Transform your landscape from haphazard to high-end with precision techniques that elevate brick edging from functional to fabulous. Small adjustments during installation make monumental differences in longevity and visual appeal.
Ensuring Level Placement with Proper Tools
Your secret weapon? A 4-foot carpenter’s level. Place it across three bricks at once to spot uneven areas instantly. Pro tip: Check alignment every 18 inches – it prevents cumulative errors that ruin straight lines.
Work in 3-brick segments, tapping each unit with a rubber mallet until the bubble stays centered. “Patience during leveling pays off in permanence,” says veteran landscaper Mara Whittaker. This method eliminates frustrating rework later.
Customizing Trench Depth and Edge Height
Control visibility by adjusting your trench depth. Shallow 1.5-inch digs let bricks stand tall for dramatic definition, while 3-inch depths create subtle guides that whisper sophistication.
| Trench Depth | Brick Exposure | Best For |
|---|---|---|
| 1.5″ | 3.5″ | Flower bed accents |
| 2.5″ | 2.5″ | Lawn separation |
| 3″ | 2″ | Subtle pathways |
For sloped gardens, alternate depths to maintain consistent brick tops. Use a story pole marked with desired heights to quickly verify multiple sections. This trick ensures uniformity across curved garden beds or angled layouts.
Remember: Compact sand under each brick individually. This granular approach prevents future sinking better than batch preparation. Your brick garden edge stays crisp through seasons when each piece gets personalized attention.
Adapting the Process to Fit Your Unique Garden Layout

Your garden’s personality shines through customized borders that flow with your landscape’s natural contours. While straight lines work for formal spaces, organic shapes add whimsy and depth to casual outdoor areas. Let’s explore how to bend the rules while maintaining structural integrity.
Mastering the Art of Curves
Flexible layouts begin with a garden hose – your secret weapon for sketching smooth arcs. Lay it on the grass to visualize flowing edges before committing to digging. When working with curves, swap long levels for compact 9-inch torpedo models that fit tight spaces.
Irregular beds become design features when you alternate brick spacing. Leave 1/4-inch gaps between units on sharp turns – these small breaks allow seamless bending. For stubborn angles, score bricks with a chisel and snap them cleanly using a brick hammer.
| Landscape Feature | Trench Adjustment | Pro Tip |
|---|---|---|
| Tree Roots | Shallow 1″ depth | Use mortar for stability |
| Slopes | Step-down trenches | Check every 3 bricks |
| Clay Soil | Add gravel base | Improves drainage |
Sandy soils demand extra compaction – tamp every layer twice. In high-traffic lawn areas, set bricks 1/2-inch deeper to withstand footfalls. Around established plants, create protective buffers by leaving 6-inch gaps between edging and stems.
These adaptable methods let your creativity flourish while keeping grass contained. Your unique layout becomes a functional artwork that evolves with your growing space.
Final Thoughts on Creating a Stunning Outdoor Space
Your transformed yard now boasts crisp definition that marries practicality with visual appeal. Those rustic bricks framing your garden beds do more than look pretty – they’re silent warriors against grass invasion and soil erosion.
This project unlocks more than just a beautiful border. You’ve gained skills applicable to future garden upgrades like stone pathways or paver patios. The techniques mastered here – proper base preparation, material selection, precision alignment – form the foundation for countless landscaping ideas.
Notice how your property’s curb appeal increased overnight? That’s the magic of brick edging working with your existing lawn and plants. As seasons change, these durable accents will develop character while maintaining their structural integrity.
Remember: Great outdoor spaces grow with their caretakers. Your new brick features will support evolving designs for decades, proving that smart investments in quality materials yield timeless results. Now step back and admire how intentional details elevate your entire yard.


