
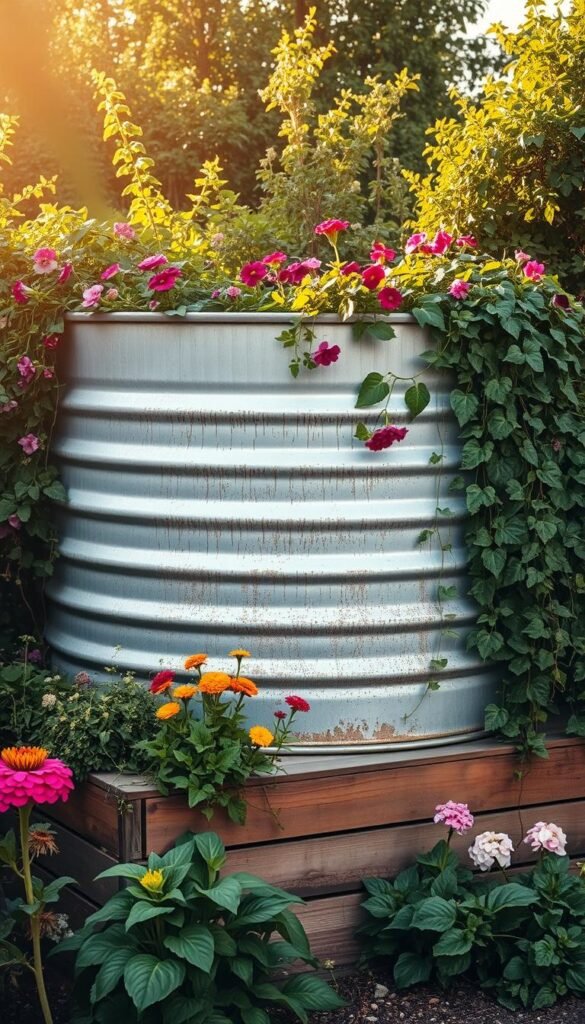
Looking for a sturdy, low-maintenance alternative to wooden planters? Galvanized metal containers offer a sleek solution. These durable units, often called stock tanks, resist rot and pests while lasting years longer than traditional materials.
Their deep design—like the popular 2’x2’x6′ size—provides ample space for roots. Crops like pumpkins and watermelons thrive in the 24-cubic-foot capacity. Plus, the 2-foot height reduces back strain, making planting and harvesting easier.
Beyond function, these tanks add modern flair. Line driveways or define borders with their clean metallic finish. Ready to start? We’ll cover drainage tips, soil prep, and filling tricks for your DIY project.
Why Choose Stock Tank Gardening for Your Raised Beds?

Transform your outdoor space with durable metal planters that outlast traditional wood. Unlike wooden beds, these containers resist rot, pests, and weather damage, ensuring years of hassle-free use. Their sleek design blends seamlessly into modern landscapes.
Durability Meets Low Maintenance
Wooden beds warp and decay over time, but galvanized metal stands strong. No staining or sealing required—just occasional rinsing. Save time and money with planters that thrive in rain, snow, and scorching sun.
Smart Designs for Small Areas
Even a side yard can host a thriving garden. Arrange 6’x2′ tanks in rows for crops or stack shorter ones vertically. One Subaru can transport four empty units—ideal for urban gardeners.
| Feature | Metal Planters | Wooden Beds |
|---|---|---|
| Lifespan | 10+ years | 3-5 years |
| Maintenance | Minimal | Annual sealing |
| Customization | Powder-coated colors | Limited finishes |
*Pro tip*: Use tanks as patio borders or focal points. Their reflective surfaces amplify sunlight for heat-loving plants.
Gathering Your Stock Tank Garden Supplies

The secret to lush growth? Start with the perfect soil blend and sturdy tools. Whether you’re a beginner or a seasoned gardener, having the right materials ensures your plants thrive from day one.
Essential Tools: Drills, Bits, and Safety Gear
You’ll need a few basics to prep your planter. A cordless drill with a ½-inch metal bit creates drainage holes easily. Don’t forget gloves and safety goggles—metal edges can be sharp!
Choosing the Right Soil and Amendments
Skip pure top soil—it turns dense like concrete when dry. Instead, aim for a balanced mix: equal parts peat moss, garden soil, and compost. For extra nutrients, add organic amendments like:
- Coast of Maine compost (rich in organic matter)
- Chicken manure (boosts nitrogen)
- Perlite or vermiculite (improves aeration)
Need to fill a 2’x2’x6′ planter? Calculate about 6 cubic feet of soil. Layer the bottom with coarse gravel for drainage, then add your blend. Your plants will thank you!
Preparing Your Stock Tank: Drilling Drainage Holes

Proper drainage is key to keeping your plants healthy in metal containers. Without holes, water pools at the bottom, risking root rot. A few minutes of prep work ensures your garden thrives all season.
Step-by-Step Hole Placement
Mark holes every 6–8 inches along the bottom edges. Use a ½-inch drill bit for optimal water flow. Secure the tank with clamps to prevent spinning while drilling.
For extra protection, place mesh over holes to keep soil in. This trick stops debris from clogging drainage paths.
Safety Tips for Working with Metal
Metal edges can be sharp, so handle with care. Follow these steps to stay safe:
- File rough edges with 80-grit sanding discs.
- Use Neodymium magnets to collect loose shards.
- Wear gloves and goggles to shield your hands and eyes.
Pro tip: Drill on calm days to avoid wind-blown debris. After drilling, inspect for burrs—smooth edges mean less cleanup later.
Selecting the Perfect Location for Your Stock Tank Beds

Finding the right spot for your garden setup makes all the difference. A sunny, level area ensures plants thrive while minimizing upkeep. Before drilling or filling, consider these key factors.
Sunlight and Accessibility Considerations
Most veggies need 6–8 hours of daily sun. Observe your yard’s light patterns over a few days. Avoid shaded spots near trees or buildings.
Place planters where you’ll easily reach them for watering and harvesting. Leave 2–3 feet between units for walking space.
Leveling and Stabilizing the Ground
Uneven ground causes water pooling. Use a 4-foot carpenter’s level to check slopes. For minor adjustments, add a layer of crushed granite—it’s sturdier than pea gravel.
Pro tip: Elevate planters with 2x4s in soggy areas. Anti-tip brackets secure them on hills. Prevent frost heave by adding a 4-inch gravel base ($75 covers four units).
- Crushed granite vs. pea gravel: Granite locks in place better.
- DIY leveling: Use sand for fine-tuning.
- Sloped yards: Terraced layouts prevent sliding.
Filling Your Stock Tank: Smart Soil Layering

Give your plants the perfect foundation with smart soil layering techniques. The right blend ensures roots grow deep and strong, while organic fillers cut costs. Start with a base layer for drainage, then build up nutrient-rich tiers.
Using Organic Fillers to Save Money
Fill the bottom third with lightweight materials like coconut coir or shredded leaves. These organic fillers reduce soil volume and improve aeration. Bonus: they decompose over time, feeding your plants naturally.
The Ideal Soil Mix for Healthy Plants
Aim for a balanced 1:1:1 mix of garden soil, compost, and peat moss. This combo retains moisture without waterlogging. For extra punch, add:
- Worm castings (boosts microbial activity)
- Mycorrhizal fungi (strengthens root systems)
- Espoma Organic Mix (pre-balanced nutrients)
Test your soil’s pH yearly. Adjust with lime (to raise) or sulfur (to lower). Refresh the top 6 inches each spring with new compost to keep plants thriving.
Planting in Your Stock Tank Raised Beds
Maximize your harvest with smart planting strategies in metal containers. Whether you’re growing herbs or sprawling vines, matching crops to your planter’s depth ensures thriving roots. Follow these tips to make the most of your space and sunlight.
Best Vegetables for Deep and Shallow Containers
Deep-rooted plants like tomatoes and carrots need 18+ inches of soil. Shallow tanks (under 12 inches) suit lettuce, radishes, and strawberries. Group crops by depth to simplify watering and care.
For a 12 sq ft surface area, try these pairings:
- Deep beds: Zucchini + bush beans (vertical trellis saves space).
- Shallow beds: Spinach + green onions (fast-growing companions).
Square-Foot Gardening Techniques
Adapt Mel Bartholomew’s method by dividing your bed into 1-foot grids. Cedar lath strips make customizable dividers. This way, you can grow 16 carrots or 4 kale plants per square.
Boost yields with high-density planting:
- Train cucumbers up a trellis to free up ground space.
- Interplant quick growers (like arugula) between slower crops (e.g., peppers).
“Vertical gardening doubles your harvest without expanding your footprint.”
Watering Your Stock Tank Garden
Keeping your plants hydrated doesn’t have to be a guessing game. Whether you prefer hands-on care or automated systems, the right approach ensures healthy growth. Start by checking your drainage—those holes at the bottom tank are your first defense against overwatering.
Hand-Watering vs. Drip Irrigation
Hand-watering lets you monitor soil moisture closely. Use a watering can with a long spout to target roots. For busy gardeners, drip systems deliver steady hydration. A basic kit ($25) hooks to a timer, saving up to 50% water.
Pro tip: Place terra cotta spikes near roots. They release water slowly, preventing dry spells.
Preventing Overwatering and Root Rot
Yellow leaves or fungus gnats? Your plants might be drowning. Fix soggy soil with these steps:
- Unclog drainage holes with a pipe cleaner.
- Mix hydrogen peroxide (1 tbsp per cup of water) to oxygenate roots.
- Add a raised bed liner (like landscape fabric) to improve airflow.
“Test soil moisture by sticking your finger 2 inches deep. If it’s damp, skip watering.”
Seasonal checks matter too. Clear debris from holes every spring and fall. Your garden will reward you with lush growth!
Maintaining Your Stock Tank Garden Through the Season
Keep your thriving garden in top shape with simple seasonal care. Regular upkeep prevents weeds, pests, and soil depletion. A few minutes each week ensures your plants stay vibrant all year.
Weeding and Soil Refreshing Tips
Pull weeds early to stop root competition. A hori-hori knife slices deep without disturbing nearby plants. Refresh soil each spring with compost—just 2 inches boosts nutrients.
For heavy clay mixes, add perlite to improve drainage. Test soil pH yearly; most veggies thrive at 6.0–7.0. Quick fixes:
- Crushed eggshells raise calcium levels.
- Pine needles acidify soil for blueberries.
Dealing with Pests and Critters
Slugs hate copper. Wrap DIY tape around planter edges to create a barrier. For aphids, mix 1 tsp neem oil with water—spray leaves weekly.
Deter rabbits with motion-activated sprinklers. Bird netting protects berries without harming wildlife. Companion planting helps too:
- Marigolds repel nematodes.
- Basil keeps mosquitoes away.
“Healthy soil grows healthy plants—skip synthetic pesticides to protect pollinators.”
Creative Layouts and Design Ideas
Turn functional planters into eye-catching focal points with smart layouts. Whether you’re designing a compact urban area or a sprawling backyard, strategic arrangements elevate both aesthetics and usability.
Grouping Tanks for Visual Impact
Cluster beds in odd numbers (3, 5, or 7) for balance. Leave 2′ between units for airflow and easy access. Try these setups:
- Tiered groups: Place taller planters behind shorter ones for depth.
- Geometric patterns: Arrange square tanks in a checkerboard way.
- Color blocks: Use powder-coated planters to define zones.
Adding Functional Pathways and Seating
Define walkways with decomposed granite or smooth pavers. These materials work better than bark mulch—they resist washing away during storms. For ADA compliance, keep paths 36″ wide.
Integrate seating by:
- Flanking a bed with built-in benches (cedar or metal).
- Adding movable stools between planters for flexible lounging.
- Using Serena & Lily’s weather-resistant side tables for drinks.
“Design gardens like rooms—use ‘walls’ of planters and ‘floors’ of gravel to create outdoor living spaces.”
Start Your Stock Tank Garden Adventure Today!
Boost your harvest with durable, low-fuss metal beds. These planters resist rot, save your back, and double your yield in small spaces. Perfect for tomatoes, herbs, or flowers.
Spring’s the ideal time to begin. Grab supplies from Tractor Supply or local farm stores. Share your progress with #StockTankStories—inspire others!
One gardener grew 50 lbs of veggies in a 6’ planter last year. Your turn! With minimal upkeep and maximal rewards, these beds make growing simple.


