
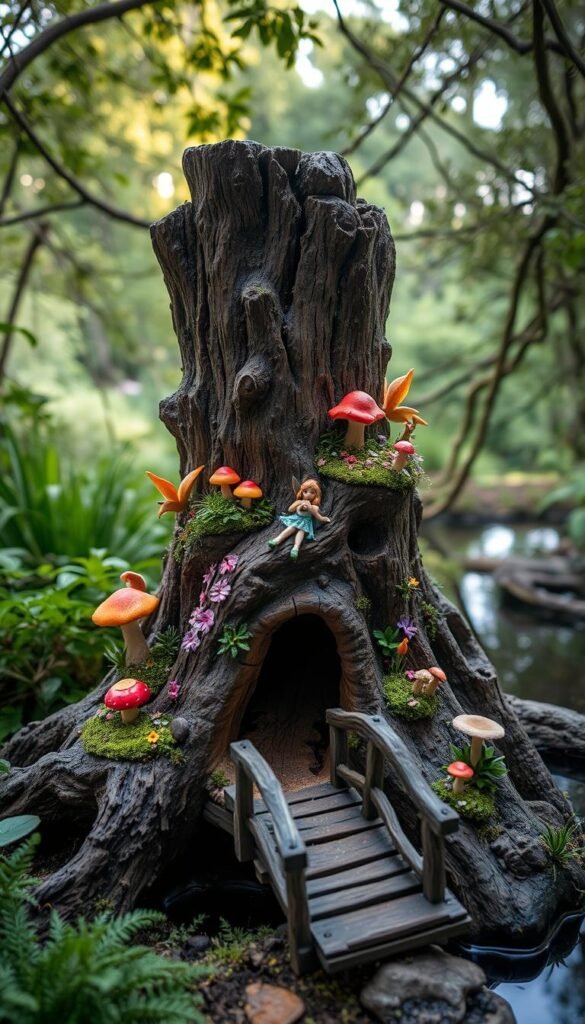
That old stump in your yard doesn’t have to be an eyesore. With a little creativity, it can become the star of your outdoor space. Imagine transforming weathered wood into a miniature world where fairies might peek through tiny windows or rest on mushroom stools. This DIY project blends practicality with pure magic.
Instead of paying for stump removal, you’ll create something far more special. A customized fairy garden adds whimsy and personality to your landscape while giving new purpose to natural materials. These charming displays have surged in popularity as homeowners discover their versatility – they work equally well in rustic cabins and modern suburban gardens.
You’ll love how this project sparks conversations with neighbors and delights kids. The best part? No two creations look alike. Whether you add miniature furniture, tiny pathways, or glowing LED lights, your design will reflect your unique style. Let’s explore how to turn that forgotten stump into an enchanting focal point that makes your yard unforgettable.
Gathering Inspiration and Materials

Your backyard holds hidden potential for enchantment – all it needs is the right combination of creativity and practical planning. Let’s start by choosing a natural canvas and gathering supplies that’ll bring your miniature world to life.
Selecting the Ideal Tree Stump
Look for a sturdy stump between 2-3 feet tall with at least 12 inches of width. This size gives enough surface area for carving details while staying proportional to fairy-sized designs. Check for:
- Solid wood texture (no soft spots or cracks)
- Flat top for stable construction
- Clear sightlines from your patio or pathways
Test the wood’s strength by pressing a screwdriver into it – if it sinks easily, choose a different stump. Position your project near seating areas or garden borders for maximum enjoyment.
Collecting Fairy Garden Accessories and Supplies
Combine functional tools with whimsical decorations to balance durability and charm. Your essential toolkit includes:
- Weatherproof exterior paint
- Miniature doors/windows (plastic or resin)
- Solar-powered LED string lights
For a personal touch, craft pathways using pebbles from your driveway or create mushroom stools from polymer clay. Local craft stores often carry affordable mini accessories, while dollar stores offer tiny planters perfect for fairy garden landscapes.
Preparing the Tree Stump for Transformation

Your weathered stump is about to get a magical makeover. Proper groundwork ensures your creation withstands rain, sun, and curious critters. Let’s create a durable canvas for your miniature masterpiece.
Cleaning and Sanding the Stump
Start by scrubbing the surface with a stiff-bristle brush. Remove all loose bark and debris – pay special attention to cracks where dirt hides. Wipe down with a damp cloth, then let it dry completely.
Grab 80-grit sandpaper to tackle rough patches. Work in circular motions until splinters disappear. Switch to 120-grit for final smoothing – this creates the perfect base for paint or stain. Always wear gloves and safety goggles!
Applying Sealant and Additional Preparations
Choose a clear, weatherproof sealant for natural wood lovers. Apply two thin coats with a foam brush, drying 4 hours between layers. For painted designs, use a primer instead to help colors pop.
Inspect for soft spots or insect holes. Fill gaps with exterior-grade wood filler using a putty knife. Let everything cure 24 hours before decorating. This crucial step prevents future warping and keeps your fairy garden looking fresh for seasons.
Carving Windows and Doors into the Stump

Carving transforms your stump into a storybook setting. This phase combines precision with playful design – where fairy house charm meets woodworking basics. Let’s create openings that look like they’ve grown naturally from the tree itself.
Marking and Measuring Openings
Start by visualizing your miniature home. Use a ruler to mark window heights at 4-6 inches from the base. For doors, leave 1-inch margins from stump edges. Trace shapes with pencil first – arched tops add whimsy, while square frames suit modern designs.
Check proportions by stepping back 3 feet. Adjust marks until the layout feels balanced. This step prevents awkward spacing that could make your fairy dwelling look artificial.
Safe Cutting and Detail Carving Techniques
Secure the stump before cutting. Use a coping saw for straight lines – make shallow passes to control depth. Switch to rotary tools for circular windows. Always cut with the wood grain to prevent splintering.
Chisels refine edges after rough cuts. Hold tools at 45-degree angles for clean results. Sand every opening with 220-grit paper until smooth. Remember: safety glasses stay on until all wood dust settles!
Install pre-made shutters using exterior-grade glue. Let cure overnight before adding flower boxes or tiny signs. Your diy creation now has character that makes neighbors do double-takes.
Painting and Decorating Your Fairy House

Now comes the fun part – adding personality to your woodland creation. This stage lets your imagination run wild while keeping your design rooted in nature’s palette. The right combination of colors and textures will make your fairy house look like it sprouted naturally from the landscape.
Choosing Color Schemes and Exterior Paint
Start with a base coat that matches your garden’s vibe. Earthy greens blend with forest themes, while soft blues suggest coastal charm. Use exterior-grade acrylic paint for durability. Pro tip: Dab a bit of contrasting color on window frames to make them pop.
Grab these tools for best results:
- 2-inch angled brush for large surfaces
- Detail brushes for trim work
- Painter’s tape for crisp edges
Let each layer dry completely – about 2 hours between coats. Test colors on scrap wood first. Darker shades hide imperfections, while pastels highlight delicate carvings.
Incorporating Natural Decor Elements
Transform ordinary tree stump features into magical details. Press moss into crevices using waterproof glue for instant age. Arrange pebbles as stepping stones leading to your tiny door. Twigs become perfect fences when cut to 3-inch lengths.
Try these DIY ideas:
- Turn acorn caps into flower pots
- Use birch bark for roofing shingles
- Create a mini pond with resin and blue glass beads
Add seasonal flowers in tiny planters near windows. For year-round color, use weather-resistant silk blooms. Your creation will look lived-in and ready for fairy tenants!
Installing Lighting and Enhancing the Ambiance

As twilight falls, your fairy house awakens with a soft glow that captivates both young and old. Strategic lighting transforms your creation from charming daytime display to mesmerizing nighttime wonder. Let’s illuminate your woodland masterpiece.
Embedding Solar-Powered and Fairy Lights
Start by marking spots for lights using chalk. Drill 1/4-inch holes with a drill bit slightly larger than your light strands. Tuck solar-powered LEDs into crevices – their warm white glow mimics fireflies at night.
| Light Type | Best Placement | Weather Resistance |
|---|---|---|
| Solar Path Lights | Along Stump Base | High |
| Fairy String Lights | Window Frames | Medium |
| Battery Tea Lights | Indoor Spaces | Low |
Angle solar panels southward for maximum sun exposure. Hide wires under moss or miniature shrubs. “Lighting is the fairy dust of garden design,” as one enthusiast notes – use it to highlight your tree stump‘s best features.
Placing Accessories for Magical Effects
Enhance your garden‘s glow with reflective surfaces. Position mirrored tiles to bounce light into shadowy areas. Cluster crystal chunks near pathways – they’ll sparkle like dewdrops in moonlight.
- Replace batteries every 3 months
- Clean solar panels weekly
- Use clear silicone to secure loose wires
Add motion-activated lights near doors for surprise reveals. Your DIY project now shines as a beacon of creativity, proving even weathered stumps can host extraordinary magic after dark.
Turning a Tree Stump into a Fairy Garden Focal Point
Your tree stump tells its own story – let your design highlight its natural quirks. Begin by studying its shape and texture. Does it slope like a hillside or stand tall like a tower? Sketch ideas that work with its features, not against them.
Step-by-Step Assembly and Design Tips
Build rock planters using flat stones from your yard. Stack them in rings, alternating sizes for stability. Press soil between layers to lock them in place. Add drought-tolerant plants like sedum or creeping thyme – they thrive in tight spaces.
Keep decorations simple at first. A tiny bench under the “window” or a pebble path leading to the door creates charm without clutter. For seasonal flair, swap accessories like mini pumpkins or evergreen sprigs. Check out these creative ideas to spark your vision.
Remember: your fairy garden grows with you. Add one new element each season – maybe a twig bridge this fall or a resin pond next spring. Let nature guide your diy project, and watch magic take root where wood meets wonder.


