
Growing fresh vegetables and flowers becomes simpler when your planting space works with you, not against you. Elevated planters let you control soil quality and skip the backbreaking work of traditional plots. They warm faster in spring, letting you plant earlier and harvest longer. For those with limited mobility or small yards, these structures turn tricky spaces into thriving green zones.
The unique curved layout of a U-shaped design puts every plant within arm’s reach. No more stepping on soil or stretching awkwardly—just natural pathways and easy access. This setup reduces strain on joints while keeping dirt loose and healthy. Customizable heights make tasks like weeding or watering comfortable whether you’re standing or seated.
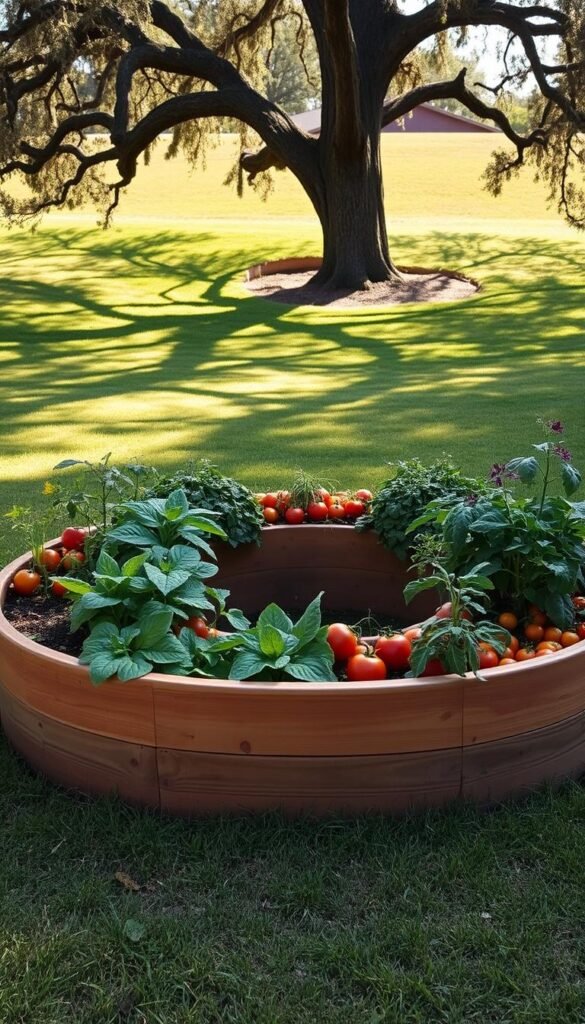
Want to maximize growing space without sacrificing style? The open-center shape creates a focal point while fitting more crops in less area. You’ll spend less time maintaining your plot and more time enjoying it. If you’re new to this method, our guide on how to build a raised bed breaks down the basics.
From better drainage to fewer weeds, this approach solves common frustrations. It’s ideal for urban balconies, sprawling backyards, or wheelchair-friendly setups. Let’s explore how smart design can transform your outdoor experience—one seed at a time.
Introduction to Raised Bed Gardening

Elevated planting systems turn tricky spaces into thriving green zones by lifting plants above challenging ground conditions. Unlike traditional plots, these structures let you control every aspect of your growing environment—from soil composition to drainage patterns. They’re perfect for patios, slopes, or areas with poor native earth quality.
What Makes These Planters Unique
You start with a blank slate—literally. Fill your structure with a custom mix of topsoil and compost, avoiding the clay-heavy or rocky ground beneath. This method prevents weeds from creeping in and stops soil compaction caused by foot traffic. No more guessing games about what’s lurking in your dirt!
Curved Layouts for Maximum Efficiency
The open-center design creates a natural workflow. You can tend to herbs on one side and tomatoes on the other without twisting your body. Materials matter too—compare options to find your best fit:
| Material | Lifespan | Cost | Best For |
|---|---|---|---|
| Cedar Wood | 10-15 years | $$ | Natural aesthetics |
| Galvanized Metal | 20+ years | $$$ | Modern spaces |
| Fabric | 3-5 years | $ | Temporary setups |
Urban gardeners love how these systems conquer small areas. A square-foot gardening layout fits perfectly in curved designs, letting you grow more in less space. For step-by-step building tips, check our guide on constructing durable planters.
Benefits of Raised Bed Gardening for Accessibility and Productivity

Say goodbye to back pain and hello to bountiful harvests with smart garden solutions. These elevated systems tackle common challenges while boosting your growing potential. Let’s break down how they improve both your comfort and your crops’ performance.
Ergonomic Advantages for You
Working at waist height changes everything. No more kneeling in mud or straining to reach distant plants. Customizable heights let you tend to herbs while standing or prune tomatoes from a seated position.
Less bending means more energy for enjoyable tasks like harvesting. Pathways stay clean since you’re not trampling soil. This setup works wonders for gardeners with arthritis or limited mobility.
Enhanced Crop Health and Soil Quality
Your plants thrive when you control their environment. Start with weed-free bagged soil mixed with compost for instant fertility. Unlike ground plots, these systems prevent waterlogging—roots get oxygen without drowning.
Pests struggle to climb tall walls, giving your greens natural protection. Want to maximize yields? Pair this method with a square-foot garden plan for strategic spacing. You’ll see:
- Deeper root growth from loose, nutrient-rich earth
- Faster warming soil for extended growing seasons
- Precise water delivery to prevent drought stress
Consistent results come from balancing drainage and moisture retention. Test different soil blends until you find your garden’s sweet spot.
U-Shaped Raised Garden Beds: Effortless Reach and High Productivity

Smart design turns ordinary plots into productivity powerhouses. By focusing on human movement and plant needs, these layouts let you work smarter—not harder. Let’s break down what makes this approach stand out.
Design Innovations and Efficiency
Your arm’s length dictates the ideal width. Keep interior sections under 4 feet wide—you’ll reach the center without stepping on soil. Shorter boards (6 feet max) for sides stay sturdy over time, resisting warping from moisture.
The open-center shape creates three planting zones with distinct purposes. Grow heat-loving veggies on sun-facing curves, herbs in shaded corners, and climbers along vertical supports. Compared to rectangle beds, this layout adds 30% more growing space in the same footprint.
| Feature | Traditional Beds | Curved Layout |
|---|---|---|
| Accessible Plants | 75% within reach | 100% accessible |
| Soil Protection | Foot traffic common | Zero compaction |
| Harvest Efficiency | Multiple steps needed | Single central path |
Curved corners create microclimates. Morning sun warms one side, while afternoon shade cools the opposite. This lets you grow blueberries and basil in the same bed garden setup. Trailing plants like strawberries spill beautifully over angled edges.
With every plant within 24 inches of a path, maintenance becomes a breeze. You’ll spend less time wrestling with weeds and more time enjoying your thriving green oasis.
Planning Your U-Shaped Garden Layout
Smart spatial planning transforms your growing area into an efficient, accessible paradise. Start by measuring your yard’s usable space—even maximizing small spaces can yield surprising results. Consider sunlight patterns and existing trees that might cast shadows during peak growing hours.
Determining the Ideal Size and Shape
Height matters more than you think. For most gardeners, lifting soil 6-8 inches above ground level improves drainage without requiring extra materials. Those needing seated access should aim for 24-27 inches—standard wheelchair clearance.
Keep each arm of the U under 4 feet wide. This lets you reach every plant from the outer pathways. Use this quick reference table to match dimensions with your needs:
| User Type | Recommended Height | Key Features |
|---|---|---|
| Adults Standing | 12-18 inches | Knee-friendly access |
| Wheelchair Users | 24-27 inches | Underclearance space |
| Children | 6-12 inches | Low sides for safety |
Pathways between beds should be at least 2.5 feet wide—enough for a wheelbarrow or kneeling stool. Curved corners save space compared to sharp angles, letting you fit more plants in tight areas.
Choose rot-resistant wood boards cut to 6-foot lengths for stability. This prevents warping while allowing easy adjustments if you expand your garden later. Remember: Your layout can evolve as your skills grow!
Selecting Materials and Tools for Your Garden Bed

What separates a temporary plot from a lasting growing space? Your choice of materials determines durability, safety, and maintenance needs. Let’s break down options for every budget and skill level.
Comparing Wood, Metal, Bricks, and Fabric
Natural wood remains the go-to for its affordability and ease of use. Cedar resists rot for 10-15 years, while pine offers a budget-friendly start (3-5 years). Metal panels outlast both—galvanized steel shrugs off rust for 50+ seasons. Bricks and pavers create permanent installations that blend with your home’s style, though costs run higher.
| Material | Cost | Lifespan | Best Fit |
|---|---|---|---|
| Cedar Wood | $$ | 10-15 yrs | Natural look |
| Galvanized Metal | $$$ | 50+ yrs | Modern spaces |
| Fabric Bags | $ | 3-5 yrs | Renters |
Fabric grow bags let you test layouts before committing. They’re lightweight and foldable—ideal for patios or durable U-shaped configurations.
Choosing the Right Tools for Installation
Your toolkit depends on materials. Wood requires:
- Circular saw for cutting boards
- Drill with outdoor-grade screws
- Staple gun for landscape fabric
Metal beds need tin snips and protective gloves. For brick blocks, grab a trowel and leveling sand. Always avoid pressure-treated lumber near edible plants—opt for naturally rot-resistant options.
Calculate quantities using your bed’s dimensions. A 6’x3’ wooden frame needs twelve 2×6 boards. Add 10% extra for mistakes. With the right tools and planning, you’ll build a structure that grows with your skills.
Step-by-Step Guide to Building Your Raised Garden Bed

Transform your outdoor space into a thriving plant haven with these straightforward construction steps. Whether using wood planks or cinder blocks, proper preparation ensures your structure lasts for seasons.
Preparing the Site and Assembling Blocks or Boards
Mark your U-shaped footprint using stakes and string. Remove existing grass by:
- Digging 2″ deep with a spade
- Spraying 20% vinegar on stubborn weeds
- Raking debris for clean ground
| Method | Time Required | Best For | Notes |
|---|---|---|---|
| Hand Digging | 2-4 hours | Small areas | Preserves topsoil |
| Herbicide | 1 week | Large plots | Use organic options |
Aerate the soil beneath your future bed using a broadfork. This lets roots penetrate deeper while improving drainage. For block constructions:
“Position your first three 8x8x16 blocks at the sunniest end—they’ll anchor the structure naturally.”
Assemble wooden frames with galvanized corner brackets. Check levelness every 12″—add sand under low spots. Curved corners need angled cuts: mark boards at 22.5° for smooth transitions.
Secure metal stakes through pre-drilled holes in wood frames. For block beds, fill hollows with gravel before adding soil. This prevents shifting during heavy rains.
Preparing the Perfect Soil Mix for High-Yield Gardens
Your plants’ success starts below the surface. The right blend of nutrients and texture gives roots room to spread while holding moisture where it’s needed most. Unlike ground plots, you control every ingredient—no surprises from existing dirt.
Topsoil, Compost, and Amendment Ratios
Aim for 60% quality topsoil as your base. Pair it with 40% plant-based compost for immediate fertility. Got clay-heavy earth? Mix in coarse sand—one part per five parts soil—to improve drainage.
| Component | Role | Pro Tip |
|---|---|---|
| Topsoil | Structure | Buy screened, weed-free bags |
| Compost | Nutrition | Use 2-3 types for diversity |
| Sand | Drainage | Only if native soil is dense |
Bulk deliveries save money for large projects. For small beds, bagged blends work well. Test your mix by squeezing a handful—it should crumble easily, not form a hard ball.
Refresh compost annually to maintain nutrients. Your greens will grow faster, resist pests better, and reward you with fuller harvests. Now get digging—your dream garden awaits!


