Got limited room but big dreams of fresh veggies and vibrant blooms? You’re not alone. Many plant lovers are discovering how creative layouts and smart designs turn cramped areas into lush, productive spaces. By directing plants upward instead of outward, you’ll maximize every square foot while keeping maintenance simple.
Why does this approach matter? For starters, it brings your harvests to eye level—no more bending or kneeling to pick tomatoes. It also lets you grow more in less room. Imagine cucumbers climbing a rustic ladder or flowers cascading down a repurposed pallet. Even better? Many setups cost almost nothing when using materials like old fencing or bamboo poles.
Discover how DIY trellises and elevated planters can transform balconies, patios, or narrow side yards. These methods aren’t just practical—they add visual interest to your outdoor space. You’ll learn which crops thrive when grown vertically and how to pair different techniques for year-round color and flavor.
We’ll walk through budget-friendly options that require basic tools, perfect for renters and homeowners alike. Whether you’re nurturing herbs in containers or training peas up a wire grid, smart design makes fresh, homegrown food possible anywhere. Let’s dig into the details!
Why Urban Gardening DIY Projects: Vertical Trellises, Raised Beds, and More Matter

Living in a city doesn’t mean sacrificing fresh greens or colorful blossoms. Smart layouts let you work with what you’ve got, turning tight corners into thriving ecosystems. Let’s explore how these methods make every inch count while boosting your success.
Benefits for Small Spaces
Growing upward solves the biggest challenge: room. Vining crops like beans or tomatoes reach sunlight without hogging precious ground area. Air flows freely around leaves, cutting mold risks. Plus, harvesting becomes easier when you stand tall instead of stooping.
Raised planters take this further. They let you control soil quality and drainage—key for healthy roots. For those with stiff joints or limited mobility, a step-by-step raised bed guide shows how to build comfortable heights. No more aching backs after weeding!
Enhancing Your Green Thumb
These methods teach valuable skills. You’ll learn to pair plants with proper supports—peas love nets, while squash needs sturdy frames. Success breeds confidence, inspiring bigger experiments like edible walls or tiered planters.
Watch how blooms and veggies thrive when leaves soak up equal light. Your meals gain flavors picked hours before cooking, and you’ll spot fewer bugs munching on elevated crops. It’s a win for your plate and your space!
Innovative Vertical Gardening Techniques

Transform blank walls and narrow plots into lush, productive spaces with clever vertical solutions. These methods let you grow twice as much while keeping your planting area tidy and accessible.
Using Cattle Panels and Trellises
Galvanized steel cattle panels offer unbeatable strength for heavy crops. Bend them into arches for climbing beans or shape them into flat screens for tomatoes. No welding needed—just secure them to stakes with zip ties.
Farmers love these grids because they last decades. Position them where vines get full sun, and watch plants thrive without crowding. Bonus: You can reuse panels each season!
Creative Alternatives: Netting and String Supports
Stretch nylon netting between wooden posts to create invisible scaffolding. This works wonders for delicate flowers like lisianthus. For taller plants, add a second layer 12 inches above the first.
Try these smart setups:
- Twine zigzagged between balcony rails for peas
- Bamboo poles tied into pyramids for cucumbers
- Repurposed ladders draped with jute for morning glories
Adjust materials based on your climate—synthetic cords handle humidity better than natural fibers. With these techniques, you’ll turn every inch into a productive green space!
Building Raised Garden Beds in Urban Settings

Elevated planters solve common challenges city growers face. They let you bypass poor ground soil and create ideal conditions for roots. Start by picking a spot with six hours of daily sun and easy water access—near a fence or wall works well.
Essential Materials and Tools
Choose cedar or redwood boards—they resist rot naturally. Composite lumber offers a low-maintenance alternative. You’ll need a drill, screws, and a level for assembly. Pre-cut kits from stores like Home Depot save time if you’re new to garden planning.
Line the bottom with landscaping fabric to block weeds. Add a mix of topsoil and compost for nutrients. This combo creates fluffy, well-drained soil perfect for beans, flowers, or leafy greens.
Step-by-Step Construction Tips
Build on level ground to prevent water pooling. Secure corners with galvanized brackets for stability. If using multiple garden beds, leave 18 inches between them for walking.
Fill your bed gradually—water each soil layer to settle it. Top with mulch to retain moisture. Now you’re ready to plant! Check retailer websites for video guides if you prefer visual instructions.
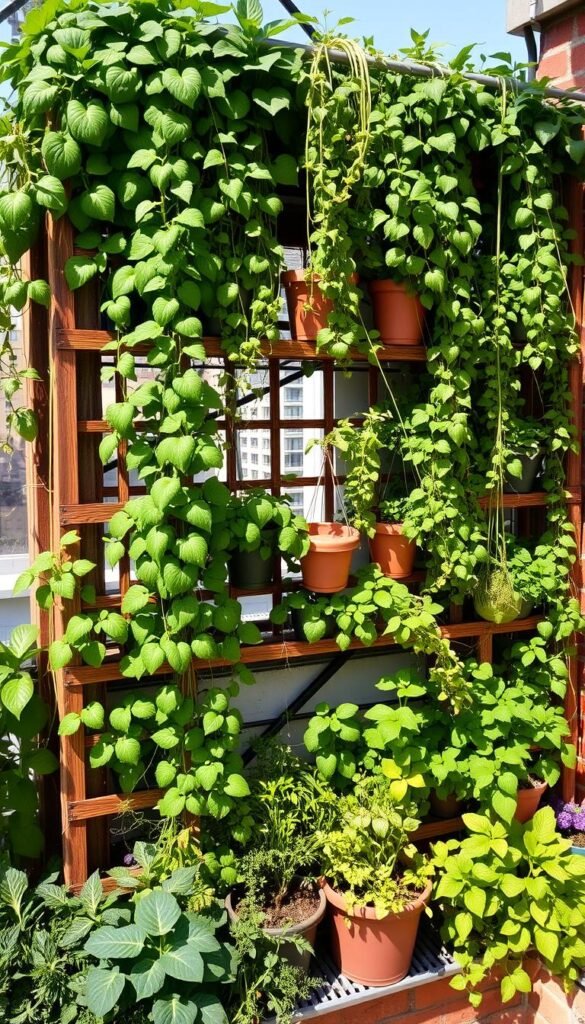
Designing Living Walls and Vertical Planters

Turn empty surfaces into vibrant ecosystems with living walls that combine beauty and function. These green installations range from simple herb pockets to elaborate floral displays, but their success starts with smart structural choices.
Choosing the Right Support Structures
Lightweight systems use fabric panels or stacked pots for herbs and small flowers. They’re perfect for renters or temporary setups. Heavy-duty walls with succulents or veggies need metal frames anchored to studs—ideal for permanent installations.
Test your wall’s strength first. Tap surfaces to check for hollow spots that can’t bear weight. For wooden fences, add waterproof backing to prevent rot from constant moisture.
Drainage makes or breaks your design. Use trays with overflow holes and line surfaces with rubber membranes. This combo protects walls while keeping roots hydrated. Pair thirsty plants like ferns with drip systems, while drought-tolerant species need less fuss.
Mix materials based on your vision:
- Galvanized grids for climbing beans
- Cedar lattice for flowering vines
- Plastic modules for easy herb swaps
Start small—a 2×3-foot section lets you refine watering and plant pairings. As confidence grows, expand your living masterpiece without overwhelming your space.
Maximizing Vertical Space with DIY Trellis Ideas

Unlock hidden growing potential by reimagining your garden’s vertical dimensions. Cattle panels become your secret weapon here—their durable grid pattern supports heavy crops while letting light filter through. With simple cuts and creative shaping, these panels transform into three types of plant-boosting structures.
Customizing Designs for Your Garden
Turn 16-foot cattle panels into teepee trellises by cutting them into 64-inch sections. Angle the tops toward each other, forming A-frames that peas and beans will scramble up. Secure joints with heavy-duty zip ties—no welding required. For tomatoes needing extra height, elevate wall trellises 18 inches off the ground using T-posts.
Arched designs create magical tunnels between beds. Use full panels bent into curves, anchoring ends in soil. “This setup doubles your harvest area,” says a Texas grower who trains cucumbers overhead and lettuce below. Match structures to your crops: delicate flowers thrive on nylon nets, while squash demands rigid frames.
Integrating Multi-Level Planting
Stack plants vertically by pairing tall climbers with shade-tolerant varieties. Grow pole beans at the trellis summit, with nasturtiums cascading beneath. Leave 12-18 inches between layers for air circulation and easy harvesting.
Rotate crops seasonally—swap spring peas for fall gourds on the same frame. Space panels 3 feet apart if using multiple arches, ensuring sunlight reaches all levels. With these adaptable systems, you’ll create a lush, layered oasis that makes every inch count.
Incorporating Video Tutorials and Hands-On Guides
Seeing a project come together step-by-step removes guesswork and builds confidence. Visual guides simplify complex tasks, like building sturdy supports or balancing soil nutrients. They’re especially helpful for adapting techniques to your unique space—whether you’re working with a sunny balcony or shaded patio.
Learning Through Visual Demonstrations
Short clips show exactly how to secure cattle panels for beans or train flowers up a wall. Watch seasoned growers position trellises to maximize sunlight or troubleshoot common issues like uneven plant growth. Many tutorials even include time-lapse footage, revealing how vines climb over weeks.
Pair these resources with smart garden planning—like the methods in our beginner’s square foot guide. You’ll learn spacing tricks for heavy fruit producers and ways to rotate crops yearly. Save favorite videos for quick reference during planting season!
Hands-on demos also highlight material durability. See how galvanized steel holds up for decades versus temporary netting. With clear visuals, you’ll spot the best setups for your climate and avoid costly mistakes. Ready to grow? Press play and get digging!